


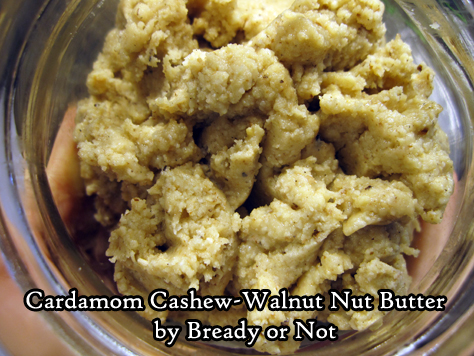
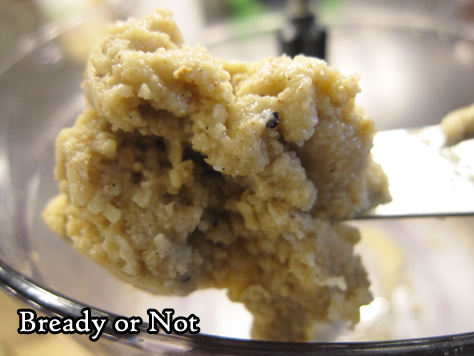
Bready or Not Original: Cardamom Cashew-Walnut Butter
This is a two-for-one Bready or Not posts: recipes for Cardamom Cashew-Walnut Butter, for both small and large food processors.
For the past few years, I had an 8-cup Cuisinart food processor. The thing was great, but as I tried more recipes, I found that most were designed for a larger food processor. Darn.
So when Costco advertised a Cuisinart double the size, I circled the ad and shoved it toward my husband, saying, “This is what I want for Christmas.”
After overcoming my initial anxiety about operating the darn thing (blades and pieces galore! confusing!), I delighted in the increased capacity. Now I can make bigger batches of stuff like nut butter!
This recipe is a particular favorite of mine. I created the original small batch recipe for my old unit, and then modified it for the shiny new machine.
You can substitute other nuts in the recipe, but the mixing time may be different. Almonds are harder, and take longer to process.
Also check out my Maple Nut Butter recipe!
Bready or Not Original: Cardamom Cashew-Walnut Butter [Small Batch]
Equipment
- 8-cup food processor
Ingredients
- 1 1/2 cups cashews
- 1 cup walnuts
- 1/2 teaspoon sea salt
- 1 Tablespoon honey
- 1/2 teaspoon ground cardamom
- 1/2 teaspoon vanilla extract
Instructions
- If the nuts are unroasted, roast them first for a boost of flavor. Line a rimmed baking sheet with foil and preheat oven at 350 degrees. Spread cashews and walnuts in an even layer. Bake for about 6 minutes, whereupon they should smell pleasantly toasty. Let cool at least 30 minutes before continuing with next step.
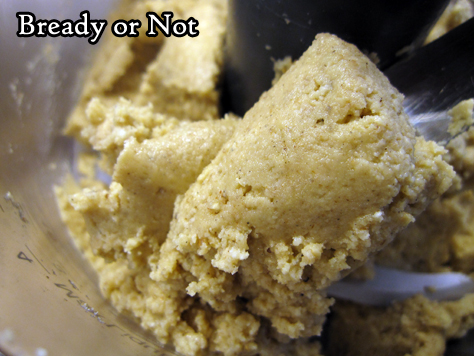
- Fit processor with an S-shaped blade inside. Pour in cashews, walnuts, and sea salt. Process for about 5 to 10 minutes, stopping sporadically to scrape sides. The nut butter is done when the mixture looks smooth and flows over the blades like a thick river.
- Add the honey, ground cardamom, and vanilla. Process another two minutes to incorporate.
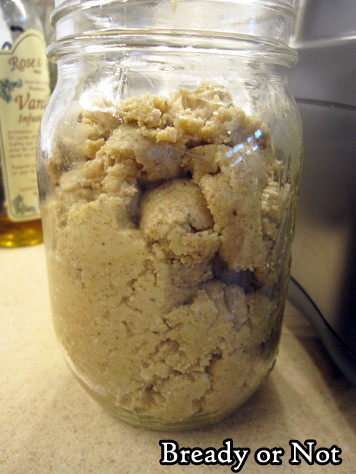
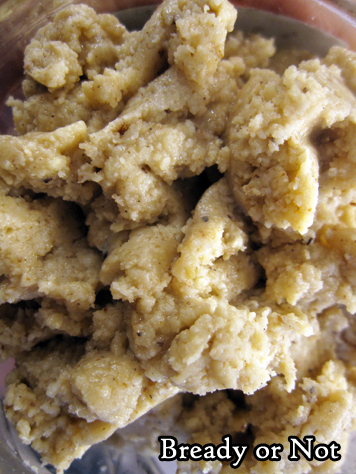
- Place nut butter in a clean glass jar (or jars). Store sealed at room temperature for as long as a year. Some separation of nuts and oil is natural--just stir them together again, if needed. If the nut butter dries out, warm what is needed in a microwave-safe bowl to make it spreadable.
OM NOM NOM!
Bready or Not Original: Cardamom Cashew-Walnut Butter [Large Batch]
Equipment
- 16-cup food processor
Ingredients
- 3 cups cashews
- 2 cup walnuts
- 1 teaspoon sea salt
- 2 Tablespoon honey
- 1 teaspoon ground cardamom
- 1 teaspoon vanilla extract
Instructions
- If the nuts are unroasted, roast them first for a boost of flavor. Line a rimmed baking sheet with foil and preheat oven at 350 degrees. Spread cashews and walnuts in an even layer. Bake for about 6 minutes, whereupon they should smell pleasantly toasty. Let cool at least 30 minutes before continuing with next step.
- Fit processor with an S-shaped blade inside. Pour in cashews, walnuts, and sea salt. Process for about 5 to 10 minutes, stopping sporadically to scrape sides. The nut butter is done when the mixture looks smooth and flows over the blades like a thick river.
- Add the honey, ground cardamom, and vanilla. Process another two minutes to incorporate.
- Place nut butter in a clean glass jar (or jars). Store sealed at room temperature for as long as a year. Some separation of nuts and oil is natural--just stir them together again, if needed. If the nut butter dries out, warm what is needed in a microwave-safe bowl to make it spreadable.
- OM NOM NOM!
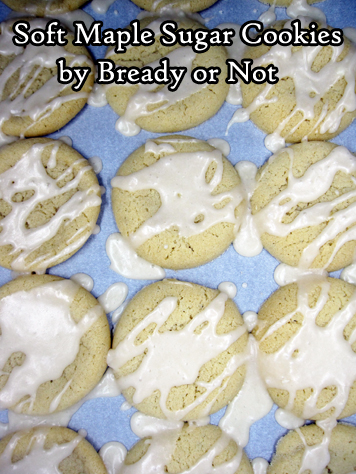
Bready or Not Original: Soft Maple Sugar Cookies
Soft Maple Sugar Cookies! That’s right, this recipe combines two of the best things ever for an original treat.
It has been way too long since I offered up a maple-flavored treat. These are so good, they make up for that lapse in a major way.
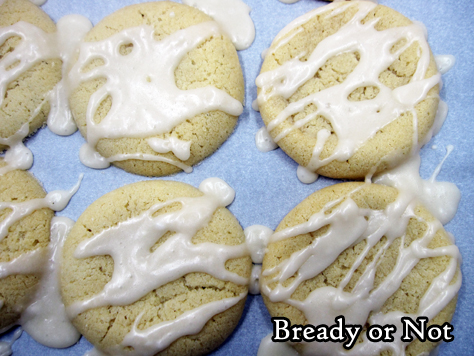
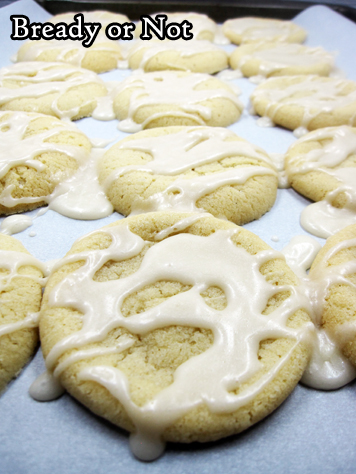
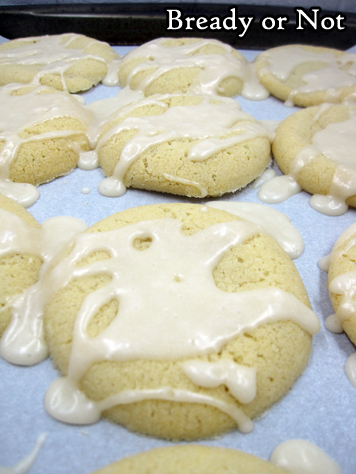
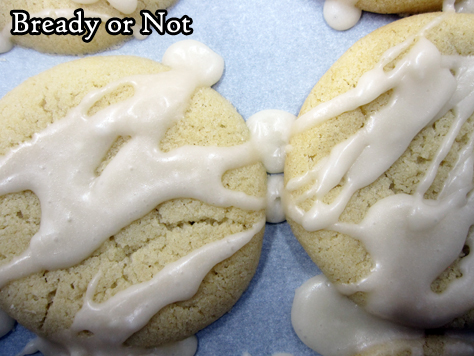
These are soft, chewy cookies. Maple flavor is built into the dough, and the drizzle of glaze adds a touch more.
I wish I could say how long these cookies will keep, but I don’t know. They stayed delicious for at least one full day, then they went to my husband’s work and were goooooooone.
You’ll have to bake them yourself and see how long they last!
Bready or Not Original: Soft Maple Sugar Cookies
Equipment
- teaspoon scoop
- parchment paper
Ingredients
Dough
- 1/2 cup unsalted butter softened 1 stick
- 1/2 cup shortening
- 1 1/2 cups white sugar
- 1/4 cup brown sugar packed
- 1/4 cup pure maple syrup
- 1 teaspoon baking soda
- 1 teaspoon cream of tartar
- 1/8 teaspoon salt
- 3 egg yolks
- 1 teaspoon vanilla extract
- 1 teaspoon maple flavor
- 1 3/4 cups all-purpose flour
Glaze
- 1/4 cup unsalted butter half stick
- 2 cups confectioners' sugar plus more is needed for thickness
- 1/4 cup half & half or milk
- 3 Tablespoons maple syrup
Instructions
- Preheat oven at 300-degrees. In a large bowl, beat together butter and shortening. Add both sugars, maple syrup, baking soda, cream of tartar, and salt. Beat for about 2 minutes, scraping bottle of bowl often. Add egg yolks one at a time, followed by vanilla extract and maple flavor. Mix in flour until just combined.
- Use a scoop or spoon to dollop dough onto a parchment paper-lined cookie sheet, spacing out to account for spread. Bake for 11 to 16 minutes. Let set on cookie sheet for 10 minutes, then transfer to a rack to completely cool.
- Once all cookies are baked and cooled, move them back to the parchment-covered pan, close together, before mixing glaze.
- In a small bowl, melt butter in microwave. Add the confectioners' sugar to bowl, followed by half & half and maple syrup. Stir. Add more sugar, if needed, to form a thick consistency. Drizzle all over cookies. Let set for 30 minutes to 1 hour before moving to sealed containers.
OM NOM NOM!
Bready or Not Original: White Chocolate Macadamia Nut Granola Bars [Gluten Free]
These delicious White Chocolate Macadamia Nut Granola Bars are perfect for breakfasts and snacks–and they are packed with protein and gluten-free, too!
![Bready or Not Original: White Chocolate Macadamia Nut Granola Bars [Gluten Free]](https://www.bethcato.com/blog/wp-content/uploads/2020/02/Wh-Choc-Mac-Nut-Granola-Breakfast-Bars-GF8_sm.jpg)
I love making no-bake batch breakfast recipes in the summer. No need to turn on the oven and heat up my kitchen! Or to fuss with making something every day!
![Bready or Not Original: White Chocolate Macadamia Nut Granola Bars [Gluten Free]](https://www.bethcato.com/blog/wp-content/uploads/2020/02/Wh-Choc-Mac-Nut-Granola-Breakfast-Bars-GF3_sm.jpg)
This recipe is even better because it is SO GOOD. I made it numerous times to experiment with ingredients and amounts. I prefer it with cashew butter and almond flour as it gives it a very cookie dough taste, but use what you have.
![Bready or Not Original: White Chocolate Macadamia Nut Granola Bars [Gluten Free]](https://www.bethcato.com/blog/wp-content/uploads/2020/02/Wh-Choc-Mac-Nut-Granola-Breakfast-Bars-GF7_sm.jpg)
To make this gluten-free, be sure to use GF quick oats from a place like Bob’s Red Mill. Also, DON’T use old fashioned/rolled oats. They are too dense. The time I tried that kind, I had to add a lot more nut butter and honey to make the mixture stick together.
![Bready or Not Original: White Chocolate Macadamia Nut Granola Bars [Gluten Free]](https://www.bethcato.com/blog/wp-content/uploads/2020/02/Wh-Choc-Mac-Nut-Granola-Breakfast-Bars-GF10_sm.jpg)
Make these on the weekend and your breakfasts are ready for the week! Just grab a bar from the fridge, eat, and enjoy!
![Bready or Not Original: White Chocolate Macadamia Nut Granola Bars [Gluten Free]](https://www.bethcato.com/blog/wp-content/uploads/2020/02/Wh-Choc-Mac-Nut-Granola-Breakfast-Bars-GF6_sm.jpg)
Bready or Not Original: White Chocolate Macadamia Nut Granola Bars [Gluten Free]
Ingredients
- 2 cups quick oats
- 1 cup almond flour or oat flour
- 1/4 cup macadamia nuts chopped
- 1 cup cashew butter or almond butter
- 1/2 cup honey
- 1/2 teaspoon salt
- 1 teaspoon vanilla extract
- 1/4 cup white chocolate chips
Instructions
- Line a 9x9 or 8x8 square pan with foil and apply nonstick spray. Set aside.
- In a bowl, measure out the quick oats, almond flour, and macadamia nuts. Also set aside.
- Place the cashew butter, honey, and salt in a large pot on the stove. Bring the temperature to medium, stirring everything until it is melted and combined. Remove from heat and stir in the vanilla extract.
- Pour the dry ingredients into the wet and stir until fully incorporated. Dump the mix into the prepared pan. Use a piece of waxed paper and a heavy glass to compress the contents into an even layer. Sprinkle white chocolate chips across the top and quickly press in by hand, as they will soften fast on the warm dough.
- Set pan in fridge to chill for at least 30 minutes.
- Use foil to lift square onto a cutting board. Slice into desired sizes. They keep in the fridge, in a sealed container, for as long as a week, and as long as a month in the freezer. If stacking, place wax paper between the layers.
OM NOM NOM!
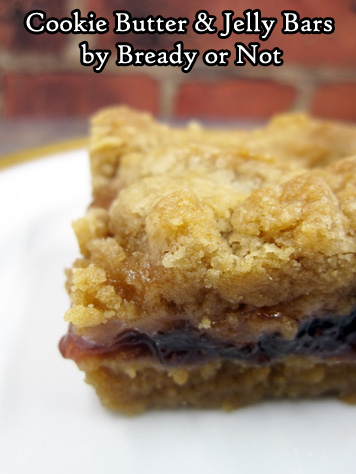
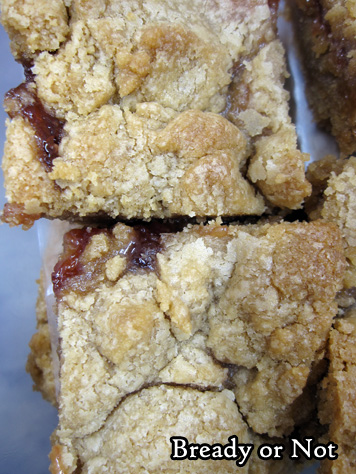
Bready or Not Original: Cookie Butter and Jelly Bars
Cookie butter and Jelly Bars! These things are soft and chewy, creating a whole casserole dish-worth of luscious goodies.
As often as I’ve advocated for cookie butter on Bready or Not, it seems people are always discovering it for the first time. Lucky you! It’s essentially pulverized cookies in spreadable form.
You can find generic versions or Biscoff brand at places like Walmart, Target, and Sprouts, and Trader Joe’s is famous for their Speculoos jars.
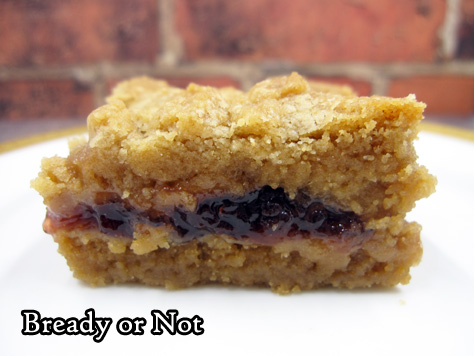
In these bars, cookie butter adds incredible softness and amps up the cookie flavor. That’s right, it has this weird ability to make cookies taste more like cookies.

Use whatever jelly or jam or preserves you want. Try not to spread it to the very edge, as it can be very sticky on the foil, even if it’s well-greased.
Bready or Not Original: Cookie Butter and Jelly Bars
Ingredients
- 1 cup unsalted butter 2 sticks, room temperature
- 1 1/2 cups white sugar
- 1 teaspoon vanilla extract
- 2 large eggs
- 2 cups creamy cookie butter
- 3 cups all-purpose flour
- 1 teaspoon baking powder
- 13 ounce jelly or preserves or jam, about 1 1/2 cups
Instructions
- Preheat oven at 350-degrees. Line a 13x9 baking pan with foil and apply nonstick spray or butter.
- In a big bowl, cream together butter and sugar until light and fluffy, scraping bottom of bowl as necessary. Follow up with the eggs, vanilla, and cookie butter, until blended.
- Gradually mix in the flour and baking powder.
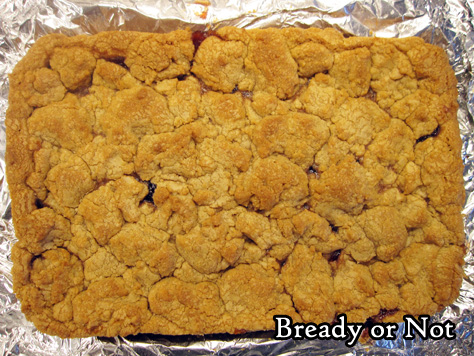
- Spread about 2/3 of the batter in the prepared pan. Spread the jelly but not quite to the edges. Dollop the remaining dough all over the top.
- Bake for 25 to 30 minutes, until the surface is golden and not jiggly, with the middle passing the toothpick test.
- Cool completely at room temperature or in the fridge. Use foil to lift contents onto a cutting board to parcel into bars. Store in a sealed container with waxed paper or parchment paper between the layers, either in the fridge or on the counter.
OM NOM NOM!
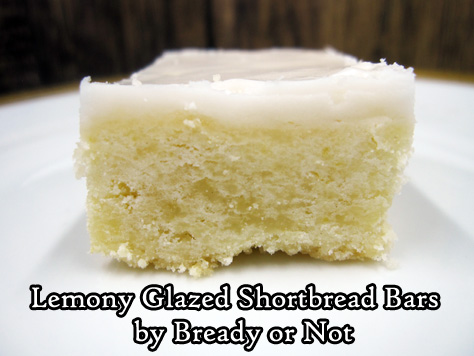
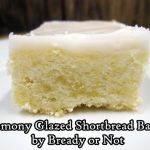
Bready or Not: Lemony Glazed Shortbread Bars
April’s lemon theme lingers into May with this week’s luscious Lemony Glazed Shortbread Bars.
These things rely fully on lemons, no bottled lemon extract or flavor required. Get a lot of lemons. You need 6, maybe 7 medium or small lemons, or 4 giant lemons. Better to have leftover zest or juice rather than not enough.
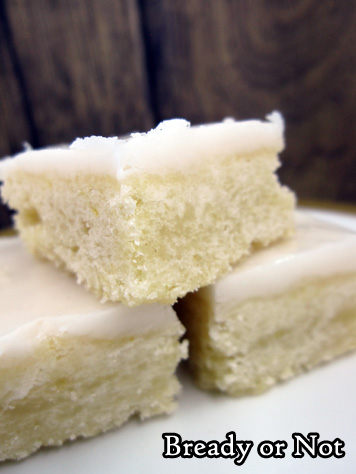
This dough is incredibly fun to work with, too. Thanks to the cornstarch with the flour, the result is soft and pliable like Play-Doh.
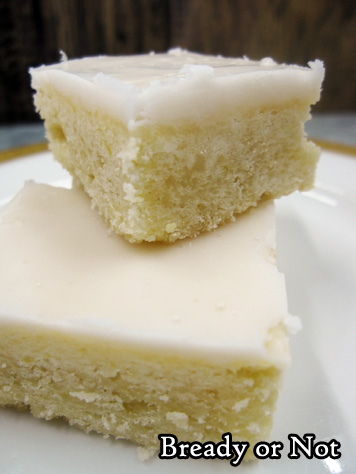
Most recipes I post that include glaze require the baked good to be completely cool first. Not so here. Make the glaze as soon as the dish is baked and put it on promptly. That means the glaze melts a bit after it’s spread on top, fusing with the bars.
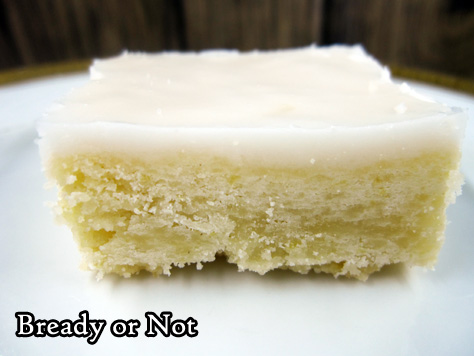
With so much lemon infused into these bars, these things ends up smelling so summer and fresh, and the taste…! If you love lemon, these shortbread bars are totally for you.
Bready or Not: Lemony Glazed Shortbread Bars
Ingredients
Bars
- 3 cups all-purpose flour
- 1/3 cup cornstarch
- 1 1/4 cups confectioners' sugar
- 1/4 cup finely shredded lemon zest from 4 giant lemons or about 6 large lemons
- 1 1/2 cups unsalted butter 3 sticks, room temperature
- 1 Tablespoon lemon juice
- 1/2 teaspoon salt
- 1/2 teaspoon vanilla extract
Glaze
- 2 1/2 cups confectioners' sugar
- 3 Tablespoons lemon juice
- 1 Tablespoon light corn syrup
- 1/2 teaspoon vanilla extract use clear extract if available, as regular will tint glaze a bit
Instructions
- Preheat oven at 300-degrees. Line a 13x9 pan with foil and apply nonstick spray or butter.
- In a bowl, sift together flour and cornstarch; set aside.
- In another bowl, combine the confectioners' sugar and lemon zest. Using fingers, break apart the zest within the sugar to distribute the threads and release the oils. The result should be more yellow in coloration and quite fragrant.
- In a big bowl, beat together the butter, lemon juice, salt, and vanilla extract until it becomes creamy, scraping bowl as needed. Gradually mix in the sugar and zest. Slowly work the flour/cornstarch mix into the big bowl. The dough should become pliable and cling together, until it can be formed into a ball.
- Press dough evenly into the pan. Bake for 40 minutes.
- Immediately make glaze. Stir together everything to form a thick, spreadable glaze; thicken with more sugar, if necessary, or add extra lemon juice or water to loosen it. Spread glaze over bars.
- Cool completely, stashing dish in fridge to speed process if desired.
- Use foil to lift contents onto a cutting board. Slice into bars. Store in a sealed container, with waxed paper between stacked layers, either at room temperature or in the fridge. Keeps for at least 2 days.
OM NOM NOM!
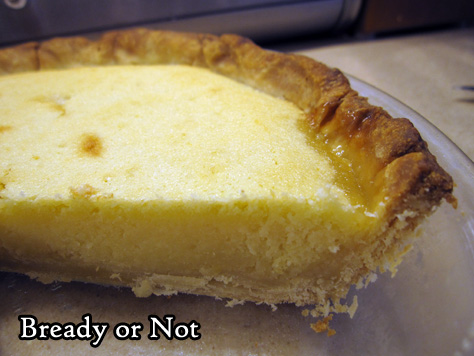
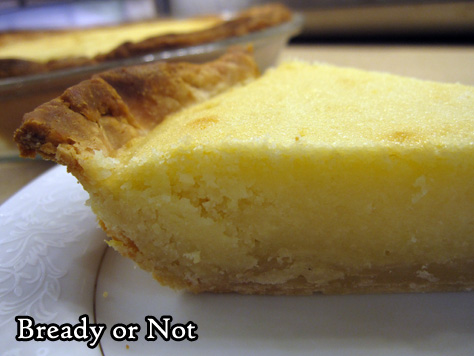
Bready or Not Original: Lemon Frangipane with Shortcrust Pastry
To finish off Lemon Month, I present a Lemon Frangipane along with a bonus recipe for Shortcrust Pastry.
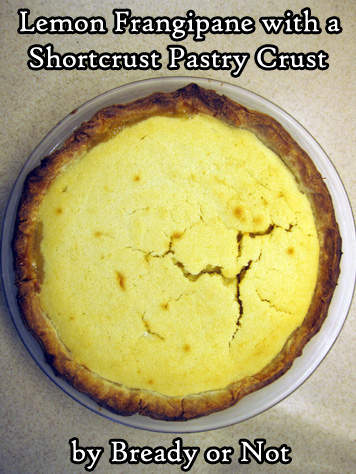
What is frangipane? It’s a sweet filling made from almonds. It can be used in cookies, pastries, or–in this case–a shortcrust pie crust.
The nutty flavor of frangipane isn’t upfront in this recipe. This one is really all about lemony freshness, which happens to complement frangipane nicely.
The shortcrust recipe is a good, basic pie crust recipe, one that is doable even for beginning bakers. The dough can be made days or weeks in advance.

I first encountered frangipane on the Great British Bake Off. Since I associated it with fancy bakes, I was a bit intimidated about trying it myself, but this recipe makes it straightforward.
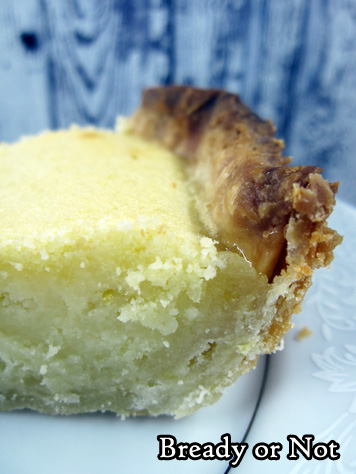
The end result is a lemony fresh frangipane with a crisp, delicious homemade crust. A crust that, thanks to being blind-baked first, should not have a soggy bottom.
Bready or Not Original : Sweet Shortcrust Pastry
Equipment
- food scale
- parchment paper
- pie weights
Ingredients
- 225 grams all-purpose flour
- 4 Tablespoons confectioners' sugar
- 150 grams cold butter cut into small cubes
- 1 large egg beaten
- 2 Tablespoons cold water plus more as needed
Instructions
- Mix flour and confectioners' sugar in a large bowl. Add pieces of butter and rub in with fingertips to break into smaller, flatter morsels. Make a well in the middle and add the beaten egg and one tablespoon of water. Use fingers to work in a bit before adding the second tablespoon.
- Work dough until it begins to lump together! Drizzle in tiny increments of additional water, if needed, to make it cohesive. The dough should be able to come together in a ball, not gluey.
- Wrap dough in plastic wrap and stash in fridge for at least 20 minutes--or for a few days, or freeze until ready to use.
- When ready to blind-bake crust, preheat oven at 375-degrees (180 C, Gas 5). Lightly grease pie plate.
- Lightly flour work surface. Use rolling pin to roll dough into proper size for your pan, at about 1/2 cm thickness. Gently set dough into dish and press into place. Make sure excessive amounts of dough don't stick out over the edge but do NOT trim exactly to edge yet.
- Cover the pastry surface with parchment paper. Use dried beans or other pie weights to completely fill plate. If using a 9-inch pie plate, bake for 20 to 25 minutes, until crust takes on a light golden color; for a smaller plate, reduce time and monitor color.
- Use parchment to lift out pie weights. Use a knife to trim excess dough from edge to form a nice, neat line. Follow filling recipe from here on and bake again as necessary.
OM NOM NOM!
Bready or Not Original: Lemon Frangipane with Shortcrust Pastry
Equipment
- 9-inch shallow pie/quiche plate
Ingredients
- 1 shortcrust pastry crust already partially baked
- 2 Tablespoons lemon curd
- 1/2 cup unsalted butter 1 stick, room temperature
- 1/2 cup white sugar
- 2 eggs room temperature
- 1 1/3 cup ground almonds sifted
- 2 1/2 Tablespoons all-purpose flour or substitute with extra ground almonds
- 1 lemon zested and juiced
- 1 Tablespoon lemon juice
- 4 Tablespoons milk or half & half
Instructions
- Preheat oven at 375-degrees (190C, Gas 5).
- Warm the lemon curd in the microwave for only 5-10 seconds, long enough to make it looser and more spreadable. Brush all over the bottom of the crust.
- In a large bowl, cream together butter and sugar until light and fluffy. Beat in eggs, one at a time. Add almond flour, flour, and lemon zest. Follow up with a tablespoon of lemon juice and the milk. Mix until just cohesive.
- Pour filling into crust. Bake for 25 minutes, or until it passes the toothpick test in center. If parts of the filling uplift in crazy ways, worry not--it should even out as it cools.
- Cool pan for an hour at room temperature for an hour to set. Cut into it then, or chill in fridge to enjoy later. Keep stored in fridge with foil covering.
