


Bready or Not: Ginger Chai Carrot Cake
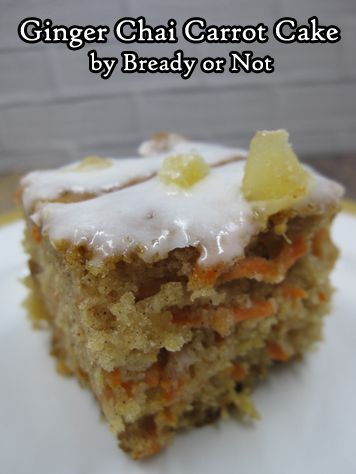
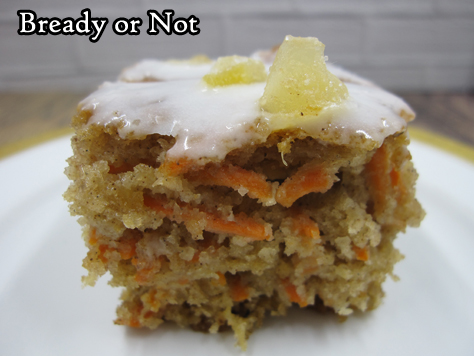
Trust me, this Ginger Chai Carrot Cake is amazing. This is the only carrot cake I have ever liked.
That’s right, I made the cake even though I was pretty ambivalent about carrot cakes overall. The combination of ingredients just appealed to me somehow. I actually went out and made the cake a week after reading the original recipe in Bake from Scratch Magazine.
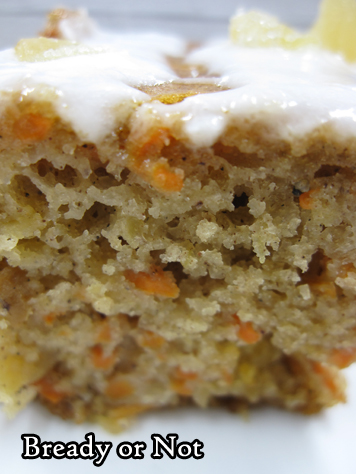
Some modifications I made straight up: I used a square pan rather than a round and tall cake pan, which meant the bake time was a little higher, too. I also upped the cinnamon because, well, cinnamon. I was worried about buying enough grated carrot so I measured and weighed that; this is why I made sure to put the “7 ounces” info in the ingredients.
The recipe looks long because of the spices it includes, but it’s actually a very easy recipe to make. To save some time on baking day, mix the dry ingredients the day before! That’s what I did.
This cake is incredibly moist. It’s sweet and spicy, embodied with cozy heat courtesy of the candied ginger. Everything melds beautifully.
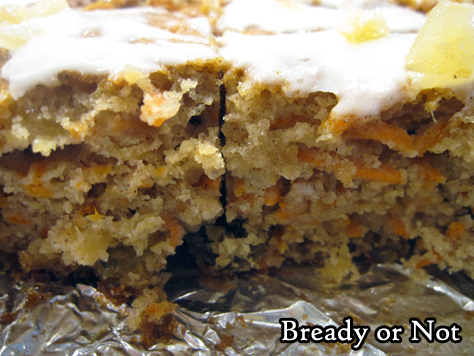
If you love carrot cake, make this cake. If you hate carrot cake, give this one a try. It just might convert you!
Bready or Not: Ginger Chai Carrot Cake
Equipment
- 9x9 square pan
Ingredients
Cake
- 1 1/2 cups all-purpose flour
- 3/4 cup brown sugar packed
- 1 1/2 teaspoons baking powder
- 1 teaspoon baking soda
- 1 teaspoon ground cardamom
- 1 teaspoon ground cinnamon
- 1/4 teaspoon kosher salt
- 1/4 teaspoon ground ginger
- 1/8 teaspoon ground cloves
- 1/8 teaspoon ground pepper
- 1/3 cup canola oil
- 1/3 cup buttermilk or soured milk (see note), room temperature
- 1 teaspoon vanilla extract
- 2 large eggs room temperature
- 9 ounces crushed pineapple drained
- 2 cups grated carrots about 7 ounces
- 1/2 cup golden raisins
- 1/3 cup candied ginger finely chopped
Glaze
- 1 cup confectioners' sugar
- 3 Tablespoons heavy whipping cream or half & half
- candied ginger finely chopped
Instructions
- Preheat oven at 350-degrees. Line pan with heavy foil to fully covers bottom and sides; apply butter or nonstick spray.
- In a large bowl, stir together flour, brown sugar, baking powder, baking soda, cardamom, cinnamon, salt, ground ginger, cloves, and pepper.
- Into the middle of the dry ingredients, pour in the oil, buttermilk, vanilla, and eggs. Mix in the pineapple, shredded carrot, raisins, and candied ginger. Pour batter into prepared pan.
- Bake for 30 to 35 minutes, until a wooden toothpick inserted in the middle comes out clean. Let cool in pan for about 15 minutes, then use foil to lift it onto a rack. Continue to cool to room temperature, or place in fridge to completely chill.
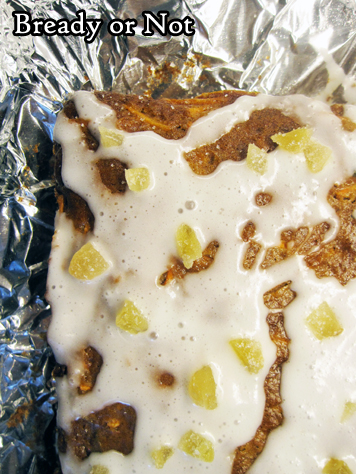
- Once cake is cool, combine the confectioners' sugar and cream to form a glaze. Drizzle over cake. Sprinkle extra candied ginger over the top. Slice and enjoy!
OM NOM NOM!
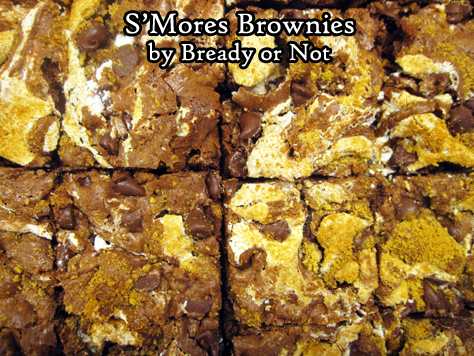
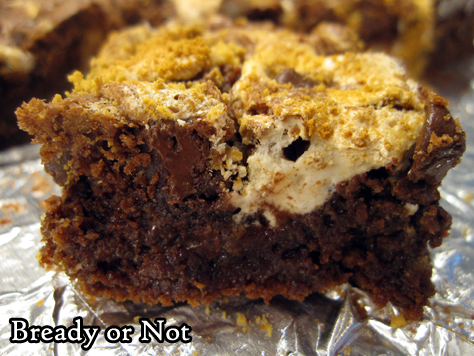
Bready or Not Original: S’Mores Brownies
Create luscious S’Mores in brownie-bar form with my original recipe for S’Mores Brownies!
I had a jar of marshmallow fluff I wanted to use. I deliberated what to use it for and hit upon S’Mores Brownies, but to my surprise, I didn’t find an existing recipe that used jarred fluff. Time to make my own recipe!
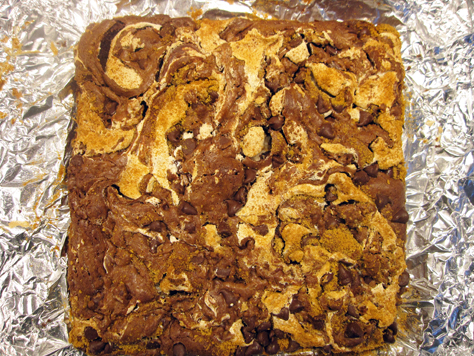
Using regular marshmallows to bake is delicious and all, but you also end up with caramelized, hollow sections. I wanted marshmallows to stay soft and gooey alongside the chocolate crumb. By golly, my idea worked!
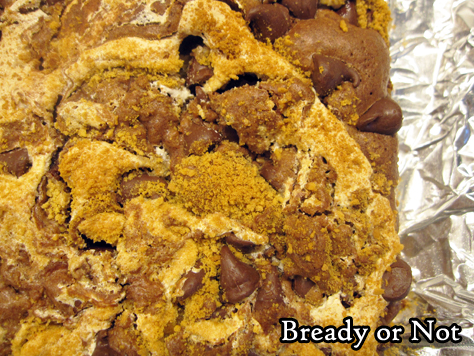
This is definitely a brownie for people who love chocolate. I loaded it with chocolate chips, inside and out. The graham cracker crumb and marshmallow complement it in a beautiful way.
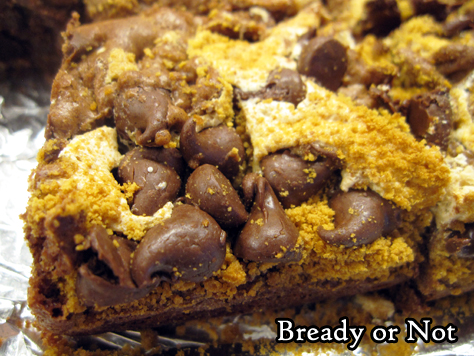
This will look messy as a batter. Marshmallow fluff is not the easiest stuff to work with. It’s lumpy and sticky. The good news is, as the pan bakes, the contents will even out. The resulting marble effect make it look as delicious as it tastes.
Store these brownies in a sealed container for days–and they can be frozen for longer, too.
Bready or Not Original: S'Mores Brownies
Ingredients
- 1/4 cup unsalted butter half cube
- 2 cups semisweet chocolate chips divided
- 1/2 cup white sugar
- 2 eggs room temperature
- 2/3 cup all-purpose flour
- 1/2 teaspoon baking powder
- 1/4 teaspoon salt
- 7 ounces marshmallow fluff one jar
- 1/2 cup graham cracker crumbs
Instructions
- Preheat oven at 350-degrees. Line an 8x8 or 9x9 pan with heavy foil and apply butter or nonstick spray.
- In a microwave safe bowl, heat the butter and 1 cup of chocolate chips in brief bursts until fully melted and smooth; watch it carefully and stir well between each burst. Stir in the white sugar, followed by eggs, flour, baking powder, and salt.
- Pour half the chocolate batter into the ready pan and spread into an even layer. Add small dollops of the marshmallow fluff across the top; it will be gloppy and sticky, so don't worry about getting it even.
- Sprinkle graham cracker crumbs over the fluff and batter. Drop dollops of the rest of the chocolate batter on top along with the remaining 1 cup chocolate chips. Even out a bit, then use a butter knife or narrow spatula to swirl the layers together for a marbled effect. It may be mountainous in some areas but it will even out as it bakes.
- Bake until the top is crinkled and edges are pulling away from the sides of the pan, about 25 to 30 minutes. Let cool at room temperature for an hour, then stash in the fridge for another few hours to completely cool.
- Use the foil to lift the contents onto a cutting board to slice into bars. Store in a sealed container in fridge, waxed paper between stacked layers to prevent sticking. Keeps for up to three days, or freeze for later enjoyment.
OM NOM NOM!
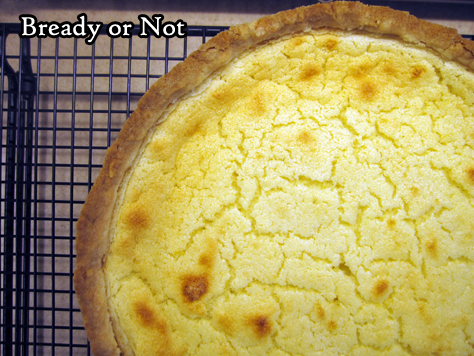
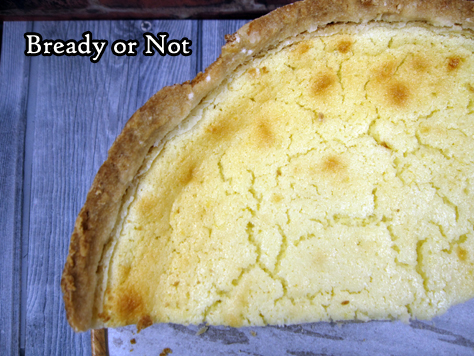
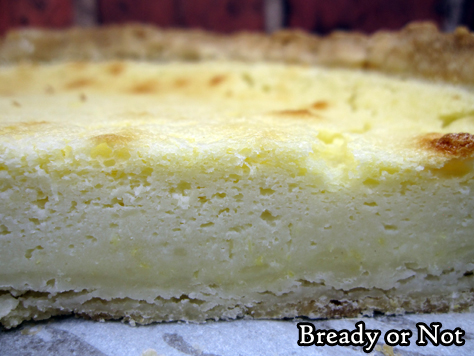
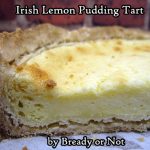
Bready or Not: Irish Lemon Pudding Tart
St. Patrick’s Day nears. Let’s celebrate with a scrumptious Irish Lemon Pudding Tart!
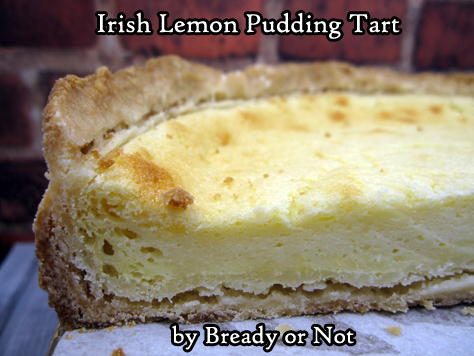
Mind you, this is “pudding” in more of a British/Irish sense, meaning a dessert. Don’t expect this to have the texture of American Jell-O pudding.
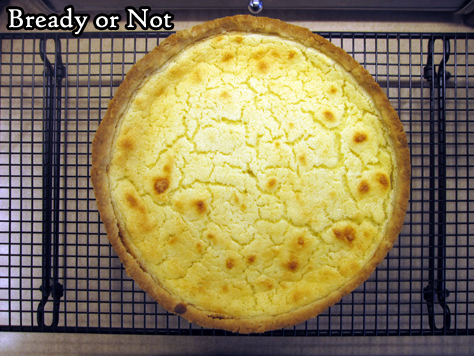
No, this is delightfully fluffy because egg whites are beaten stiff and folded in right at the end, adding loft light texture.
Make no mistake: this tart takes work. It dirties a lot of bowls.
But wow, does it taste like something special. I certainly can’t find anything like this in stores around the southwest US.
Even better, this tart keeps very well in the fridge for at least a week. Just keep it covered by foil.
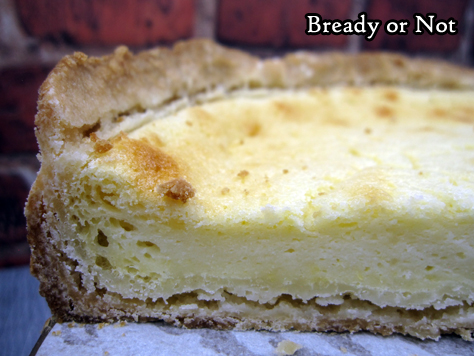
This isn’t a super-sweet dessert. The fresh lemon flavor is at the forefront. Really, this is a perfect spring or summer dessert. Or breakfast. Or snack.
Bready or Not: Irish Lemon Pudding Tart
Equipment
- 9-inch springform pan
- parchment paper
Ingredients
Crust:
- 1/2 cup unsalted butter 1 stick
- 1 1/4 cups all-purpose flour
- 3 Tablespoons white sugar
- 1/4 teaspoon salt
Pudding:
- 2 eggs whites and yolks, divided
- 2 Tablespoons unsalted butter softened
- 1/4 cup white sugar
- 2 large lemons zested and juiced
- 1/2 cup all-purpose flour
- 1 1/4 cups milk or substitute 1 cup half & half plus 1/4 cup water
- 1 teaspoon lemon extract
Instructions
Make the crust:
- Cut parchment paper to fit inside springform pan. Apply nonstick spray; place parchment circle inside, then spray again to coat the entire inside of pan.
- Melt butter in microwave or on stovetop.
- In a large bowl, stir together flour, sugar, and salt. Pour in the butter. Use hands to knead ingredients together until they can form a ball. Flatten out handfuls and place in prepared pan, forming an even layer across the bottom and up about 2/3 of the height of the pan walls. Cover with plastic wrap and chill about 30 minutes.
- Preheat oven at 350-degrees.
- Take pan out of fridge. Use a fork to prick bottom and sides of crust all over. Bake for 10 minutes, then set aside to prepare filling.
Make the pudding:
- Place the egg whites in a bowl that can accommodate a hand mixer. Set aside.
- In a large bowl, beat together butter and sugar. Add egg yolks and beat until fluffy. Add lemon zest, juice, and lemon extract. Beat until smooth; add flour, and mix until just blended. Pour in milk and incorporate. Batter will look thin with bubbles at the edges of the bowl.
- Return to the egg white bowl. Use a hand mixer to beat until stiff peaks form.
- Fold whites until batter without losing too much volume. It's okay if there are still some lumps. Pour batter into crust.
- Bake for 35 to 40 minutes, until middle is set and passes toothpick test. Let cool completely.
- Unlock sides of springform pan. Store on base disc of pan, or move to another dish, if desired. Keep draped by foil in fridge for up to a week. Serve cold or slightly warmed.
OM NOM NOM!
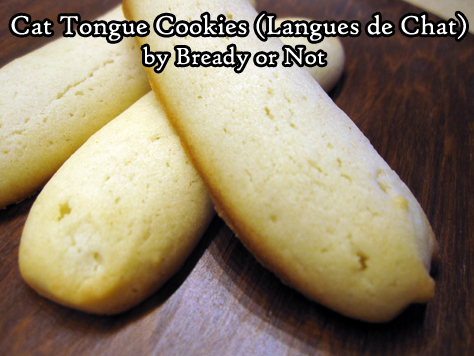
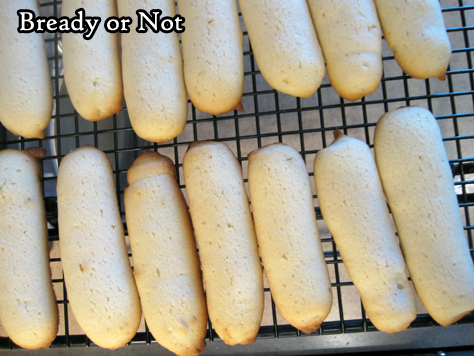
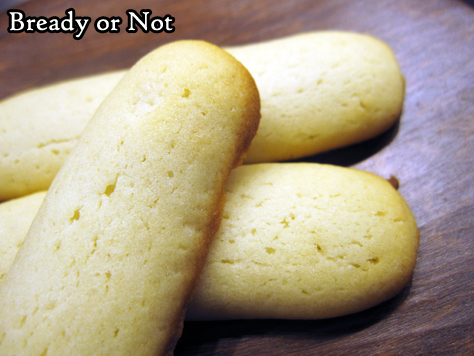
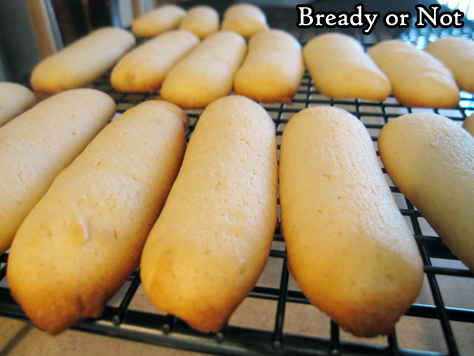
Bready or Not: Cat Tongue Cookies (Langues de Chat)
Cat Tongue Cookies! NO CATS WERE HARMED IN THE MAKING OF THESE COOKIES.
I first heard about these cookies on the Great British Bake Off, where they were used as part of another recipe. My curiosity was piqued.
I am trying out a lot more French recipes. This seemed like a good, basic one to try… even though I HATE piping things. Did I say hate? I meant LOATHE.
That said, this recipe wasn’t too awful in that regard. The dough wasn’t a big sticky mess. I used a gallon Ziploc bag and cut the corner off, the old basic method, and that worked just fine.
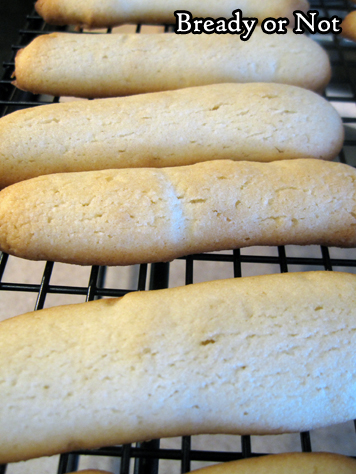
The end result reminded me a lot of the old American stand-by, Nilla Wafers. Nothing fancy by themselves, but crisp and refreshing. They would be easy to dress up by dipping them in chocolate, Nutella, jam, whatever–if you want.
I thought they were just fine by themselves, with my cats lurking close by–tongues intact.

Bready or Not: Cat Tongue Cookies (Langues de Chat)
Equipment
- parchment paper
- piping bag or gallon Ziploc
Ingredients
- 9 Tablespoons unsalted butter softened
- 1/2 cup white sugar plus 2 Tablespoons
- 3 egg whites
- 1 1/2 teaspoons vanilla extract
- 1 1/2 cups all-purpose flour
Instructions
- Preheat oven at 400 degrees. Line a large baking pan with parchment. Use pencil to draw 3-inch lines spaced several inches apart in rows upon the paper, then flip over so the pencil lines still show through as guides.
- In a medium bowl, cream together butter and white sugar (1/2 cup and 2 Tablespoons) until smooth. Beat in egg whites one at a time until batter is light and fluffy. Stir in vanilla followed by flour. Dough might be stiff.
- Put about half of dough into a Ziploc bag (then cut off corner) or a piping bag with a medium star tip. Squeeze out dough onto the lines on parchment.
- Bake for 10 to 11 minutes, until edges are starting to brown. Move to cooling rack. Pipe and bake remaining dough, reusing parchment.
- Store in a sealed container. Good dipped into chocolate or spread with Nutella--or all by itself.
OM NOM NOM!
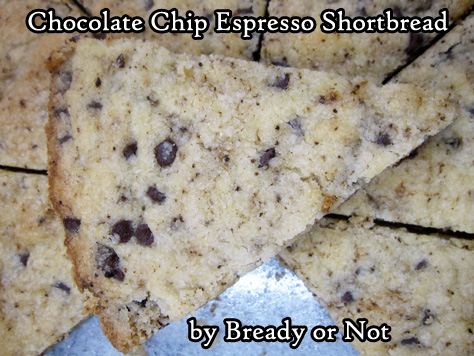
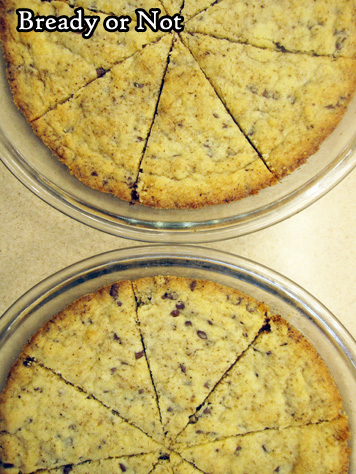
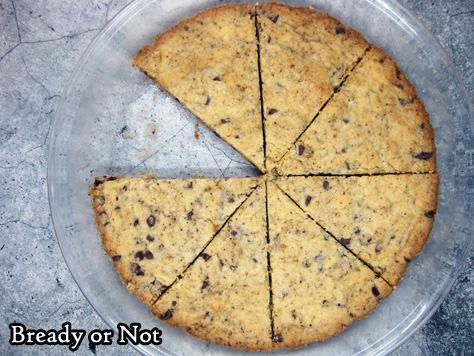
Bready or Not Original: Chocolate Chip Espresso Shortbread
Basic Scottish shortbread is one of the awesomest things in the world. It’s also a blank canvas for variations beyond count. Chocolate chips and a jolt of espresso add extra oomph to this new spin!
Pride O’ Scotland Shortbread was one of the first recipes I considered ‘mine’ as a teenager. It became the one thing I made each year for our family’s Thanksgiving potluck.
Appropriately, it’s also something I made for my husband the very first day I met him when I was 18. (Yes, he was an almost total stranger. Yes, I welcomed him with shortbread. Because that’s what I do.)
I considered the recipe sacrosanct the past two decades… and then I got an idea. Chocolate. Espresso powder. It had to be good, right? Or would it be a crumbly mess?

Yes indeed, it turned out to be delicious. No, it remained as cohesive as ever. Yay!
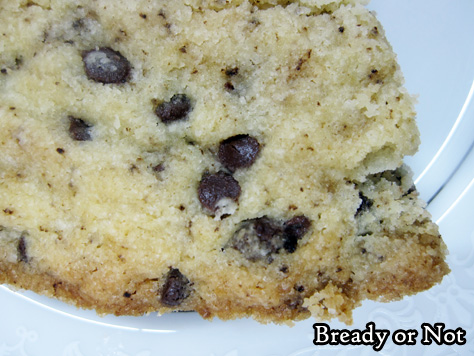
Espresso powder is fantastic along with chocolate; I include it in most every brownie recipe. The coffee flavor doesn’t come in strong (I actually hate coffee), but it make the chocolate taste bolder and more nuanced.
Bready or Not Original: Chocolate Chip Espresso Shortbread
Equipment
- two basic 9-inch pie plates
Ingredients
- 2 cups all-purpose flour
- 3/4 cups white sugar
- 1 teaspoon espresso powder
- 1/4 teaspoon salt
- 1 cup unsalted butter softened, 2 sticks
- 1 egg yolk
- 1 teaspoon vanilla extract
- 1/2 cup mini chocolate chips
Instructions
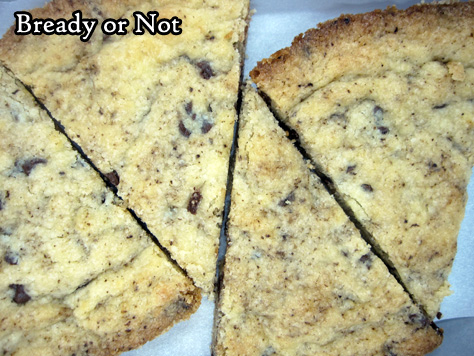
- Place flour, sugar, espresso powder, and salt in mixing bowl; add butter, egg yolk, and vanilla. Mix with fingers until dough holds together, then fold in the mini chocolate chips. Once chips are distributed, divide dough into two balls and press each ball into a pan. Flatten evenly with palms and prick surface all over with floured fork. Slash into wedges.
- Bake for 17 to 22 minutes, until the edges are golden brown. Remove from oven. Immediately cut again following slash marks and carefully run the blade around the edge of the crust to loosen the shortbread.
- Let shortbread cool. Cut again along slash marks and the crust, then remove wedges to eat. Shortbread keeps in sealed container for several days.
OM NOM NOM!
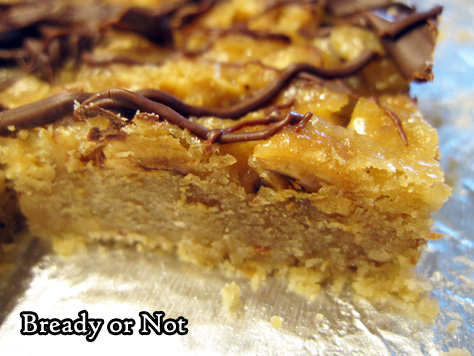
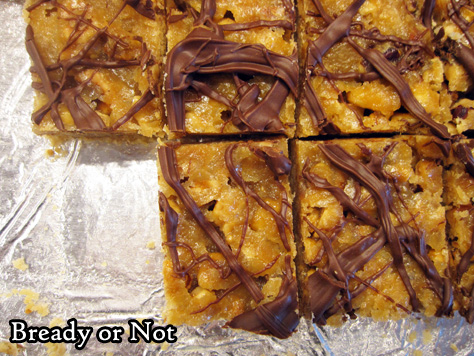
Bready or Not Original: Hazelnut Praline Bars
These delicious Hazelnut Praline Bars are a lot like praline candy, but it fantastic bar form.
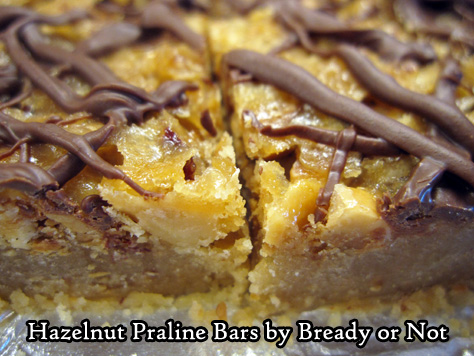
The top of these bars caramelizes. These things are very sweet, with the nuts rendered softly crunchy. The combination of textures is just divine.
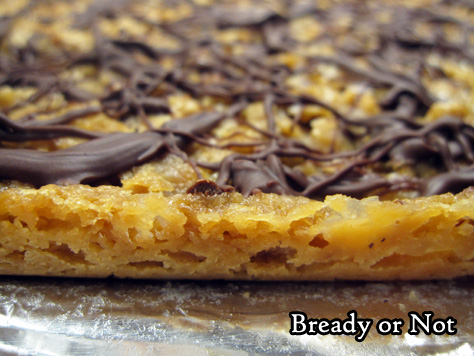
The slight drizzle of chocolate on top is the perfect accent, too. Funny how the tiniest bit of chocolate adds so much in terms of flavor.
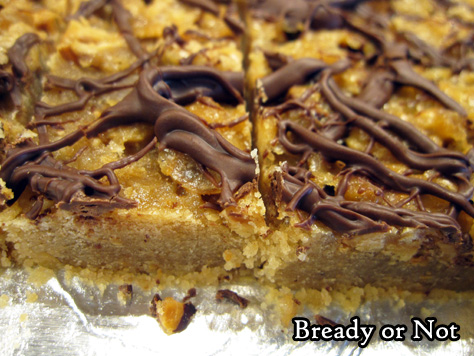
A 6 ounce bag of hazelnuts will be the perfect amount for both the crust and nut layer, too.
Can you use other nuts? I haven’t tried it in this recipe, but why not? Praline candy traditionally uses pecans, after all. I bet using other nuts–or a combo–would be fine.
Hazelnuts are sure delicious and fun, though!

Bready or Not Original: Hazelnut Praline Bars
Equipment
- 13x9 pan
- food processor
- small saucepan
Ingredients
Crust
- 1/2 cup hazelnuts
- 1 cup brown sugar packed
- 3/4 cup unsalted butter softened, 1 1/2 sticks
- 2 cups all-purpose flour
Nut Layer
- 1 cup hazelnuts
- 13 Tablespoons unsalted butter
- 1/2 cup brown sugar packed
Topping
- 1/2 cup milk chocolate chips
Instructions
- Preheat oven at 350-degrees. Line a 13x9-inch pan with foil and apply nonstick spray or butter.
- Place the 1/2 cup hazelnuts in a food processor. Process until finely ground.
- In a medium bowl, beat together the next two crust ingredients, the brown sugar and butter. Add the flour and ground hazelnuts. Press crust into pan; a piece of wax paper and a heavy glass makes it easy to form an evenly compressed layer. Bake for 10 minutes.
- In the meantime, put the remaining hazelnuts in the food processor and give them a quick pulse, just to coarsely chop them.
- As soon as the crust comes out, sprinkle the hazelnuts over the top. In a small saucepan, warm the butter and brown sugar to boiling at medium heat. Boil for a minute. Pour over hazelnuts.
- Bake for 15 to 18 minutes, until edges are bubbling and center is set. Cool completely.
- In a small microwave-safe bowl, zap the chocolate in 25 second bursts, stirring well between each pass, until it can be stirred smooth. Use a fork to drizzle the chocolate over the bars.
- Chill in fridge for 30 minutes, or until chocolate is set. Use the foil to lift contents onto a cutting board and slice into bars.
- Store in a sealed container at room temperature or in the fridge with waxed paper or parchment between the layers.
