Bready or Not Guest: Stacey Berg with Homemade Beer
I’m happy to welcome author Stacey Berg to Bready or Not! Her novel Dissension was released by Harper Voyager Impulse in March. She’s here today to share a beer recipe that directly connects to her book.
Fermentate for the Future
My novel Dissension is set in a world where the Church exploits genetic technology to lead the remnants of humanity as they struggle for survival in the last inhabited city. The population is beginning to recover, and although life still isn’t easy, people make do and even flourish. And while their food remains quite simple, they’re human, so they do have beer. It’s known in the book as “fermentate.” I enjoy home-brewing, so naturally when Beth invited me to do a Bready or Not guest post, the first thing I thought of was a beer recipe. After all, beer is liquid bread!
Here’s my recipe for “Future Fermentate” (an India Pale Ale, because they keep well in the heat.)
Equipment you’ll need: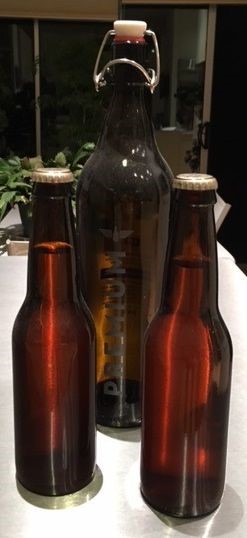
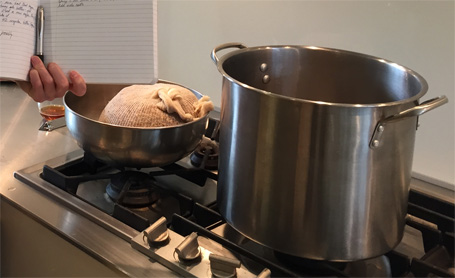
A big pot
Two 6 gallon buckets (food grade, please!) with a hole in the lids..
a rubber stopper that fits in the hole, with a hole drilled in the stopper
airlock
siphon with an attachable bottling cane
thermometer
bottle capper
sanitizer
You can get fancy with a hydrometer to check your specific gravity, but I never bother. Eventually you’ll need some bottles and caps too. Fortunately those are easy to come by—just drink some beer.
Your local home brewing store will be happy to put a kit together for you, and they’re easy to find online too. A decent one will set you back $50-$100, but it will last forever.
Ingredients :
If you tell your home brewing store you’re making an IPA they’ll know what to give you.
7 lb light malt extract
2 lbs two-row pale malt
1/2 lb cara-pils malt
1/2 lb medium crystal malt
(Get these crushed together and put in a steeping bag at the shop)
1-1/2 cup brown sugar
1 package Burton water salts (optional)
1 oz Bullion or Target hops
1 oz Northern Brewer or Wye Challenger hops
1 oz Kent Golding hops, divided in half
Ale yeast (I like the liquid kind best)
Brewing Day: the process is pretty straightforward but takes a couple of hours. It goes better if you drink some beer while you’re doing it.
- Heat 1 gallon of water until steaming (about 155-170 F). Put in the bag of crushed grains and steep 20 min off heat.
- While your grains are steeping, sanitize your bucket and other equipment according to the instructions on the iodophor.
- Rinse the steeped grain bag with another 1 gallon of water, remove the bag from the liquid, add 1 c. brown sugar and the water salts if you’re using them, and bring the liquid to a boil.
- Turn off the heat and add the malt extract. Stir until all the extract is dissolved in the water, then bring back to a boil for 10 minutes.
- Add 1 oz Bullion or Target hops, and boil 40 minutes.
- Add 1 oz Northern Brewer or Wye Challenger hops and boil 10 more minutes.
- Turn off heat and add 1/2 oz Kent Golding hops.
- Let the liquid (this is called “wort” at this stage) cool until it’s under 100 F (hotter will kill the yeast). You can set it in an icebath in your sink to make this step faster.
- Pour the wort into the sanitized plastic bucket and add cold tap water to make a total volume of 5 gallons.
- Add the yeast and give a good swirl to mix it in.
- Attach the sanitized lid with the stopper in the hole and insert the sanitized airlock into the stopper. Fill the airlock halfway (I use vodka but water is fine).
- Put the bucket somewhere it can sit out of the way for a week, ideally at not-too-warm room temp. Spare-room bathtubs work great. You should see the airlock start to bubble by 12-24 hours as the yeast goes to work and the beer starts fermenting.
- The bubbling should stop in less than a week. You have a choice here: either go straight to bottling, or preferably, use a sanitized siphon to “rack” the beer into a second sanitized 5 gallon container. Leave the gunky stuff in the bottom of the first bucket. Add 1/2 oz Kent Golding hops into the second container (if you aren’t using a seconday container, throw these hops in after step 10 instead).(If you didn’t read the recipe ahead and it’s too late, don’t worry. Drink some beer). You might or might not see more bubbling in the airlock for a few days. You can leave the beer in the second container for a few weeks.
To bottle your beer:
- Sanitize the siphon and two cases of bottles.
- Dissolve 1/2 cup brown sugar into a cup of boiling water.
- Siphon the beer into a sanitized 5 gallon container
- Add the dissolved brown sugar and stir well.
- Connect the sanitized bottling cane to the siphon and start bottling. Leave an inch or two of headspace in each bottle.
- Cap the bottles.
- Let the beer age for at least a week at room temp (3-4 weeks is better).
- Refrigerate, and enjoy!

For four hundred years, the Church has led the remnants of humanity as they struggle for survival in the last inhabited city. Echo Hunter 367 is exactly what the Church created her to be: loyal, obedient, lethal. A clone who shouldn’t care about anything but her duty. Who shouldn’t be able to.
When rebellious citizens challenge the Church’s authority, it is Echo’s duty to hunt them down before civil war can tumble the city back into the dark. But Echo hides a deadly secret: doubt. And when Echo’s mission leads her to Lia, a rebel leader who has a secret of her own, Echo is forced to face that doubt. For Lia holds the key to the city’s survival, and Echo must choose between the woman she loves and the purpose she was born to fulfill.
Amazon | Barnes & Noble | Harper Collins

About Stacey:
Stacey Berg is a medical researcher who writes speculative fiction. Her work as a physician-scientist provides the inspiration for many of her stories. She lives with her wife in Houston and is a member of the Writers’ League of Texas. When she’s not writing, she practices kung fu and runs half marathons. She is represented by Mary C. Moore of Kimberley Cameron & Associates. You can visit her at www.staceyberg.com.
Read More
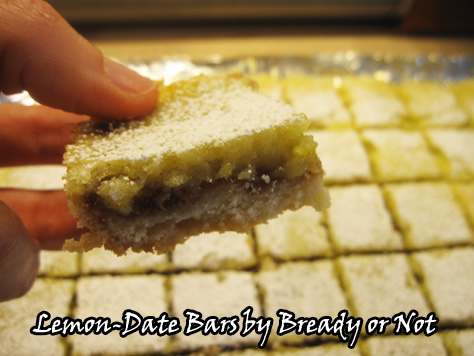
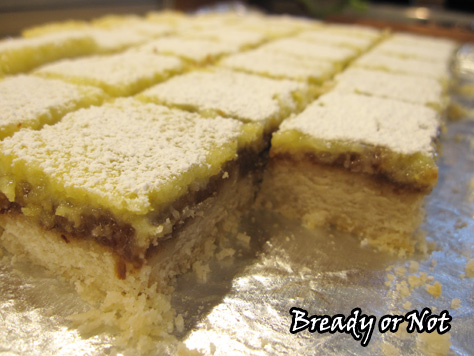
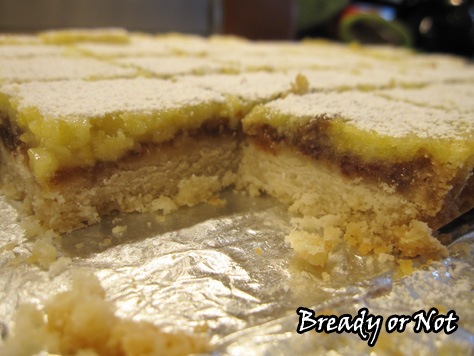
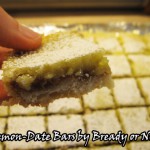
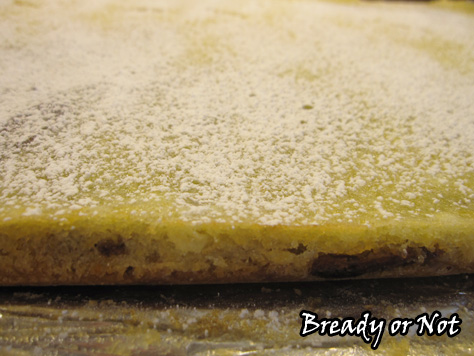
Bready or Not: Lemon-Date Bars
As I have mentioned before, my husband loves lemony desserts. These lemon-date bars have it all going on. They are shortbread plus savory-sweet plus lemon custard.
This isn’t a quick fix recipe. There are a lot of steps, but each is fairly straightforward.
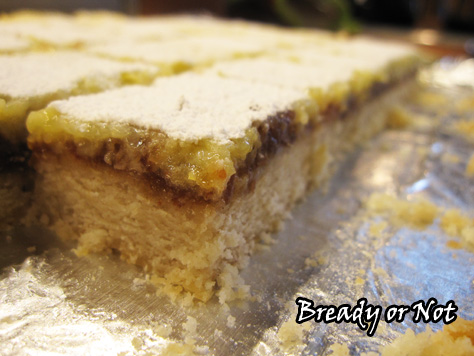
The end result is an extraordinary kind of lemon bar that looks like you put a lot of effort into it. Because you did.
If you love lemon desserts, make these!
Adapted from Martha Stewart Living.
Bready or Not: Lemon-Date Bars
Ingredients
Dates
- 8 ounces medjool dates pitted and choppd
- 1 cup boiling water
Crust
- 3/4 cup unsalted butter 1 1/2 sticks, cut into pieces
- 1 3/4 cups all-purpose flour
- 3/4 cup confectioners' sugar plus more for dusting
- 1 teaspoon coarse salt
Filling
- 1 1/4 cups white sugar
- 1/4 cup all-purpose flour
- 3/4 teaspoon coarse salt
- 4 large eggs
- 4 - 5 lemons zested and juiced
- 1 Tablespoon lemon zest finely-grated
- 3/4 cup lemon juice
Instructions
Filling
- In a heatproof bowl, soak dates in boiling water for 15 minutes. Drain, reserving liquid. Purée dates in a food processor with enough of soaking liquid (about 1/2 cup) to make a spreadable paste; this can also be done with an immersion blender, but be cautious in case it spits. (You should have about 1 1/4 cups of date paste.) Let mixture completely cool in fridge.
Crust
- Preheat oven to 350-degrees. Line a 9-by-13-inch baking dish with aluminum foil or parchment paper, leaving an overhang on the long sides, and use nonstick spray or butter to coat the interior.
- In a bowl, whisk together flour, confectioners' sugar, and salt. Work in butter with your fingertips or a fork until it's combined and mixture holds together when pinched. Press crust evenly into bottom of prepared pan. Freeze 15 minutes so it will set. Bake the crust until light golden brown, 20 to 25 minutes.
- While the crust is baking, whisk together the granulated sugar, flour, and salt. Whisk in eggs one at a time, followed by the lemon zest and juice.
- Spread the cooled date paste evenly over baked crust; an uneven spatula is handy for this.
- Bake at 350-degrees for 4 minutes. Reduce heat to 325-degrees and pour lemon filling over date layer. Bake about 10 minutes and rotate pan in oven, then cook for another 10 minutes. The top will be evenly set when it is done.
- Let cool on a wire rack. Store in fridge. Lift out the bars by the foil or parchment to cut them. Right before serving, sprinkle confectioners' sugar all over top (it'll absorb in a short time, but you can always add more).
- OM NOM NOM!
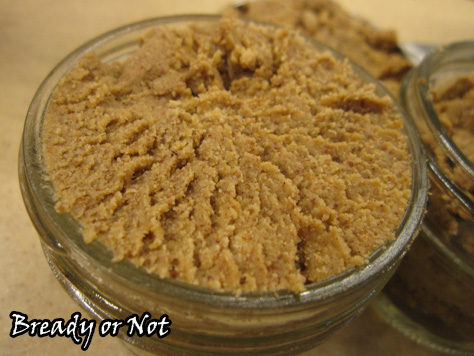
Bready or Not: Maple Nut Butter
Peanut butter can be bought for cheap. Other nut butters? Not so much. The good news is, with a food processor and about 20 minutes of spare time, you can make your own amazing nut butter!
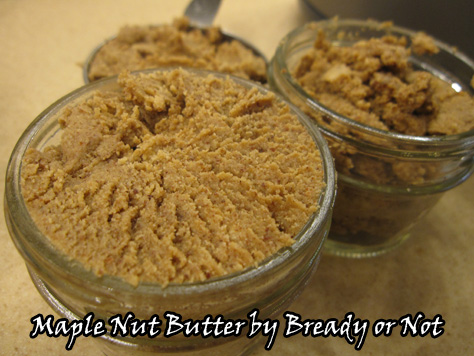
Me being me, I make MAPLE NUT BUTTER. I have done this two ways: with 1 cup each of almonds and cashews, and also with 2 cups of cashews. Other nut combos should work just fine, too. The end yield will be somewhere about 1 1/2 cups nut butter.
I priced and researched food processors for about a year until I caved in and bought a lovely refurbished Cuisinart model. This baby does the job. I’m pretty darn happy with it.
I combined a few recipes to make my own original version. I will type out the details of each stage in the full recipe below, but let’s illustrate in pictures first.
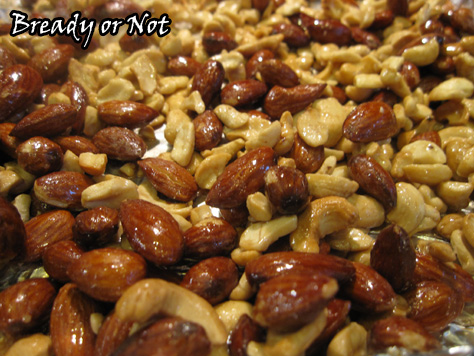
You toss the nuts in maple syrup and toast them in the oven. Let them cool a bit before processing them.
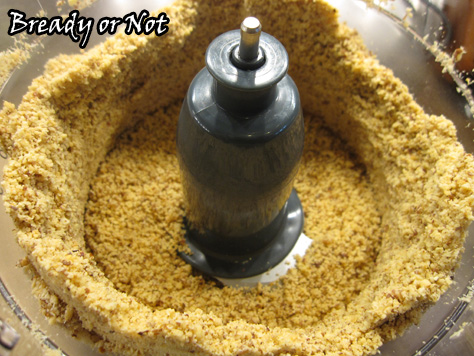
The ground nuts looks like coarse nut flour at first. They will gum up the blades every minute or so. I stop and scrape the sides often.
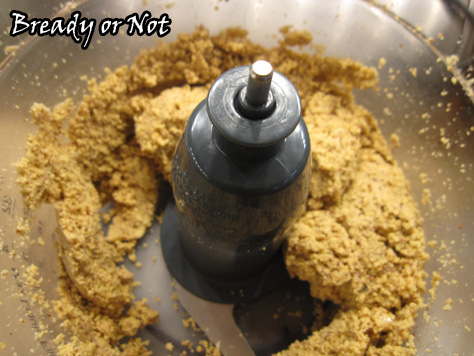
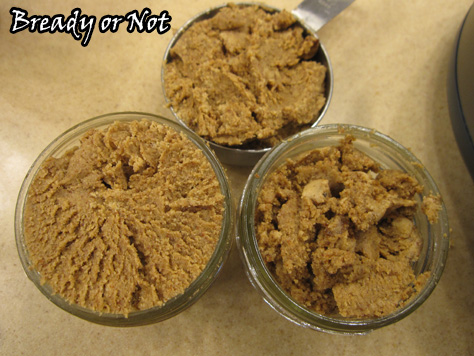
Then things start to get clumpy. Those lumps will migrate around on the blades like a glacier.
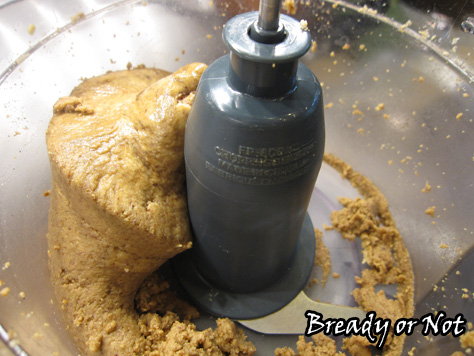
Keep on processing, and after about 15 minutes, you get that. Almost smooth nut butter! After a few more minutes it gets even smoother, and that is when you add spice, flavor, and a bit of oil.
I seal the nut butter in jars and store them in the fridge. Try to use it up within a month. It will be dryer than the standard store stuff, but you can always mix in a little more oil. I like avocado oil because it’s almost tasteless. The nut butter itself is the tastiest nut butter you’ll ever have. It just screams of maple and cinnamon and freshness.
Ready for the recipe? Okay!
Bready or Not: Maple Nut Butter
Ingredients
Toast
- 2 cups nuts 1 cups almonds + 1 cup cashews, or 2 cups cashews, or try other combos
- 1/4 cup pure maple syrup
After processing
- 1 teaspoon vanilla extract
- 1 teaspoon maple flavor optional, but adds oomph
- 1/2 - 1 teaspoon cinnamon
- 1 Tablespoon avocado oil or other oil, more as needed
- sprinkle sea salt
Instructions
- Preheat oven at 325-degrees. Line a rimmed baking pan with sturdy aluminum foil. In the pan, toss the two cups of nuts with maple syrup until they are coated. Toast for about 15 minutes, checking about every 5 minutes to toss the nuts around. Let the nuts cool for 30 minutes or so.
- Add the nuts to a food processor. (Note that you'll need to pry some off the foil.) Put the lid on and start processing. Run for 2 to 3 minutes then scrape down sides. The mix will look coarse and gritty.
- Continue processing, pausing every 1 or 2 minutes to scrape sides of bowl. Mixture will start to clump together.
- Continue grinding. The nuts will release more oil and start to smooth out more. Continue to stop and scrape the sides every 2 minutes or so to give the machine a break. After about 10 total minutes, it will look like nut butter but it won't be done yet!
- Continue processing. It will smooth out and finally evolve to a liquid-like form that snakes across the blades. This will be at about the 15 to 20 minute point. Add the rest of the ingredients and process another minute or so to blend together. Taste test to see if you need to tweak things.
- Transfer the nut butter to mason jars to store in the fridge for up to four weeks. If it seems especially dry, mix in a drizzle of oil.
- OM NOM NOM!
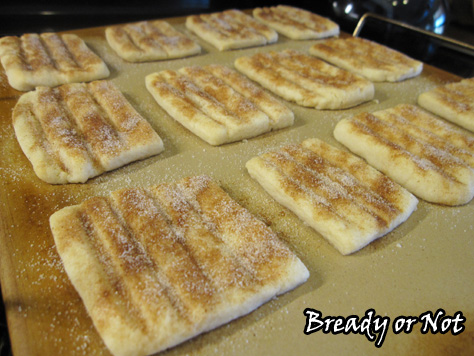
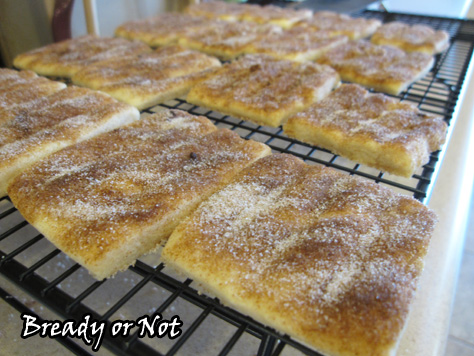
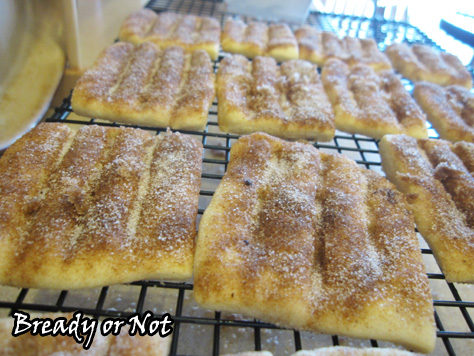
Bready or Not: Churro Shortbread
This repost from the Holy Taco Church features cookies made with a hefty dose of butter and then basted with more butter.
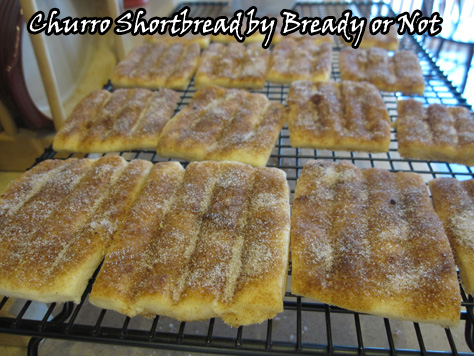
These look like churros but they taste like snickerdoodles. I found chopsticks quite handy for impressing the churro-esque lines into the tops of the cookies. You can also use skewers.
Superfine or caster sugar makes for smoother cookie dough. You can make finer sugar yourself by putting regular white granulated sugar in a high-powered blender or food processor and grinding it down more. Or just use regular white sugar; it’ll make for a heavier cookie, but it will still be delicious.
I tried double-soaking these in butter. As one does. This means I brushed on butter before and after baking, and dosed it with more cinnamon and sugar after each buttering. There was no difference in taste. Therefore, I say only do double butter if you need to use up some extra in your bowl.
Modified from Heat Oven to 350.
Bready or Not: Churro Shortbread
Ingredients
- 2 1/2 cups all-purpose flour
- 3/4 cup caster sugar or superfine sugar, or regular white sugar
- 1/4 tsp salt
- 1 cup unsalted butter 2 sticks, room temperature
- 2 Tb cream cheese room temperature
- 2 tsp vanilla extract
Topping
- 2 Tb unsalted butter melted
- 1/4 cup white sugar
- 3 Tb cinnamon
Instructions
- Whisk the flour, sugar, and salt together in a large bowl. Beat the butter into the dry mix until it looks crumbly. Toss in the cream cheese and vanilla and blend. The dough should form a large cohesive clump. (If you live in a dry locale, add a teeny bit of water, if need be, so it comes together.)
- Lightly flour a surface. Roll out the dough as evenly as you can. Use a pizza slicer to cut the dough into cookie-sized rectangles. Line a cookie sheet with wax paper and set the cookies on it; if you stack them, put wax paper between the layers, or they will stick. Stash the cookies in the fridge for at least 15 minutes. This will keep them from spreading in weird ways when they bake.
- Preheat the oven to 350-degrees. In a microwave-safe saucer or bowl, melt the two tablespoons of butter. In another bowl, combine the cinnamon and sugar for the topping.
- Bring out the cookies and transfer them to a new cookie sheet. They shouldn't spread much so they don't need a lot of space between them. Use a chopstick or something similar to gently form ridges in the tops of the cookies; the chilled dough might crack, but just mush it together again if that happens. Use a pastry brush to apply the melted butter and then sprinkle on the topping as evenly as you can.
- Bake cookies for 10-12 minutes. Remove from oven and immediately use your chosen tool to gently indent the tops of the cookies again. Let them cool another ten minutes and then transfer to a rack.
- OM NOM NOM!
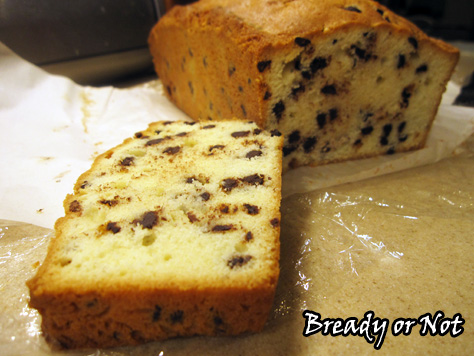
Bready or Not: Baileys Chocolate Chip Pound Cake
Today we wrap up the Baileys Coffee Creamer theme with an amazing pound cake that’s perfect for breakfast or snack.
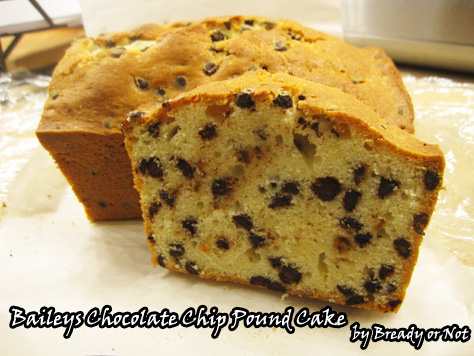
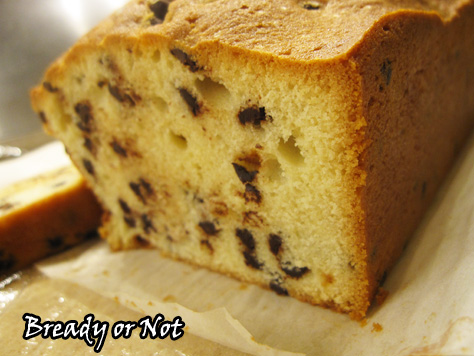
The original version of the recipe used alcoholic Baileys and also included it in a chocolate glaze. I decided to do without the glaze (I know! Gasp!) but I think it was a good call. The cake is perfectly sweet on its own, and the mini chips add the perfect amount of chocolate taste.
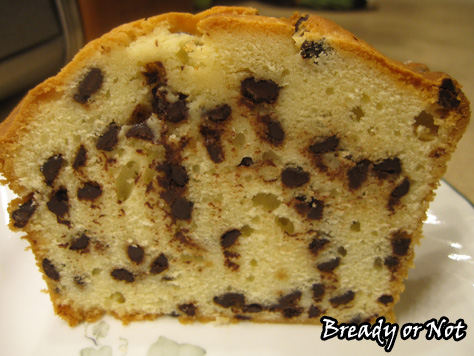
The combination of the nonalcoholic coffee creamer and sour cream lend this a tender yet dense crumb. It slices easily because of the mini chips.
The most impressive thing about this pound cake was that it was delicious fresh, and it was just as delicious five days later. We kept it shrouded in plastic wrap at room temperature.
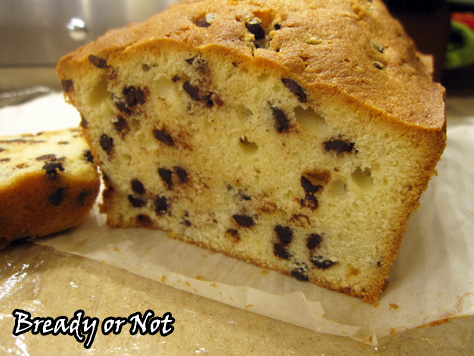
This is a pound cake you’ll want to pound into your mouth, again and again.
Modified from Lemon Tree Dwelling.
Bready or Not: Baileys Chocolate Chip Pound Cake
Ingredients
- 1/2 cup unsalted butter 1 stick, room temperature
- 3 eggs
- 1/4 cup sour cream
- 1/4 cup Baileys Irish Coffee Creamer or Irish Cream
- 1 1/2 cups all-purpose flour
- 1/4 teaspoon baking powder
- 1/8 teaspoon baking soda
- 1 cup white sugar
- 1 cup mini chocolate chips
Instructions
- Prepare the loaf pan by coating with nonstick spray, then cutting a sling of parchment paper to fit the width of the pan that can stick up on either side. Apply nonstick spray on that as well.
- Preheat oven at 325-degrees.
- In a mixing bowl, beat butter until it's creamy. Gradually add the sugar and continue to beat 4 or 5 minutes, or until it's light and fluffy. Stop and scrape the bowl a few times.
- While that is beating, in a separate small bowl combine the flour, baking powder, and baking soda. In another bowl, whisk together the Baileys and sour cream. It's okay if it's a bit lumpy.
- In the butter-sugar bowl, add the eggs one at a time and mix well in between. Pour in the dry mix and the Baileys mix a bit at a time, going back and forth, until everything is just combined. Stir in the mini chocolate chips. Pour batter into the prepared loaf pan.
- Bake for 65-75 minutes or until it passes the toothpick test in the middle of the loaf.
- Cool on a rack for 20 minutes then use the paper sling to lift it up to cool completely. Store in layered plastic wrap at room temperature. Keeps well for at least 5 days.
- OM NOM NOM!
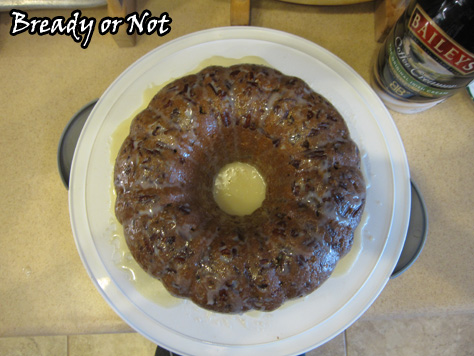
Bready or Not: Baileys Irish Coffee Creamer Bundt Cake (with cake mix)
Welcome to part 2 of my St. Patrick’s series as I use up a big honkin’ bottle of Baileys Coffee Creamer! This time, it doctors another cake mix, but in bundt cake form.
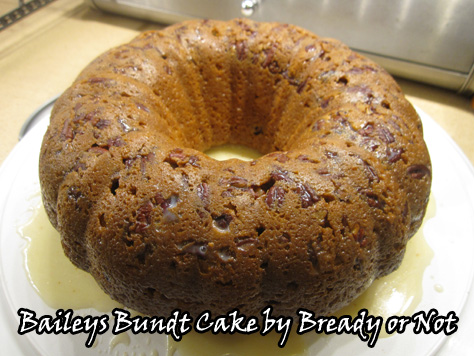
This is, really, a large pound cake/poke cake. The flavor of Baileys isn’t heavy here at all. It’s all about vanilla smoothness and tender crumb.
The glaze isn’t something that sits on top of the cake. It soaks in. You poke it all over and drizzle the glaze on slowly so the moisture can penetrate. After a day in the fridge, it’s hard to tell it was glazed at all… until you cut inside and see how lusciously moist the cake is inside.

This is a cake that’d be great for breakfast, brunch or dessert, by itself or dressed up with fruit or ice cream. You can always make extra glaze for adorning individual pieces, too–the original recipe recommended doing just that. It also used the alcoholic Baileys, so that’s another way to “dress this up,” too.
Use the mild-mannered coffee creamer or the harder stuff. Your call. Whatever you use, it’ll make for a yummy, tender cake.
Modified from Noble Pig.
Bready or Not: Baileys Irish Coffee Creamer Bundt Cake (with cake mix)
Ingredients
Cake
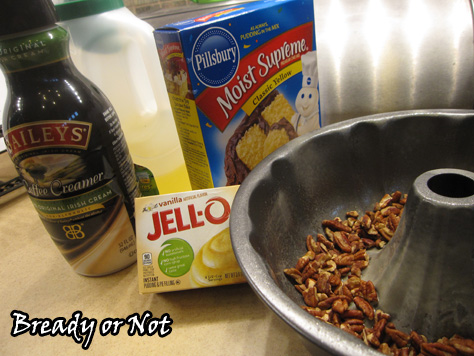
- 1 cup pecans chopped
- 1 box yellow cake mix
- 3.4 ounce instant vanilla pudding mix 1 box
- 4 large eggs room temperature
- 1/4 cup water
- 1/2 cup vegetable oil
- 3/4 cup Baileys Irish Coffee Creamer or liqueur
Glaze
- 5 Tb unsalted butter
- 3 Tb water
- 2/3 cup white sugar or caster sugar
- 3 Tb Baileys Coffee Creamer or liqueur
Instructions
- Preheat oven to 325-degrees. Generously grease and flour a 10-inch bundt pan. Sprinkle pecans all the way around the bottom.
- In a large bowl, mix together the yellow cake mix, vanilla instant pudding mix, eggs, water, oil and coffee creamer. Pour the batter over the pecans in pan.
- Bake for 60 minutes, or until it passes the toothpick test. Let it cool for about 15 minutes then flip the cake out onto a wire rack to cool completely.
- When the cake is cool, make the glaze. In a small saucepan, combine the butter, water, and sugar. Bring it to a boil and keep it there for 5 minutes, stirring all the while. Remove it from heat and add the Baileys.
- Poke the cake all over with a skewer of chopstick. Slowly drizzle the glaze over the cake so that the sweetness can soak into the puncture points; a brush is useful here, too. Gradually work all of the glaze inside and over the cake; note that it will soak in more over the next hours and the cake will look moist rather than iced. Store covered in the fridge.
- OM NOM NOM!