Bready or Not: White Chocolate Lemon Blondies
Memorial Day weekend is coming up, so let’s do make something fresh and summer-y! How about chewy bars that taste like lemonade?
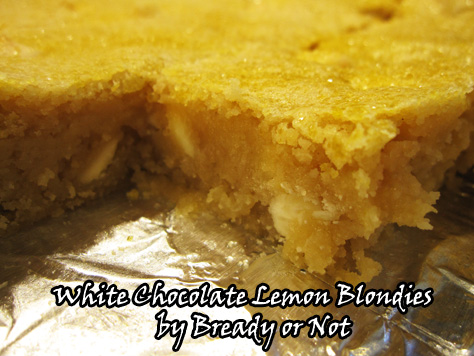
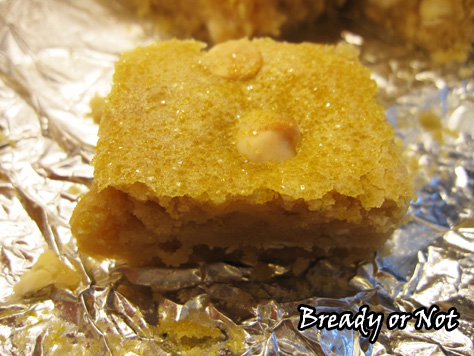
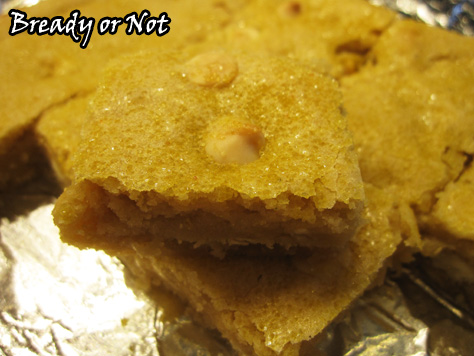
These bars are soft and chewy with a delightfully fresh flavor. White chocolate and lemon make for a wonderful pairing in both taste and texture.
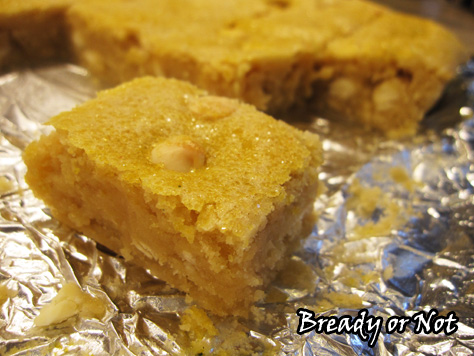
I’d like to say that these kept well for days, but I really don’t know. They stayed yummy for one day, at least.
When my husband took these to work, a co-worker told him, “Your wife can make these any time she wants.” I always welcome that kind of encouragement to bake more!
Modified from A Kitchen Addiction.

Bready or Not: White Chocolate Lemon Blondies
Ingredients
- 1/2 cup unsalted butter 1 stick, softened
- 1/2 cup brown sugar packed
- 1/2 cup white sugar
- 1 lemon zested and juiced
- 2 eggs room temperature
- 1 1/2 tsp vanilla extract
- 1/2 tsp lemon extract
- 1 1/2 cup all-purpose flour
- 1/2 tsp baking powder
- 1/4 tsp salt
- 1/2 cup white chocolate chips
- sparkling sugar or turbinado sugar for top, optional
Instructions
- Preheat oven to 350-degrees. Line an 8x8 or 9x9 inch baking dish with aluminum foil and apply non-stick cooking spray.
- Cream together butter and both sugars. Add lemon juice, eggs, and vanilla extract, and beat until combined.
- In a separate bowl, stir together the dry ingredients: flour, lemon zest, baking powder, and salt. Gradually add the flour mix into the wet ingredients.
- Stir in white chocolate chips; dough will be thick. Spread into the bottom of the ready baking dish. An offset spatula works well to smooth it out. If desired, sprinkle sparkling or turbinado sugar all over the top.
- Bake for 20-25 minutes, until it passes the toothpick test.
- Set on a wire rack to cool completely, then use foil to lift contents to a cutting board. Cut into bars.
- OM NOM NOM!
Bready or Not: Roasted Edamame
Roast your own edamame to make a delicious protein addition for salads, noodle dishes, or sandwiches–or as a healthy snack by itself!

Dry edamame is expensive in stores, often sold in small bags. My local Sprouts carried dry edamame in their bin section for an awesome price and I bought it often, but then they remodeled last year and the edamame vanished. Sigh.
So I decided, heck, I’d make my own!

A pound bag of frozen edamame is $2-4 in stores. It takes some planning and minimal work to roast it, and you can make it as crunchy as you like. I like to keep the beans a little chewy.
I do a lot of sweets on here, but this is the kind of food I like to do for myself as a treat. Om nom nom!
Modified from Bams Kitchen.

Bready or Not: Roasted Edamame
Ingredients
- 16 ounces shelled edamame 1 bag, frozen
- olive oil or avocado oil
- sea salt
- pepper
Instructions
- Take the sealed edamame bag out of the freezer and set it on a plate in the fridge to defrost overnight.
- Next day, open up the bag and place the shelled beans in a colander. Rinse and sort through to make sure they are thawed. Set out towels and let the edamame sit out to dry in a single layer; blot the top with another towel. The beans should be completely dry before roasting.
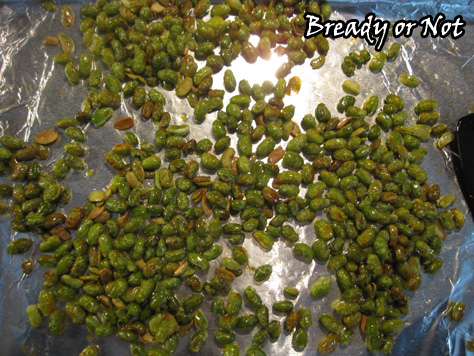
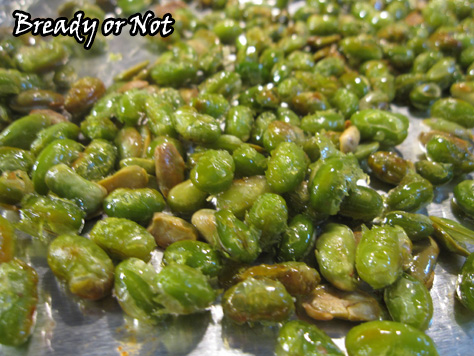
- Preheat oven at 375-degrees. Prepare a rimmed baking sheet with aluminum foil. Place your edamame on the sheet. Drizzle with oil and stir them for complete coverage. Add a sprinkling of salt and pepper.
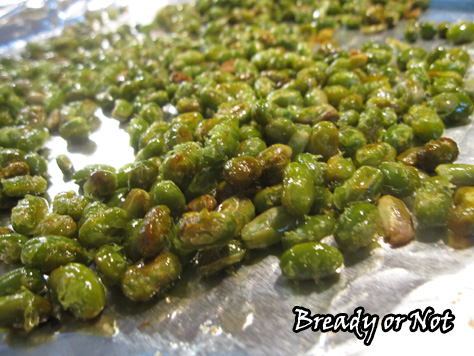
- Bake for 40 to 50 minutes, with breaks about every 15 minutes to stir the edamame. The longer they cook, the crispier and browner they get, so bake to preferred taste!
- Eat right away, or store in a sealed container in the fridge. Roasted edamame is great as a snack, or in all sorts of dishes!
- OM NOM NOM!
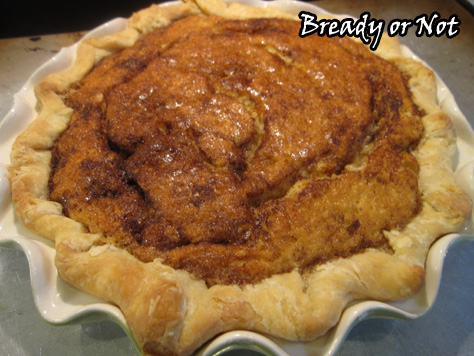
Bready or Not: Snickerdoodle Pie
I attend the Nebula Awards in a few days. I don’t expect to win, but the whole thing is freaky and exciting and a cause for celebration. Therefore, I am sharing a special recipe for Snickerdoodle Pie.

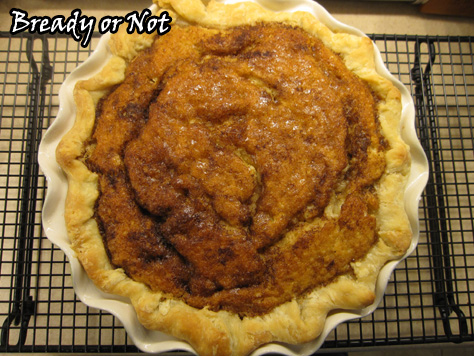
That’s right. Snickerdoodle Pie. It happens to be a photogenic pie, too, so brace yourself for an onslaught of pictures.
In all honesty, it would be faster to make Snickerdoodle Cookies than to make this pie. The thing is… this pie is awesome. It looks and tastes like you made an extra effort.
It really does taste like a giant Snickerdoodle, too. I used my tried-and-true pie crust recipe, which is reposted below, but you can use a store crust or your own reliable recipe.
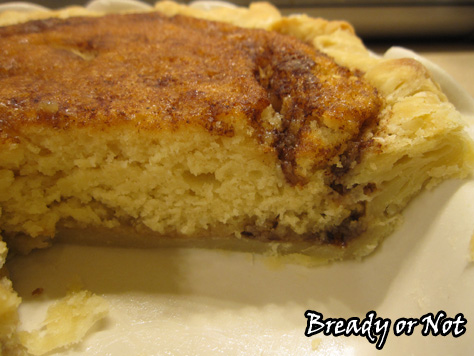
It’s kind of weird how perfectly Snickerdoodley this is, even for being so thick. It’s kind of magical, if magic involves cinnamon, sugar, and cream of tartar.
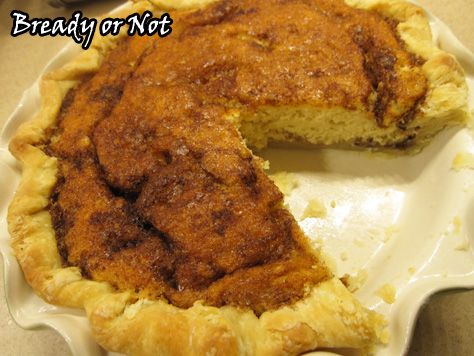
My husband adored this pie. The slices were great straight out of the fridge, but he experimented and found out it’s even better reheated in the oven. Wrap up a slice in some foil and warm it just enough to caramelize the sugar crust some more. Yum!
This is a special occasion pie. A birthday pie. A holiday gathering pie. A hey-I was-nominated-for-an-awesome award pie.
Plus, if you have pie, you’re a winner no matter what!
Modified from the Taste and Tell Blog and the Better Homes and Gardens New Cook Book 16th Edition.
Bready or Not: Basic Pie Crust
Ingredients
- 3 cups all-purpose flour
- 1 Tablespoon sugar
- 1 teaspoon fine salt
- 1 cup unsalted butter 2 sticks, cold, cut into cubes
- 3/4 cup ice water
Instructions
- Make dough hours in advance or the night before. In a medium mixing bowl, whisk together the flour, sugar, and salt. Add in the cold butter cubes, and either use a pastry blender or pulse the ingredients in a food processor until the butter is pea-sized.
- Pour in the cold water and pulse/mix together until the dough forms a loose ball. I like to use my hands at this point. The dough may be sticky, but it will firm up well.
- Pour dough onto a floured surface. Divide into two balls and fallen them into discs. Wrap each disc in parchment paper, then in plastic wrap. Refrigerate at least one hour before placing in pie dish, or freeze for up to 3 months.
- Roll out the refrigerated dough into a 12-inch round. Press it into a 9-inch dish, trimming the excess and pinching the edges. Wrap loosely with plastic wrap and freeze at least two hours before using, or keep frozen up to three months.

Bready or Not: Snickerdoodle Pie
Ingredients
- 1 single unbaked pie crust
- 1 Tablespoon raw sugar or coarse sugar
- 3/4 teaspoon ground cinnamon divided
- 1 Tablespoon unsalted butter melted
- 1/2 cup brown sugar packed
- 1/4 cup unsalted butter
- 3 Tablespoons water
- 2 Tablespoons light corn syrup
- 1 1/2 teaspoons vanilla extract divided
- 1/4 cup unsalted butter softened
- 1/2 cup white sugar
- 1/4 cup confectioners' sugar
- 1 teaspoon baking powder
- 1/2 teaspoon salt
- 1/4 teaspoon cream of tartar
- 1 egg room temperature
- 1/2 cup milk or almond milk
- 1 1/4 cups all-purpose flour
Instructions
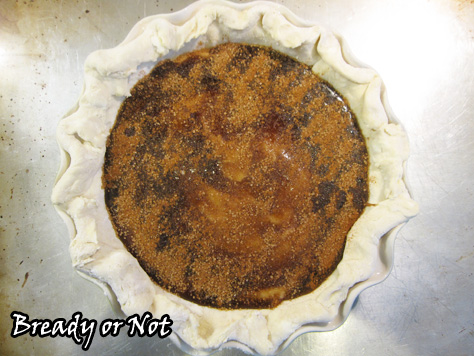
- Preheat the oven to 350-degrees. In a bowl, combine the tablespoon of coarse or raw sugar and 1/2 teaspoon of the cinnamon. Brush the 1 Tablespoon of melted butter on the bottom of the pie crust, then sprinkle 1 teaspoon of the cinnamon sugar mixture over the butter. Set aside on a cookie sheet.
- In a small saucepan over medium heat, combine the brown sugar, 1/4 cup butter, water, corn syrup, and remaining 3/4 teaspoon of cinnamon. Bring to a boil, stirring to dissolve the brown sugar. Let everything boil for 2 minutes, then remove from the heat. Stir in 1/2 teaspoon of vanilla extract, and set the pot aside to cool.
- In a mixing bowl, beat the 1/4 cup softened butter until it's creamy. Add the 1/2 cup of white sugar, powdered sugar, baking powder, salt, and cream of tartar until it's just mixed. Beat in the egg and the remaining 1 teaspoon of vanilla extract. Slowly beat in the milk. Add in the flour until it's just incorporated.
- Spread the cookie dough mixture evenly in the pie crust. Get the saucepan, and slowly pour the syrup over the top. Sprinkle with the remaining cinnamon-sugar mixture.
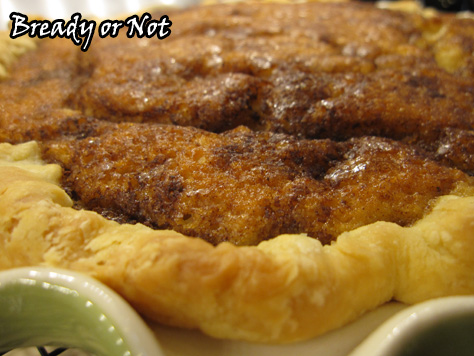
- Cover the edges of the pie with foil or a pie shield; bake for 25 minutes. Remove the foil/shield. Continue to bake about 20 more minutes, until the top of the pie is puffed and golden brown--and looks like a snickerdoodle! Use the toothpick test in the middle of the pie to make sure it's done.
- Cool for at least 30 minutes before serving. The leftovers are good cold, but are even better if warmed in the oven or toaster oven. Reheat a slice wrapped in aluminum foil at 375-degrees for about 10-12 minutes; it'll get warm through, and caramelize the top.
- OM NOM NOM!
Bready or Not: Chili Lime Mozzarella Sticks
Hot, melted cheese is one of the finest things in life. Add some flavor oomph and you have the perfect yumminess to stuff in your face.

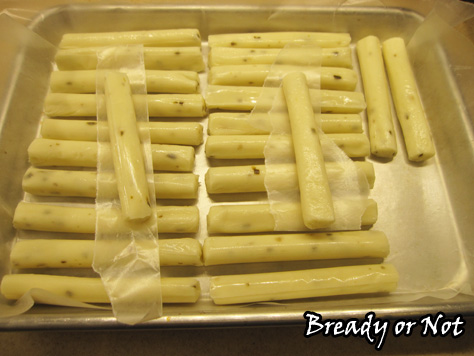
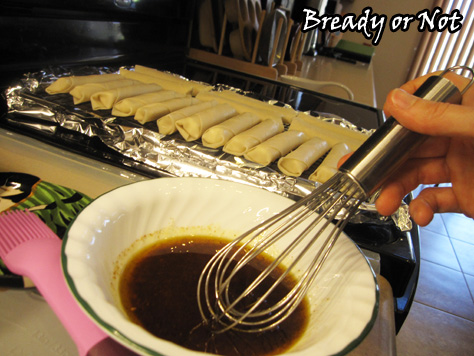
The concept is simple: freeze cheese sticks. Wrap them in egg roll wrappers. Apply seasoning. Bake. Devour.
To boost this to another level, I recommend jalapeno mozzarella sticks. I was a little worried they might be too hot, but it turned out the flavor was very mild. DO NOT BE AFRAID OF THE CHEESE STICK.
The wrapping process is pretty easy. It gives directions on the back of the egg roll wrap package. However, don’t be like me and forget to brush water on the edges. (I think that’s why my wrappers leaked cheese. This can be categorized as a fantastic problem, because I then had to eat puddles of seasoned cheese off the aluminum foil. Darn.)
Modified from Carlsbad Cravings. First posted by me at the Holy Taco Church.

Bready or Not: Chili Lime Mozzarella Sticks
Ingredients
- 24 mozzarella sticks regular or jalapeno
- 20 egg roll wrappers 21-22 come in a pack; count wrappers and perhaps double up on a cheese stick or two
- 1/4 cup water
Chili Lime Olive Oil
- 1 Tablespoon lime juice
- 1/4 cup olive oil
- 1/2 teaspoon chili powder
- 1/2 teaspoon ground cumin
- 1/4 teaspoon onion powder or onion flakes
- 1/2 teaspoon garlic powder
- 1/2 teaspoon kosher salt or sea salt
- 1/4 teaspoon pepper
Instructions
- Unwrap mozzarella sticks and freeze for 1-2 hours. Do this on wax paper so they don't stick.
- Whisk together the chili lime olive oil ingredients in a small bowl while the oven preheats to 400 degrees.
- Wrap your sticks. Follow the directions on the package or you can Google it. Be gentle so you don't tear the thin pastry, and do remember to brush water on the edges so that it seals. Note that you likely won't have 24 wrappers in the pack, so count them and be prepared to eat some naked cheese or do some double-wrapped versions.
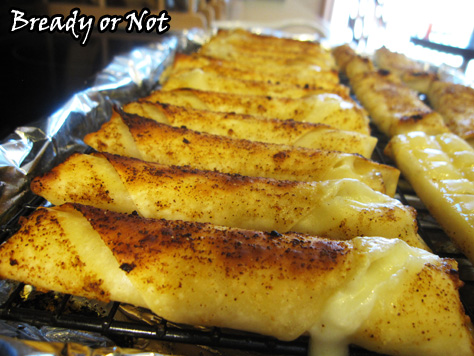
- Place the wrapped cheese on a baking rack placed on a foil-lined baking sheet. Stir the seasonings again (the spices will settle) and then brush the oil all over the cheese sticks. Use up all that good stuff.
- Bake for 15 minutes at 400-degrees. Adjust the rack and broil for 3-5 minutes, or until golden, then flip them to broil the other side.
- Eat up! They are amazing fresh--dip them in the oil in the pan. Serve with salsa or guac. Also, these things are amazing cold out of the fridge, if you happen to have any leftover.
- OM NOM NOM!
Bready or Not: Blueberry Muffin Breakfast Truffles
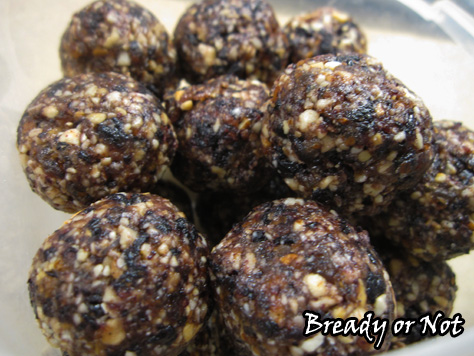
Gluten-free. Basic, wholesome, raw ingredients. No added sugar. No baking involved. Tastes like a mini blueberry muffin. Oh yeah.

I have posted about breakfast energy truffles before. This is a distinct variation because of the use of dried blueberries. Mind you, those can be an expensive ingredient, but you only need 1/2 cup for the recipe. I thought the blueberry flavor might be overwhelming, but the addition of a little lemon juice does a lot to mellow it.
These are super-easy to make in a food processor or high-powered blender (though for the latter, you might need to blend this in smaller batches). It just takes a few minutes to make these truffles.

Store them in the fridge for upward of a week or two. They are perfect for a breakfast or snack!
Modified from Blueberry Muffin Energy Balls at The Healthy Maven.

Bready or Not: Blueberry Muffin Breakfast Truffles
Ingredients
- 1/2 cup cashews
- 1/2 cup almonds or use other combination of nuts to equal 1 cup
- 1/2 cup dates diced
- 1/2 cup dried blueberries
- 3/4 teaspoon vanilla extract
- 1 Tb lemon juice
- dash salt
Instructions
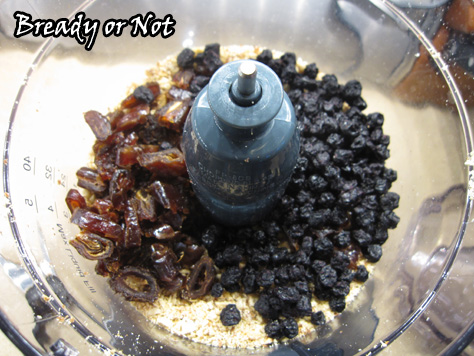
- Add nuts to food processor. Pulse until they are in pieces. Add the dates and dried blueberries, and process until they are in tiny pieces and starting to stick together
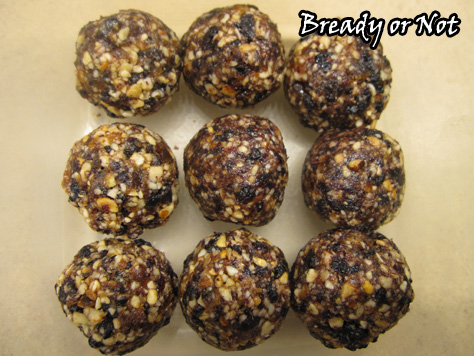
- Add the lemon juice, vanilla extract, and salt. Blend everything until it forms a big sticky ball.
- Use a teaspoon or tablespoon scoop to form balls. You might need to stir the mix as you go, as the lemon juice tends to lurk at the bottom. Use your hands to compress each ball. Store in a sealed container in the fridge for up to two weeks, or freeze between layers of wax paper.
- OM NOM NOM!
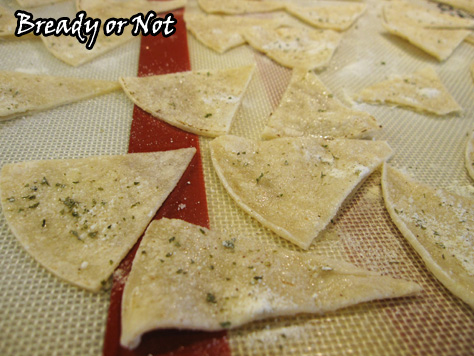
Bready or Not: Homemade Tortilla Chips
When you make tacos, do you ever use up all of the tortillas? I sure don’t. There always end up being half a pack wallowing in the fridge. They come in handy for quick-fix quesadillas, but here’s another quick-fix for those leftovers: homemade tortilla chips!

I think corn tortillas are the best way to go here, but feel free to try this with flour. I just think they’d get too hard. I like corn because there’s more chewiness. Also, this can totally be gluten-free, if you need that kinda thing.
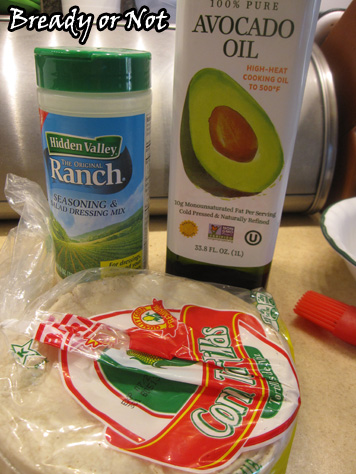
Choose how you wish to equip your chips. I went with ranch mix. If you use a packet, you won’t need that much out of it. You could likewise use taco seasoning, sea salt and pepper, cayenne, whatever. Heck, make this dessert with cinnamon and sugar and dip up some ice cream!
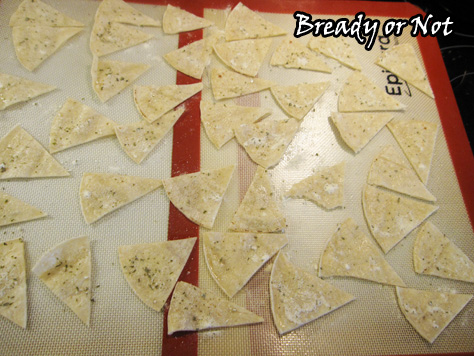
The technique is simple. Slice up your tortillas. A pizza cutter makes this easy. Brush oil on both sides of the wedges. Season. Bake a short time.
Do keep a close eye on the oven so you don’t overbake these! That would be a tragedy.
The batch shown here, I baked for 15 minutes. The resulting chips were crisp yet still somewhat chewy and fresh. Find your sweet spot for the texture you want.

Modified from DIY Ranch Tortilla Chips at Make the Best of Everything. Originally posted at the Holy Taco Church.

Bready or Not: Homemade Tortilla Chips
Ingredients
- corn tortillas
- oil olive oil, avocado oil, canola, etc
- ranch dressing mix or other seasoning like taco mix, Italian, etc
Instructions
- Preheat oven to 350-degrees. Prep a large baking sheet with silicone mats or parchment paper. You can likely only fit 5 or 6 tortilla's worth of chips on a sheet.
- Use a pizza cutter to slice your chips to desired size; they will shrink some as they bake. Brush a small amount of oil onto both sides of the wedges. Season them as much as you want; it's probably not necessary to do both sides. Use your fingers to smooth out any clumps.
- Bake chips for 12 minutes then monitor them closely for desired crispness. Stay close to the oven--these are thin, remember, so they can quickly overcook!
- Eat promptly or store chips in a sealed container.
- OM NOM NOM!