Bready or Not: Honey Roasted Chicken and Carrots
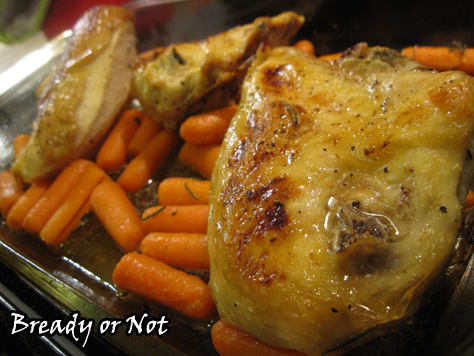
When bone-in chicken breasts go on sale, I’m really happy for the chance to make this family favorite: Honey Roasted Chicken with Carrots.

This is a fairly healthy recipe. It relies on the chicken skin and a touch of olive oil to keep the chicken tender and moist, with a little more butter added at the end. You can use however many baby carrots you want, though you might not be able to squeeze more than 12 ounces worth into a dish. The carrots end up tender and the slightest bit sweet and caramelized.
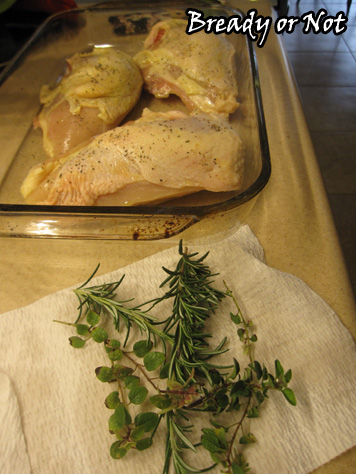
I have fresh oregano and rosemary handy, so I like to use one or both of those in this, but you can season this however you want. Dry herbs will rehydrate nicely.

One of the things I love most about this is that the breast pieces are meaty and we’re bound to have leftovers the next day. This tender chicken is delicious in salads, wraps, or sandwiches!
Modified from a recipe published in the Arizona Republic, October 4th 2007.

Bready or Not: Honey Roasted Chicken and Carrots
Ingredients
- 2 - 3 chicken breast halves with bone and skin
- olive oil
- salt and pepper
- 8 - 12 ounces baby carrots
- 2 Tablespoons unsalted butter softened
- 1 Tablespoon honey
- 2 - 3 Tablespoons fresh oregano or rosemary, or a few teaspoons dry herbs
Instructions
- Preheat oven to 425-degrees. Set out a large casserole dish. Rub the chicken with enough oil to coat it on both sides, then season with salt and pepper. Place the breasts skin side down in the dish.
- Bake for 25 minutes. Turn the chicken over--watch out, it will sizzle and pop! Add as many carrots as desired to the pan.
- Bake for another 25 minutes. As the chicken bakes, in a bowl combine the butter, honey, and herbs.
- Turn the chicken over to be skin-side up again. Spoon the butter-honey mix over the chicken and carrots. Roll the carrots around in it for good measure. Roast for an additional 5 minutes.
- OM NOM NOM!
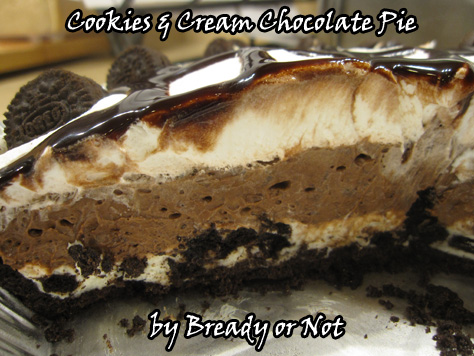
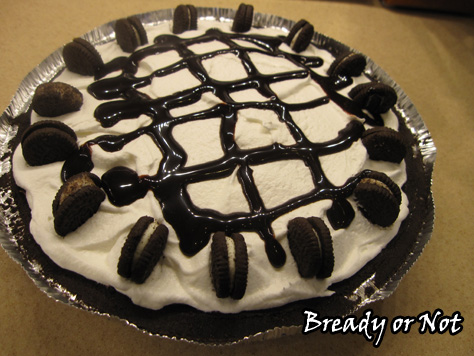
Bready or Not: Cookies and Cream Chocolate Pie
Here’s a no-bake, super-easy pudding pie that perfect for summer.
You can go hardcore with this and make your Oreo crust from scratch. Me? I’ve done that before, but honestly, I prefer the store version for both taste and ease of use.
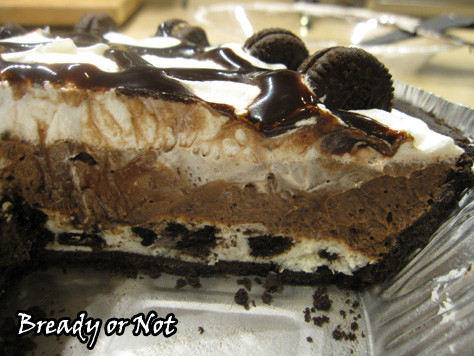
The chocolate flavor here is great because it’s neither weak nor strong. If you want to amp it up, heck, that’s easy to do with more chocolate topping. When I made this for my folks, my brother thought it was even better with dulce de leche added to individual slices. It made it taste kinda like a Twix with that caramel-chocolate thing going.
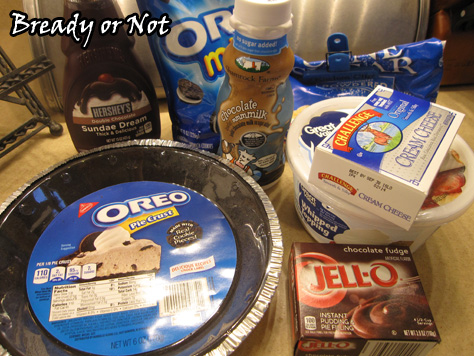
I used mini Oreos for everything in this recipe. They chop up easily to throw in and I can often get them on sale for about a buck. Plus, my son loves eating the leftovers!
This is the perfect pie for a potluck or to stash in the fridge to slice up and cool off on a hot summer day.
Modified from Inside Bru Crew Life.

Bready or Not: Cookies and Cream Chocolate Pie
Ingredients
- 1 Oreo pie shell store bought or homemade
- 4 ounces cream cheese softened; half a box
- 1/3 cup confectioners' sugar
- 3 cups Cool Whip divided
- 2/3 cup Oreo cookie chunks
- 3.9 ounce instant chocolate fudge pudding mix
- 1 cup chocolate milk
- 10 - 15 mini Oreo cookies
- hot fudge squirt bottle or dulce de leche topping, optional
Instructions
- Set out the Oreo crumb pie shell so it is ready to be filled.
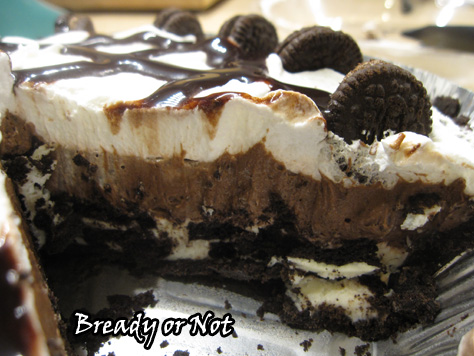
- Beat the cream cheese and powdered sugar together and fold in about 1/2 cup of Cool Whip. Stir in the Oreo chunks. Spread everything in the bottom of the crust.
- Using the same bowl or a new one, whisk together the pudding mix and chocolate milk. Fold in 1 cup of Cool Whip. Spread this as your second layer.
- Top off the pie with the remaining Cool Whip. Add mini Oreos around the edge or even crumble some for the top, if you wish. If you have squirt bottles of chocolate or dulce de leche, add some swirls or cross-hatching to the top.
- Chill pie at least two hours before serving. Keep refrigerated thereafter.
- OM NOM NOM!
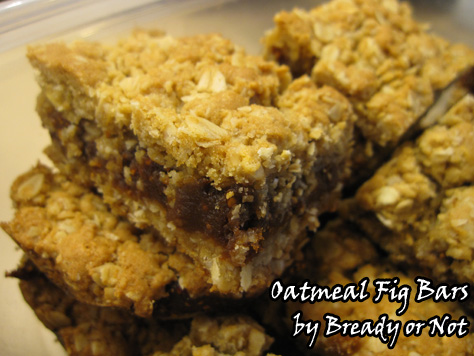
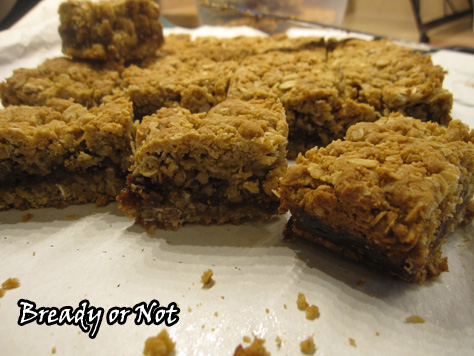
Bready or Not: Oatmeal Fig Bars (aka Homemade Fig Newtons)
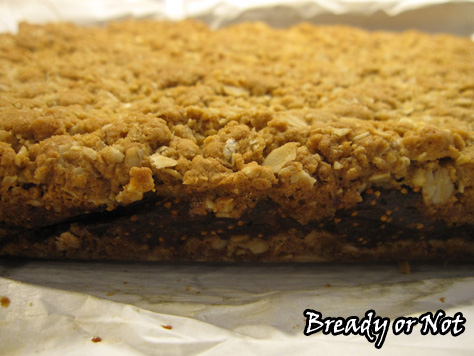
These are like Fig Newtons, but better. They are thicker. Fresher. The top has the slightest crunch.
This recipe is what happened after I thought I was buying dates to use for my breakfast truffles. It took me a few weeks to notice I really had figs in my cupboard. Whoops?
An awesome kind of whoops!
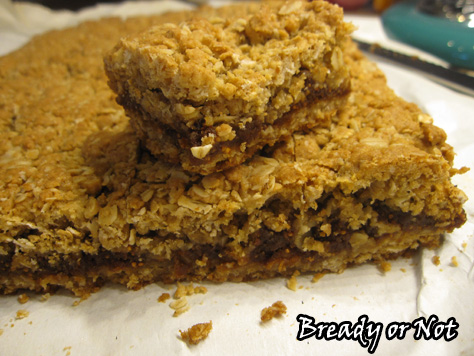
I doubled the original recipe so I could use as many figs as I could. My immersion blender pulsed the fruit on the stovetop. Everything came together fast and easy. I used the double sided parchment-aluminum foil for easy clean up, too.
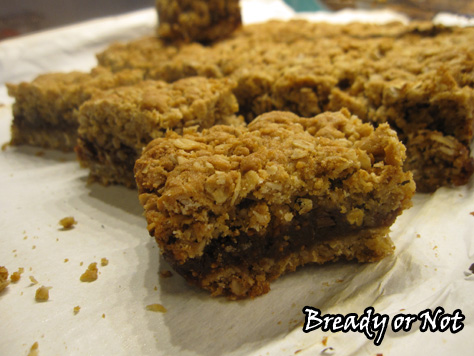
These bake up with golden, crispy tops while the rest of the bar is dense and chewy. These things are hearty. They’d make for a good breakfast or snack for kids or adults, and I imagine they would even freeze well.
I’m not sure how well they keep beyond a day, though. My husband took them to work and they kinda vanished. All that remained were crumbs and rave reviews.
Recipe doubled and adapted from Alida’s Kitchen.
Bready or Not: Oatmeal Fig Bars (aka Homemade Fig Newtons)
Ingredients
For fig filling
- 2 cups dried figs about 16 ounces, chopped, stems removed
- 1 cup water
- 2 Tablespoons lemon juice
For dough
- 3 cups oats old fashioned or quick oats, or a mix
- 2 cups all-purpose flour
- 1 1/2 cups brown sugar packed
- 1 tsp baking soda
- 1/2 tsp salt
- 3/4 cup unsalted butter 1 1/2 sticks, melted
- 2 eggs room temperature
Instructions
- In a small sauce pan, bring figs, water, and lemon juice to a boil. Simmer for several minutes until it starts to thicken. Remove from heat and let it cool for ten minutes or so.
- Use a food processor or an immersion blender to process the fruit unless smooth. Be very careful--hot fruit splatter is not fun! Set it aside to cool as you ready everything else.
- Preheat oven to 350 degrees. Line a 9x13 casserole pan with parchment paper and apply nonstick spray. Melt the butter and let it cool a few minutes.
- In a large bowl, whisk together the oats, flour, sugar, baking soda and salt. Add the butter and eggs and stir until just combined.
- Press half of the oat mixture into the prepared baking dish. [Handy tip: use a sheet of wax paper and a heavy glass to compress the layer.] Evenly spread the fig mixture to the edges.
- Use your hands to compress the remaining dough into small discs and pieces, and set this on top as evenly as you can. Gently compress it again.
- Bake for about 30 minutes, or until lightly browned at edges. Completely cool on wire rack.
- OM NOM NOM!
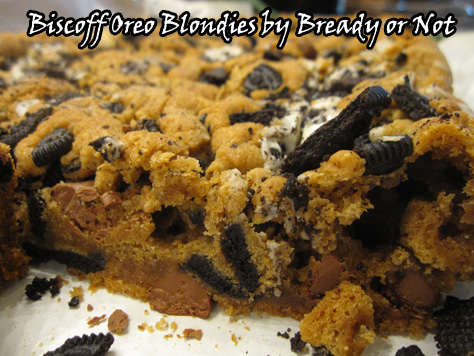
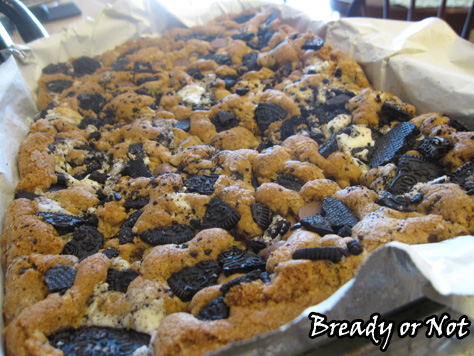
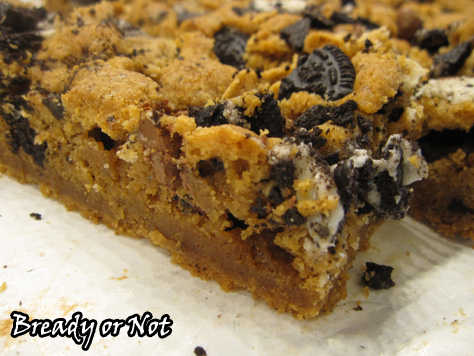
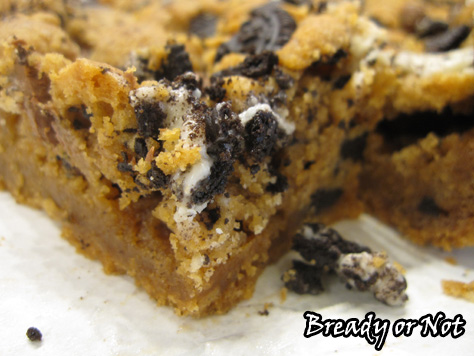
Bready or Not: Biscoff Oreo Blondies (Redux)
This week, as I dash off to WorldCon, I share a re-do of a Biscoff Oreo Blondies recipe I first featured on my LiveJournal back in 2013. I modified it from the original Peanut Butter Oreo Blondies at Crepes of Wrath.
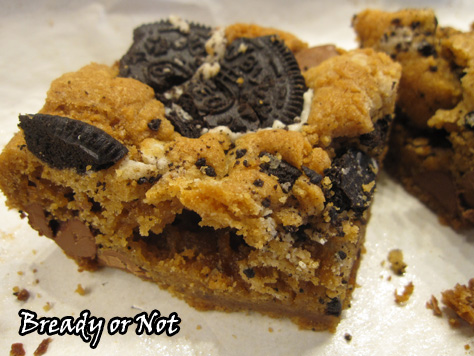
But this time when I made it, I modified it more. MORE OREOS. MORE CHOCOLATE CHIPS. MORE HAPPINESS.
I love Biscoff spread (also known as Speculoos at Trader Joe’s). It’s crack in a jar. If you’re not familiar with it, it’s cookie butter: yes, really, the consistency of a nut butter, but made of cookies.
Yeah. This is not health food. It ain’t gluten-free, either.
If it’s paleo, I want to join that tribe.
If you don’t like Biscoff (BLASPHEMER! BEGONE!) or can’t find it (though it’s at a lot of Wal-marts, Targets, and World Markets), you can substitute nut butter for this recipe, too. Not the natural type, though. You want it moister.
Oh yeah. I used Double-Stuf Oreos, too. Because those are the best kind.
The end result is a luscious, thick, chewy bar that’s like a cookie on steroids. Cookie butter does that to baked goods. It’s magic.
Mix up the add-ins if you want. Use dark chocolate. Use different kinds of Oreos or different cookies all together.
Live dangerously. And scrape clean that Biscoff jar when it’s empty.

Bready or Not: Biscoff Oreo Blondies (Redux)
Ingredients
- 2 1/2 cups all-purpose flour
- 1 1/2 teaspoon baking powder
- 1/2 teaspoon baking soda
- 1 cup brown sugar packed
- 1 cup white sugar
- 1/2 cup unsalted butter 1 stick, melted
- 2/3 cup Biscoff spread or other cookie butter brand
- 2 large eggs room temperature
- 2 teaspoons vanilla extract
- 2 cups Oreos roughly crushed
- 1 cup chocolate chips
Instructions
- Preheat your oven to 350-degrees. Line a 9x13 pan with aluminum foil or parchment and apply nonstick spray.
- Whisk together your flour, baking powder, and baking soda. Set aside.
- In a large bowl, beat together the sugars and melted butter. Add cookie butter and mix to combine. Add in the eggs, one at a time, beating after each addition, then the vanilla extract. Gradually add in the flour mixture, mixing until just moistened. The dough will be very thick. Fold in most of the Oreos and chocolate chips; save some to make the top pretty, if you want.
- Press the thick dough into the pan as evenly as possible. Press in the remaining Oreos and chips.
- Bake for 24-30 minutes, until the blondies are lightly golden and set.
- Allow them to cool completely before cutting into bars and serving. These will keep well in an airtight container at room temperature for up to a week, if they last that long.
- OM NOM NOM!

Read More
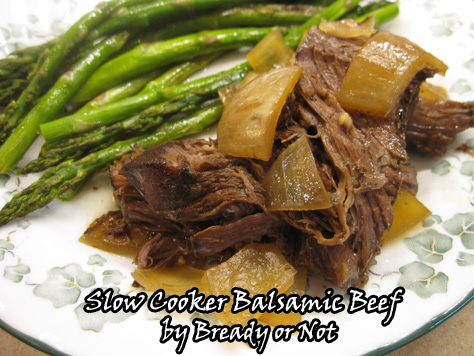
Bready or Not: Slow Cooker Balsamic Beef
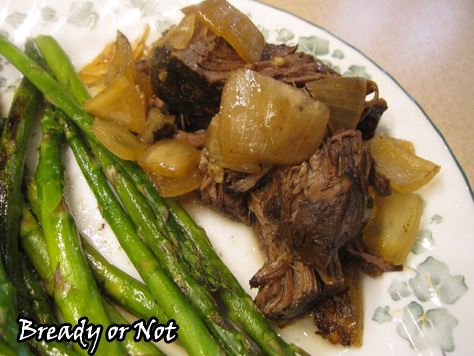
This is my favorite non-taco way to cook up beef in the crock pot. The result is slightly sweet and perfect by itself, on a sandwich, in a salad, in a wrap…! Delicious meat in any form.
With the way beef prices have shot up, I pretty much have stopped buying ground beef. Roasts are the way to go, and slow cooking is the way to keep the cuts nice and tender.
This is just an all-around good recipe. It’s very easy to tweak if you want it more or less sweet. The oven is off and my kitchen stays cooler. The one bad thing is that I work from home, and I’m tortured by the scent all day long.
Modified from Shugary Sweets.

Bready or Not: Slow Cooker Balsamic Beef
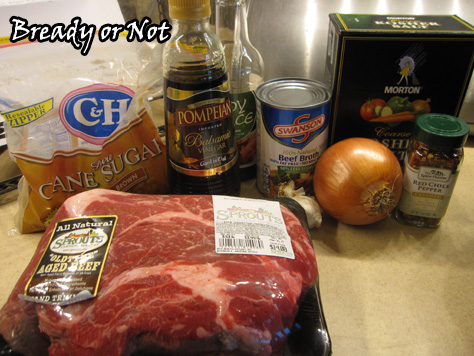
Ingredients
- 4 - 5 lb beef chuck roast
- 1 yellow onion
- 1 can beef broth low sodium
- 1/2 cup light brown sugar packed
- 1/4 cup balsamic vinegar
- 1 Tablespoon soy sauce low sodium
- 1 teaspoon kosher salt
- 1/4 teaspoon crushed red pepper flakes
- 3 garlic cloves minced
Instructions
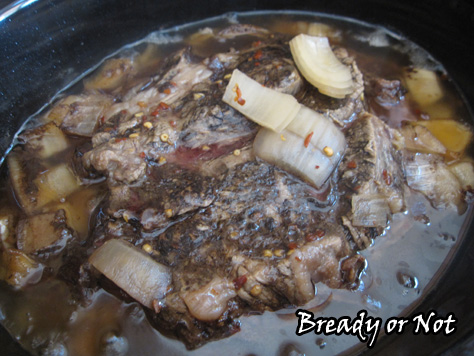
- In the slow cooker, whisk together the ingredients from the beef broth through the end.
- Cut the onion into chunks and place in slow cooker. Trim any excess fat from the roast and place the meat atop the onion. Cover and cook on LOW for 8 to 10 hours.
- Soon before mealtime, pull the meat out and shred apart. Place back in pot to soak up juice. Set the cooker on WARM until ready to serve.
- OM NOM NOM!
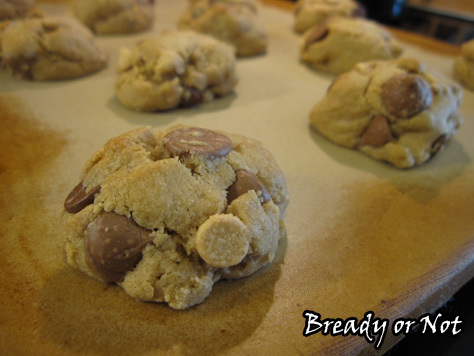
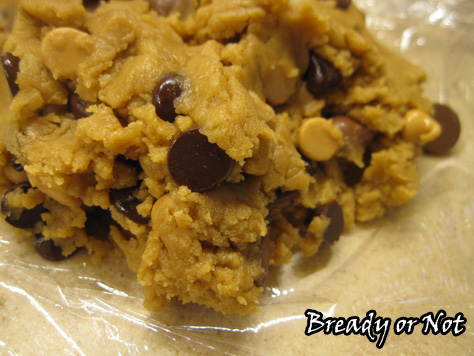
Bready or Not: Double Peanut Butter Cookies
Peanut butter in the dough. Peanut butter and chocolate chips teamed up for flavor reinforcement. That’s why these are called Double Peanut Butter Cookies.

These taste like a cookie version of a Reese’s Peanut Butter Cup. Then there’s the texture. See, you whip a lot of air into the dough by mixing it for five minutes at the start, then you chill the finished dough for a prolonged period of time.
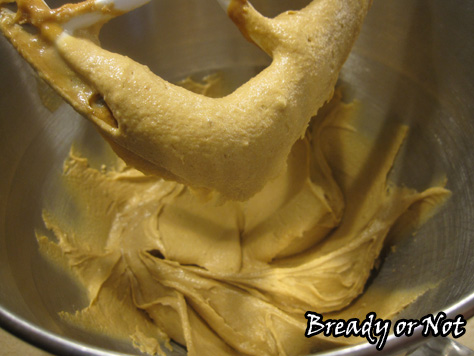
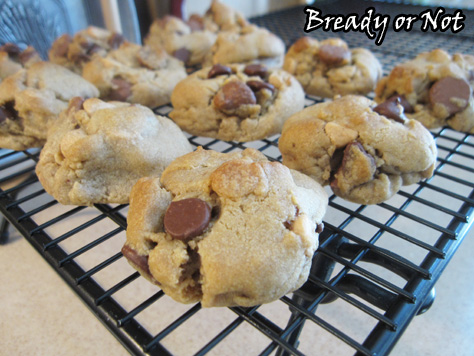
This combination adds LOFT. The end result is like a fluffy pillow of cookie. Seriously, these things don’t even spread when they bake. You need to compress them to be flat and bake evenly.
This dough will keep at least five days fully wrapped in the fridge. You can also freeze it. After baking, the cookies keep well for at least five days. Maybe longer than that. I can’t say. They were all eaten by that point.

If you love peanut butter, make these cookies. They will change your life.
Modified from Averie Cooks.

Bready or Not: Double Peanut Butter Cookies
Ingredients
- 1 large egg room temperature
- 1 cup light brown sugar packed
- 3/4 cup creamy peanut butter not homemade or natural peanut butter
- 1/2 cup unsalted butter 1 stick, softened
- 1 Tablespoon vanilla extract
- 1 3/4 cups all-purpose flour
- 3/4 teaspoon baking soda
- pinch salt
- 1/2 cup peanut butter chips
- 1 cup milk chocolate chips or semi-sweet chocolate chips
Instructions
- In a large bowl, cream together the egg, brown sugar, peanut butter, butter, and vanilla extract. A mixer is best. Pause every so often to scrape down the sides of the bowl, but continue mixing until the dough is light and fluffy, about 5 minutes.
- Add the flour, baking soda, and salt until just incorporated. Add the peanut butter and chocolate chips.
- Place two large strips of plastic wrap on the counter. Divide the dough in half, compress it to be stackable, and completely wrap each big disc. Stash it in the fridge for a couple of hours or up to five days. (Chilling the dough makes the end result thick and pillowy! Don't skip this.)
- Preheat the oven at 350-degrees. Line a baking sheet with a silicon mat or parchment paper. Use a tablespoon scoop to dole out the dough. Compress each ball of dough to a thick oval; this is important because the dough won't spread much as it bakes.
- Bake for 10-12 minutes, until the edges have just set. Allow the cookies to rest on the baking sheet another 10 minutes; they will firm up during this time. Transfer them to a rack to finish cooling, and start the next batch.
- Cookies will keep at least five days in a sealed container at room temperature.
- OM NOM NOM!