


Bready or Not: Healthy Butternut Squash Soup
This wonderful soup has been one of my cool weather dinner staples for several years!
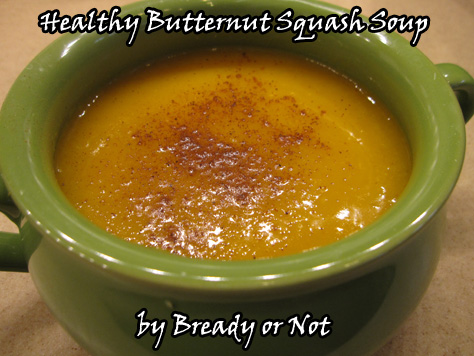
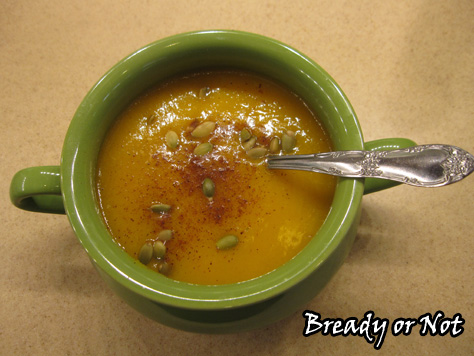
I love, love this soup. It takes a little bit of prep work but then feeds me for a few days. It’s both delicious and healthy. Butternut squash is one of my favorite roast vegetables, and this just blends it into liquid form.
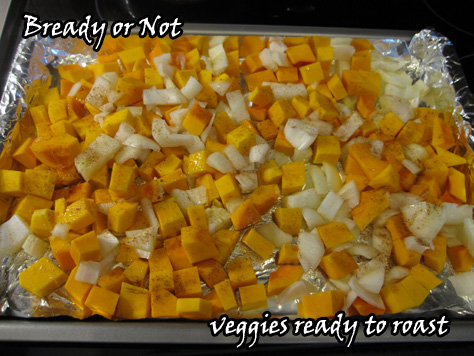
Butternut squash can be intimidating to slice up. I recommend the technique shown at The Kitchn. Basically, you slice off the ends, then take off the rind, de-seed, then dice the orange flesh.
This recipe freezes really well, too. I like to measure it in 2-cup increments and seal it up in quart-size freezer bags; I can freeze them flat so they take up almost no room.
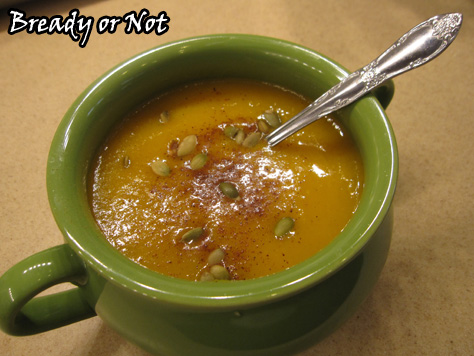
The soup’s flavor improves after being in the fridge for a day, too. The roasted vegetables really come through. I like to add spices like nutmeg, cinnamon, or pumpkin spice mix, and a few pepitas for texture.
It’s a bowl of stomach-warming happiness.
Modified from Lick My Spoon.

Bready or Not: Healthy Butternut Squash Soup
Ingredients
- 2 - 3 pound butternut squash
- 1 yellow onion
- 32 ounce chicken broth or vegetable broth, 1 box or 2 cans
- 2 Tablespoons olive oil
- salt Hawaiian salt recommended
- nutmeg or cinnamon, or pumpkin spice mix, to taste
- pepitas or chopped pecans, optional
Instructions
- Preheat oven to 450-degrees. Prepare a large rimmed baking sheet by lining it with foil.
- Peel, de-seed, and dice the squash into roughly 1-inch cubes. It doesn't need to be neat--they will all be blended in the end. Peel and dice up the onion.
- Place the squash and onion on the baking sheet. Drizzle or spray olive oil over everything. Add salt and other spices like cinnamon or nutmeg and toss to coat.
- Roast in oven for about 25 minutes. Turn over the squash, then cook another 15-25 minutes, until the squash is just browning and is fork-tender.
- If you want to complete the soup later, just stick the squash in the fridge. Or continue...
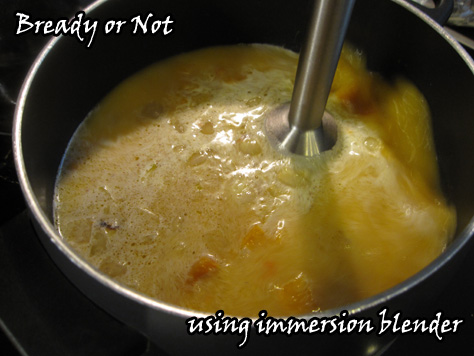
- In a large pot, bring the broth to a simmer. Add the roasted squash and onion. Carefully puree using an immersion blender, or blend in small batches in a blender or food processor. Use caution: you’re working with hot liquid! Process until the soup is smooth, and bring to a simmer again.
- Serve in bowls with an additional sprinkling of spices and perhaps some pepitas or chopped pecans on top! Leftovers keep sealed in fridge upward of a week; the taste actually improves after being in the fridge for a day. It can also be frozen in freezer bags or plastic dishes. Reheats quickly in the microwave or on the stove.
- OM NOM NOM!
Read More
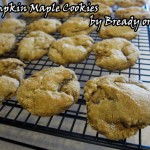
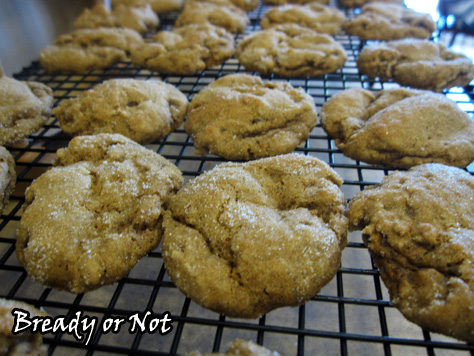
Bready or Not: Pumpkin Maple Cookies
These cookies epitomize the season of fall in a single cookie.
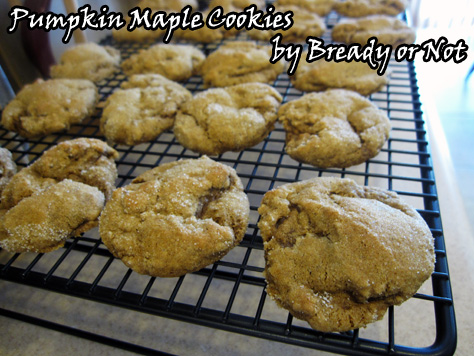
First you taste pumpkin and the cinnamon, ginger, and cloves, then that is followed by the mellow sweetness of maple. The texture is chewy and perfect.

I found the original of this recipe at Two Peas and Their Pod and thought, “Hey, you know what this recipe needs for some extra oomph? MAPLE.”
The flavors play so well together. Add that to the chewy texture and the lovely light orange tint of pumpkin, and you have the perfect goodies to accompany a hot drink on a brisk autumn night.
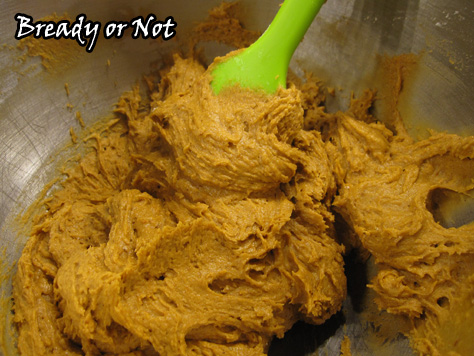
Do note that this cookie dough is very sticky and goopy. It needs to chill in the fridge so that it can be shaped and rolled in sugar. So plan ahead for this one: make the dough, then bake everything hours or a day later.
Adapted from Pumpkin Gingersnap Cookies at Two Peas and Their Pod.
Bready or Not: Pumpkin Maple Cookies
Ingredients
- 1/2 cup unsalted butter 1 stick, room temperature
- 1 cup white sugar plus more for rolling the cookies
- 1/2 cup pumpkin puree
- 1/4 cup molasses
- 1 large egg room temperature
- 1 teaspoon vanilla extract
- 1/2 teaspoon maple flavor
- 2 1/3 cups all-purpose flour
- 2 teaspoons baking soda
- 2 teaspoons cinnamon
- 1 1/2 teaspoons ground ginger
- 1/2 teaspoon ground cloves
- 1/2 teaspoon salt
Instructions
- In a large bowl, beat the butter and sugar together until creamy and smooth. Add the pumpkin, molasses, egg, vanilla extract, and maple flavor.
- In a medium bowl, whisk together the remaining dry ingredients. Add them to the batter until just combined. Refrigerate the cookie dough for at least 1 hour or up to 3 days.
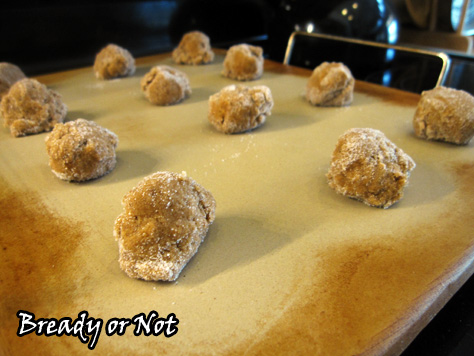
- When it's time to bake, preheat the oven at 350-degrees. Use greased stoneware or line a baking sheet with silicone mats or parchment. Place white sugar in a small bowl. Use a scoop to drop balls of dough in the sugar. Roll them around and then place on baking sheet. (Note: the dough is very sticky and goopy. It needs to be chilled to be workable, so be sure to place it back in the fridge between batches.)
- Bake for 9-11 minutes for teaspoon sized dough, or 10–12 minutes for tablespoon-sized. The cookies should look crackled and set, but still soft. Let them cool on the baking sheet for ten minutes before moving to a rack.
- OM NOM NOM!
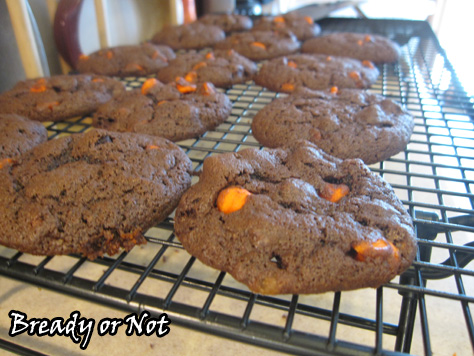
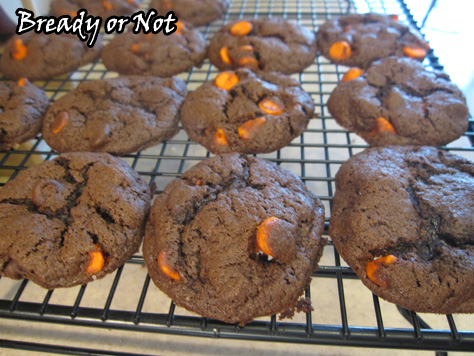
Bready or Not: Cocoa Cookies
In the mood for chocolate? Here you go. These cookies are like mini brownies packed with cocoa and chocolate chips!
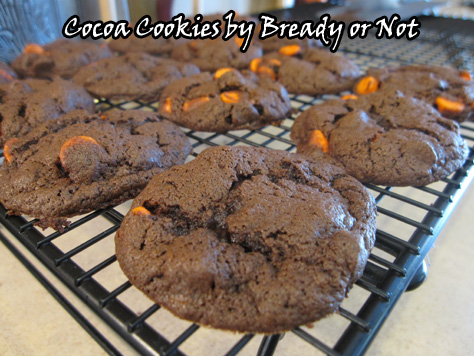
I used Nestle Tollhouse chips in Halloween colors to really set off the lovely dark dough. It helps to show how much chocolate is loaded in these babies, too.
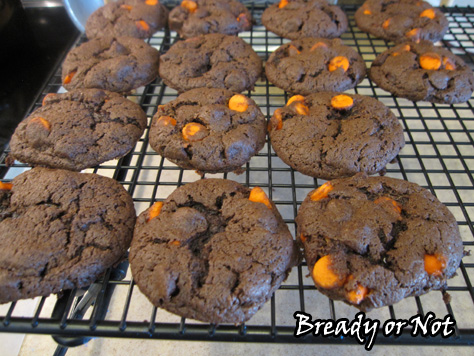
There is nothing healthy about these. Nothing. You have butter, sugar, cocoa, and loads of chocolate chips. It’s the first week of October and I have already sabotaged all your healthy eating plans for the season.
Sorry/not sorry.
This is modified from Chocolate Drop Cookies at King Arthur Flour.

Bready or Not: Cocoa Cookies
Ingredients
- 1/2 cup unsalted butter 1 stick
- 1/2 cup white sugar
- 1/3 cup brown sugar packed
- 1/3 cup Dutch-process cocoa sifted
- 1/2 teaspoon salt
- 1/4 teaspoon baking soda
- 1/2 teaspoon baking powder
- 1 teaspoon vanilla extract
- 1 large egg room temperature
- 2 Tablespoons milk or almond milk
- 1 cup + 2 tablespoons all-purpose flour
- 1 teaspoon espresso powder optional; for depth of flavor
- 2 cups chocolate chips 1 bag
Instructions
- Preheat the oven to 375. Lightly grease a baking sheet or line with parchment.
- Beat together the butter, sugars, cocoa powder, salt, baking soda, baking powder, and vanilla extract until well blended. Scrape sides of bowl.
- Add the egg and milk, beating until smooth, then the flour and espresso powder (if using). Add the chocolate chips last.
- Use a teaspoon scoop to set dollops of dough on the cookie sheet. Don't set them too close together.
- Bake cookies for 9 to 11 minutes, until they've lost their sheen. Cool on pan for a few minutes and then move to rack.
- OM NOM NOM!
Read More
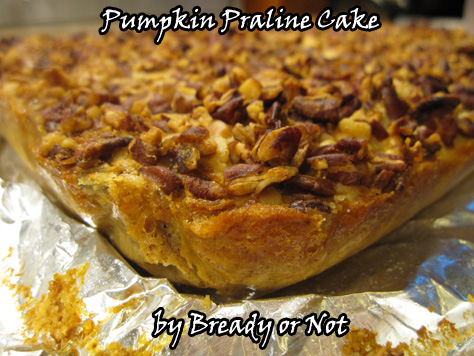
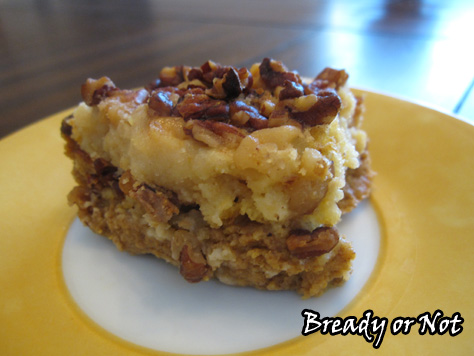
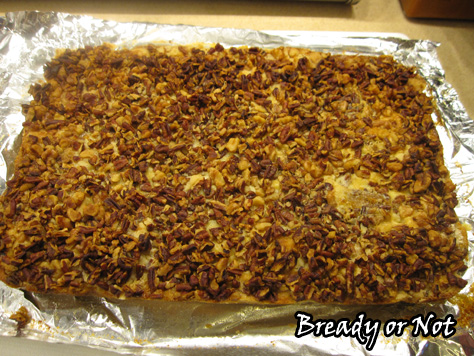
Bready or Not: Pumpkin Praline Cake
If you love quick and easy dump cakes, let me introduce you to one that is full of pumpkin goodness.
Last year I went through a stack of old issues of Betty Crocker magazine. I sliced out recipes that looked promising. This was one of them.
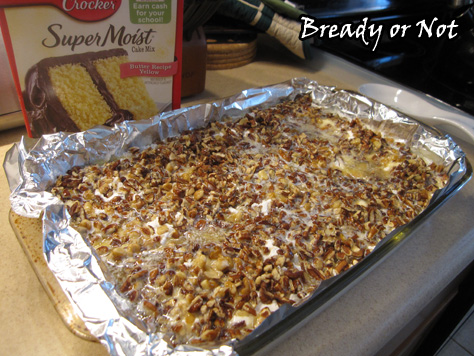
I was amazed at how easy this recipe was. It literally came together in the time it took for the oven to preheat. The flavors and texture are amazing: you have a cakey base topped with spicy pumpkin custard, with a nutty-crunchy layer atop.
Plus, you can cover it with plastic wrap and keep it in the fridge for days! It tastes even better after a day or two. The spices meld with everything.
My husband took this cake to work. He returned with an empty dish. The guys raved about it.

If you like pumpkin, if you like cake, this is the way to start your fall off right.
Bready or Not: Pumpkin Praline Cake
Ingredients
- 15 oz pumpkin puree
- 12 oz evaporated milk
- 3 eggs room temperature
- 1 cup white sugar
- 4 teaspoons pumpkin pie spice heaping
- 1 box yellow cake mix
- 1 1/2 cups pecans or walnuts, chopped
- 3/4 cup unsalted butter or margarine, melted
Instructions
- Preheat oven to 350-degrees. Prepare a 13x9-inch pan by lining with foil or parchment and then greasing it well with Pam or butter.
- In a large bowl, beat together the pumpkin puree, evaporated milk, eggs, sugar, and pumpkin pie spice. It should be smooth. Pour it into the pan.
- Sprinkle the dry cake mix over the pumpkin goop. Sprinkle the nuts all over the top. Pour the melted butter evenly over everything.
- Bake for 50 to 60 minutes, until a knife in the center comes out clean. Let cool to room temperature, then cover and refrigerate. Cut and serve from the pan; warm slices in the microwave, if desired, or eat cold.
- OM NOM NOM!
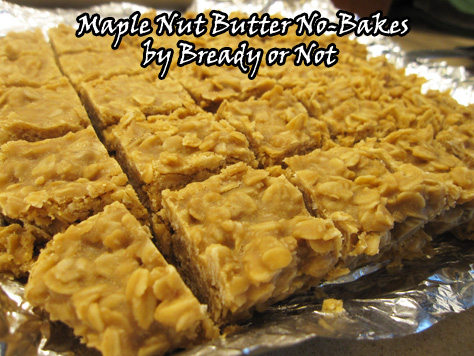
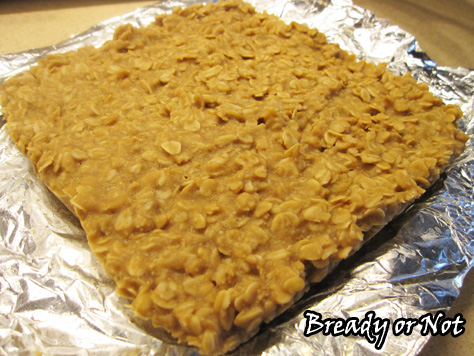
Bready or Not: Maple Nut Butter No-Bakes
When you need maple goodness whipped up quickly with no baking involved, here’s your go-to recipe: Maple Nut Butter No-Bakes.
I had PB & Co Mighty Maple Peanut Butter, so I went with that to add some maple oomph. You can use various nut butters here, but avoid the natural kind where the oil separates. That would make these too dry and probably make it turn out weird.
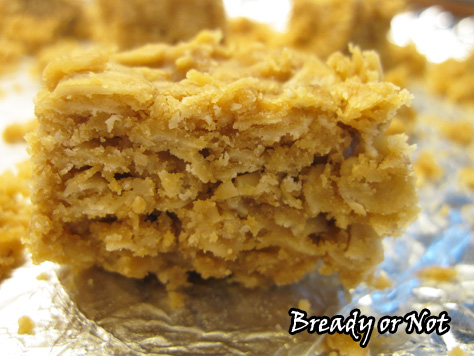
I made these because I needed to create goodies on a quick timeline, so I put them in the fridge straight away, chilled them for an hour and a half, then sliced them. The bars crumbled some, I think because I didn’t chill them long enough. They were still mostly intact, though, and tasted fabulous.
Therefore, I highly recommend these get to cool down at room temp and then have a few more hours in the fridge, just to solidify things and make the end result a little prettier.
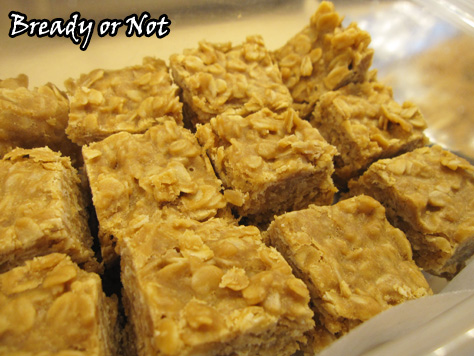
The taste is what matters most, though. If you love maple, you must make these bars. It’s maple candy. Sweet, chewy, maple candy. With autumn nigh, these are perfect to whip out for any of the forthcoming holidays!
Modified from Maple Almond No-Bakes at Lovely Little Kitchen.
Bready or Not: Maple Nut Butter No-Bakes
Ingredients
- 1/2 cup unsalted butter 1 stick
- 1 1/2 cups white sugar
- 1 cup almond butter or peanut butter; not natural, it's too dry
- 1/4 cup milk almond milk works
- 1/2 teaspoon maple flavor
- 3 cups old fashioned rolled oats
Instructions
- Prepare an 8x8 or 9x9-inch baking dish by lining it with foil or parchment paper then greasing it. Measure out the maple flavor and oats so they are ready to add quickly.
- In a medium pan, bring the butter, sugar, almond butter, and milk to a boil over medium high heat. Stir frequently. Bring the mix to a full boil for one minute, stirring constantly, and then removed from the heat and stir in maple extract. Immediately add the oats and stir thoroughly to coat everything.
- Glop the mixture into the baking dish. Cool at room temperature and then chill in fridge for several hours until it is firm.
- Use the foil or parchment to lift out the bars for easy cutting. Best served chilled.
- OM NOM NOM!
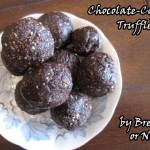
Bready or Not: Chocolate-Coffee Truffles
Start the day off right with breakfast truffles packed with coffee and cocoa!
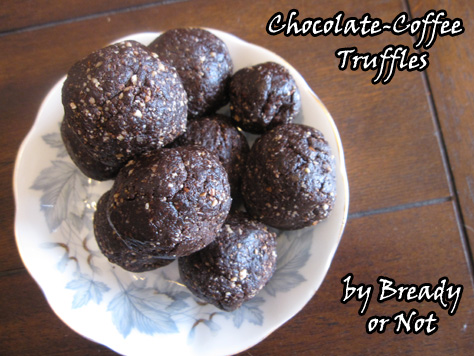
Sure, they might not be the most photogenic of items, but they are delicious and they pack a caffeine wallop. These are also gluten-free with no added sugar.
The dates act as the source of sweetness and as the binding agent. Almonds are loaded with all kinds of healthy goodness. Everything about these screams “HEALTHY!”
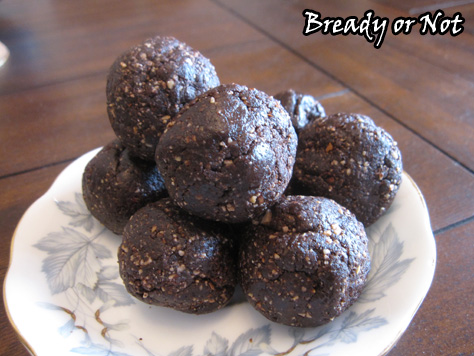
Trust me. They might not look pretty, but they’re tasty.
Modified from Relish Magazine.
Bready or Not: Chocolate-Coffee Truffles
Ingredients
- 1 cup chopped Medjool dates about 15 dates
- 1/2 cup almonds raw or roasted
- 1/4 cup unsweetened cocoa powder
- 2 Tablespoons ground coffee
- 1 Tablespoon chia seeds or wheat germ or flax seeds
- pinch salt
Instructions
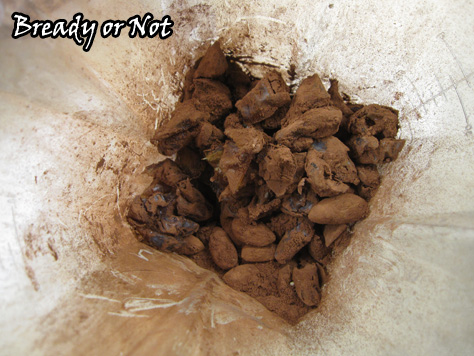
- Combine all the ingredients in a food processor or high-powered blender. It might need to be blended in batches.
- Pulse until the almonds are in very small pieces. If the mixture isn't cohesive, add a teaspoon of water and blend again. Add more water if needed. The mash should hold together when pressed but not be wet.
- Use a spoon or scoop to form the mix into truffles. Makes about 9 tablespoon-sized.
- OM NOM NOM!

