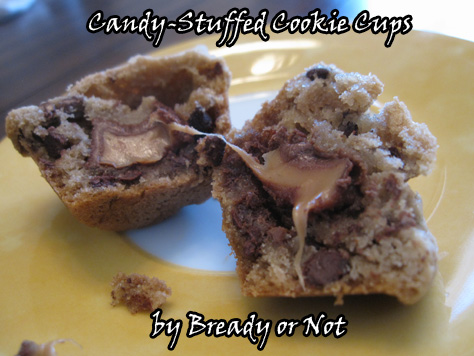
Bonus Bready or Not: Candy-Stuffed Cookie Cups
I could accurately name these Salted Browned Butter Candy-Stuffed Chocolate Chip Cookie Cups but that’s a royal pain to even type out, much less say.
These are what I made for my book release at Changing Hands. My book has almost been out a month (!!!) so I figure it was about time I shared this recipe, as promised.
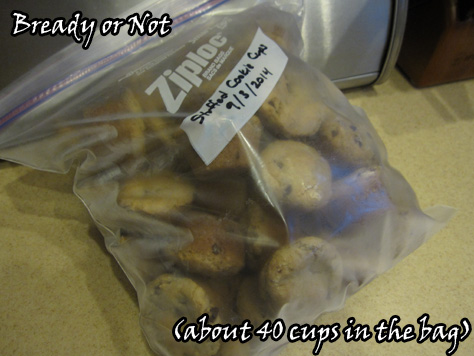
I wanted something cookie-like but more durable so that I could make it a few weeks ahead and freeze in a gallon freezer bag.
I thought, hey! Mini muffin pan cookies would be great! I already had a few such recipes pinned, so I combined them to create something new.
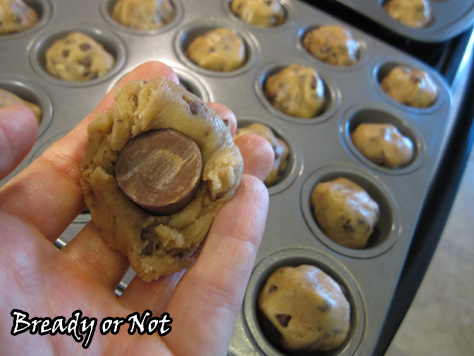
It was important to me that the candy be inside the cup. Since my event was in September in Arizona, I already knew I’d need to transport food in a cooler. Even so, I didn’t want lots of chocolate on the surface where it could melt.
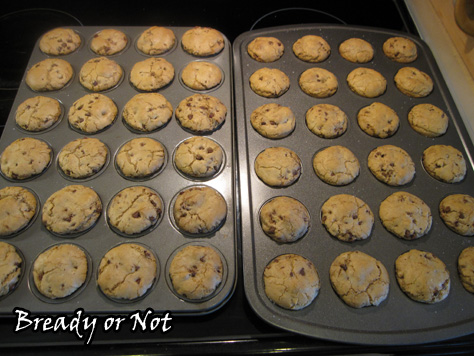
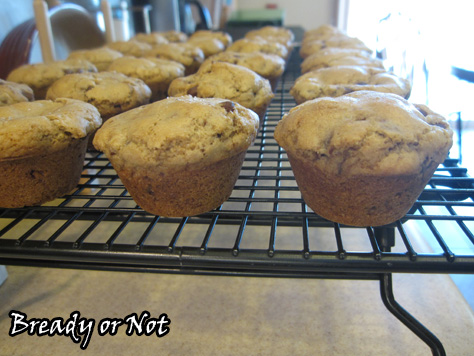
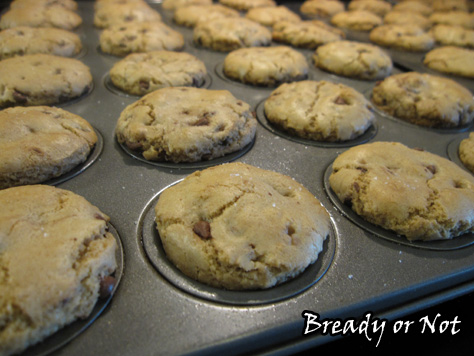
In my first attempt at this recipe, I used the tablespoon amount called for in one of the base recipes. They baked into these overflowing mushroom shapes. Taste-wise, the combo worked, but they were HUGE.
Therefore, I knew on my next attempt that I wanted to use about a teaspoon of dough for each cup. That’s enough for it to gently round, not overflow.
I also added corn starch to the recipe, which is what I use in my Soft Batch-like recipe. I prefer cookies chewy rather than crispy, and these would get crispy fast.
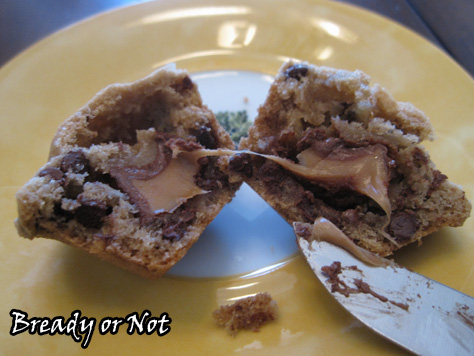
Stuff these cups with whatever you want. I used Rolos and mini Milky Ways. Any bite size chocolate candy would work, or caramels or Snak Sak Oreos. Go crazy. Go delicious.
My recipe is a combination of Rolo Chocolate Chip Cookie Cups at Crazy for Crust and Salted Caramel Browned Butter Cookie Cups at Buns in my Oven.
Bonus Bready or Not: Candy-Stuffed Cookie Cups
Ingredients
- 1 cup unsalted butter browned on stove
- 3/4 cup white sugar
- 1 cup light brown sugar packed
- 2 large eggs
- 1 Tablespoon pure vanilla extract
- 1 teaspoon baking soda
- 3 1/4 cups all-purpose flour
- 1/4 teaspoon salt
- 4 teaspoons corn starch
- 1 1/2 cups mini chocolate chips
- about 50-60 candies or mini cookies Rolos, Kisses, Reese's Peanut Butter Cups, mini Oreos, etc
- sea salt to sprinkle on top
Instructions
- Melt butter in saucepan at medium heat. Whisk until it turns deep golden brown, about 5 minutes. Let it cool a few minutes.
- Prep the mini muffin pan(s) by generously buttering or using a non-stick spray like Pam. If desired, use mini baking cup liners and spray them.
- Preheat oven to 350-degrees. In a medium bowl, combine flour, baking soda, salt, and corn starch.
- In a large bowl, pour in the white and brown sugar. Add the still-mildly-warm browned butter and mix. Add eggs one at a time followed by vanilla extract. Add the dry ingredients until just combined. Stir in mini chocolate chips.
- Have your candy unwrapped or ready at hand. Use a teaspoon scoop to dole out dough. Press a candy inside the dough ball and cover completely. Place in mini muffin pan hole. Once the pan is full, sprinkle sea salt on top.
- Bake cookie cups for about 11 minutes. Tops should be golden brown and gently rounded. Let cool in pan for an extended time before removing (especially if they overflow with a mushroom-like effect).
- Cookies will keep in the freezer for weeks, or for several days in a covered container at room temperature. Makes about 50-60
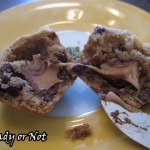
OM NOM NOM.
Fall Recipes
It’s pumpkin time! And squash and apple time! Plus, it’s legitimately maple time. Last year I gathered my past fall recipes. Now that my recipe content is split between BethCato.com and LiveJournal, I really wanted to post those recipes again. The list now includes the 2013 posts, too.
Mini Pumpkin Donuts with Maple Glaze
Pumpkin Snickerdoodles
Pumpkin-Molasses Freezer Pie with Ginger Snap Crust
Maple Spritz Cookies
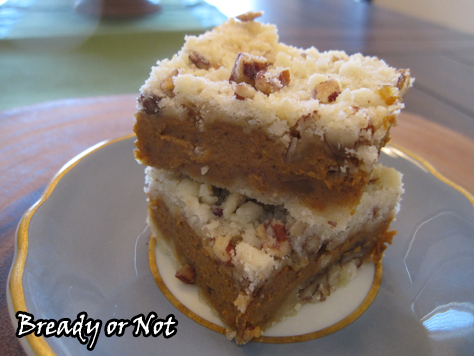
Pumpkin Pie Bars
Maple Fudge Bites
Pumpkin Gnocchi
Pumpkin Poppers
Overnight Crock Pot Apple Butter
Butternut Squash & Chickpea Salad with Almond Butter Dressing
Pumpkin chocolate chip brownies
Pumpkin-applesauce bundt cake
Candy corn cookies
Halloween party bundt cake (cake mix)
Pumpkin pie
Pumpkin cranberry breakfast cookies
Pumpkin roll bars
Pumpkin spice smoothie
Also, on Pinterest I have a wide array of boards including a Bready or Not board and a pumpkin board where I try to list the amount of puree each recipe calls for. It probably won’t surprise you that I have a devoted space for maple recipes, too.
Read MoreLinks of the Week
I’m still wandering about the internet, though not in the frantic style I was a few weeks ago (thank goodness!). I’ve actually been working on FICTION again. It feels good! These past few days, I tore apart a story I wrote back in August, one I mentally worked on for months because the subject matter intimidated me. That makes me feel even more accomplished now that it’s coming together.
I wrote another new story at the end of September, too. That one is being critiqued right now. I hope to start work on those edits soon. I love this later stage of revisions… once I figure out what I’m doing.
New poetry publications:
– “Grandfather and Granddaughter (Age 5),” Devilfish Review
– “Nisei” and “Seeds” (reprinted), Mythic Delirium Anthology; available in all formats
Socializing in happily geeky ways:
– SF Signal: Words We Learned From Genre Fiction
FOOOOOOOD:
– Over at the Holy Taco Church, I amp up the pumpkin spice goodness with Pumpkin Cheesecake Sopapillas, which use fast ingredients from the store.
Guest blogging about the book:
– “Romance in the Clockwork Dagger” at Reading Between the Wines
Really nice mentions of the book:
– Tor.com: Sleeps With Monsters: Books, Redux by Liz Bourke with a lovely mini review
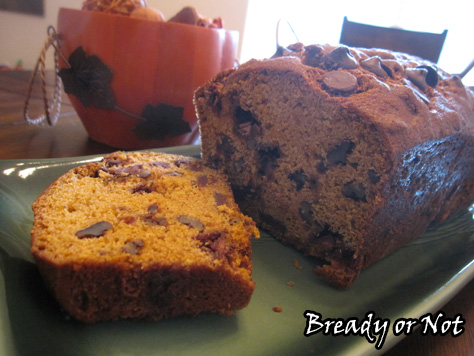
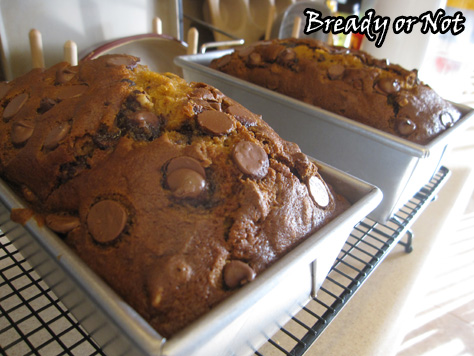
Bready or Not: Pumpkin Chocolate Chip Bread (2 Loaves)
I declare this recipe to be just about perfect. Oh yeah, it tastes good, too.
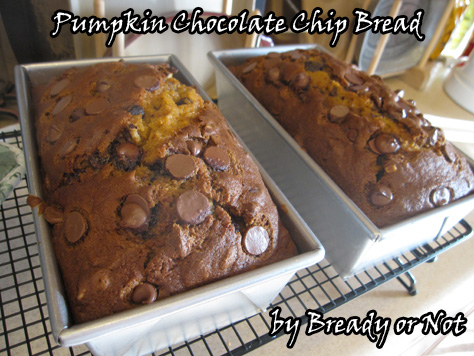
I love recipes that use up a full can of pumpkin. It makes things tidy. No worries about measuring it or stashing a bag in the freezer. Even more, this recipe makes TWO loaves of bread. Serve one, save the rest for later! Or serve them both. These things are easy to eat. They might go fast.
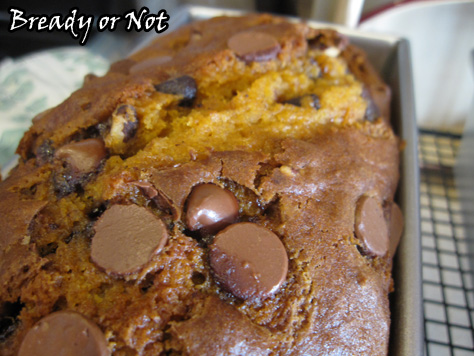
Why, you ask? The bread ends up tender and delicious. Kept chilled in the fridge, it doesn’t get horribly tacky as some pumpkin baked goods do.
I made this using shortening instead of oil, chopped pecans for the nuts, and Ghirardelli milk chocolate chips, but the recipe has a good bit of flexibility. You could even do one loaf plain, the other loaded!
As for me, I looooooove Ghirardelli milk chocolate chips. They are big and luscious, plus I love supporting a California company.
I found this recipe in my King Arthur Flour Baker’s Companion Cookbook but it is also shown on their website as Easy Pumpkin Bread. Take a look at that star rating! I’m not the only one to fall in love with this recipe.

Bready or Not: Pumpkin Chocolate Chip Bread (2 Loaves)
Ingredients
- 1 cup vegetable oil or 2/3 cup shortening
- 2 2/3 cups white sugar
- 4 large eggs room temperature
- 15 ounce pumpkin puree not pumpkin pie filling
- 2/3 cup water
- 3 1/3 cups all-purpose flour
- 1/2 teaspoon baking powder
- 2 teaspoons baking soda
- 1 1/2 teaspoons salt
- 1 teaspoon nutmeg
- 1 teaspoon vanilla extract
- 1 cup chopped walnuts or pecans optional
- 1 1/2 cups chocolate chips could also substitute chopped candied ginger, golden raisins, cranberries, etc
Instructions
- Preheat oven to 350°F. Grease two 9x5 loaf pans.
- In a large bowl, beat together the oil/shortening, sugar, eggs, pumpkin, and water.
- Add the flour, baking powder, baking soda, salt, nutmeg, and vanilla, stirring to combine. Mix in the chips and nuts, or whatever add-ins you choose.
- Spoon batter into the prepared pans.
- Bake the bread for 60 to 80 minutes, or until a cake tester or toothpick inserted in the center of the loaf comes out clean.
- Remove the bread from the oven, and cool it on a rack. When it's completely cool, use a knife to loosen the loaves and plop them out. Wrap bread in plastic wrap and store it overnight before serving.
OM NOM NOM!
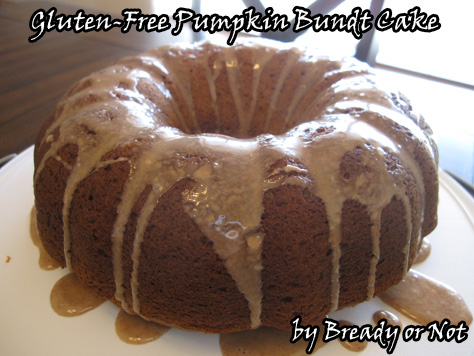
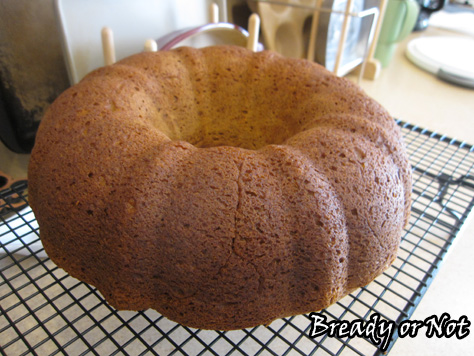
Bready or Not: Gluten-Free Pumpkin Cake
Let’s carry September’s Cake Month into October as I start the annual autumn theme of pumpkin, maple, and other seasonal flavors!
Most of the stuff I bake goes with my husband along to his work. Lo and behold, a few of his co-workers eat gluten-free. I hate for people to feel left out. Therefore, I try to mix in some GF goodies every so often.
Baking gluten-free can be rather intimidating. The stuff is expensive, and even worse, some of it tastes BAD. As in, scrub-out-your-mouth-with-a-toilet-brush bad. I also worried about cross-contamination. My kitchen is pretty much saturated in gluten.
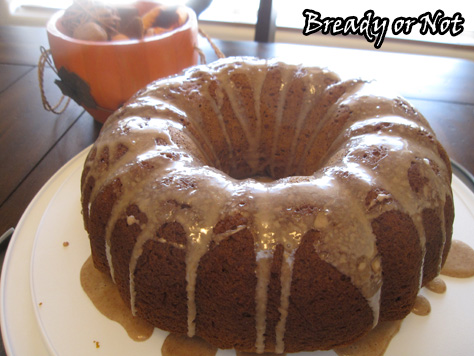
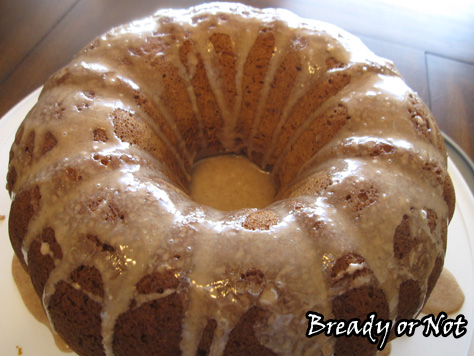
I prowled around for good pumpkin cake recipes and I found this one at King Arthur Flour. Their recipes are very reliable. I modified it slightly. I used a Bob’s Red Mill GF Vanilla Cake Mix here, as Bob’s mixes and flours are pretty darn good. I also used my own maple glaze, because, well, MAPLE!
The end result was an absolutely delicious cake. It tasted totally normal–no one would suspect it was gluten-free!
Modified from the recipe at King Arthur Flour, with my own glaze.

Bready or Not: Gluten-Free Pumpkin Cake
Ingredients
Cake ingredients:
- 5 large eggs room temperature
- 3 Tablespoons molasses
- 15 oz pumpkin purée
- 3/4 cup vegetable oil
- 1 gluten free cake mix yellow, vanilla, or white (recommend King Arthur or Bob's Red Mill)
- 1/2 cup cornstarch
- 1/4 teaspoon baking soda
- 1 Tablespoon pumpkin pie spice or substitute 2 teaspoons ground cinnamon, 1/2 teaspoon ground ginger, and 1/4 teaspoon ground cloves
Maple Glaze ingredients:
- 1 cup confectioners' sugar sifted
- 1/2 teaspoon cinnamon
- 1/4 teaspoon maple flavor
- 1 1/2 Tablespoons milk almond milk works!, more as needed
Instructions
- Preheat the oven to 325°F. Thoroughly grease a 10-cup Bundt pan.
- Whisk together the eggs, molasses, pumpkin purée, and oil. Set aside.
- In another big bowl, combine the cake mix, cornstarch, baking soda, and spice(s).
- Stir the wet and dry mixtures together until smooth and pour the batter into the prepared pan.
- Bake the cake for 60 to 65 minutes, until it passes the crumb test.
- Remove the cake from the oven, let it cool in the pan for 15 minutes, then turn it out of the pan to cool completely on a rack.
- Dust the cake with confectioners' sugar, or make the maple glaze. Combine the glaze ingredients, adding more sugar or milk for desired texture. Drizzle over cake.
OM NOM NOM!
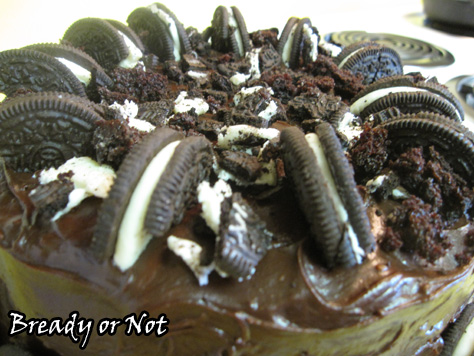
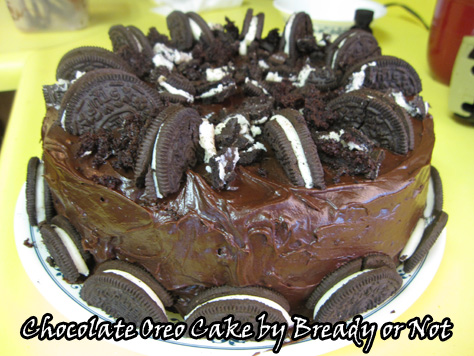
Bready or Not: Chocolate Oreo Cake
Let’s finish off Cake Month with a cake of chocolate wonder, shall we?
I made this while visiting my parents’ house for the 4th of July. My brother’s birthday was in June and I let him pick the recipe for me to try. I prepared all of the dry ingredients beforehand and toted them to California.
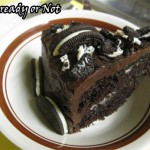
I think he chose pretty well. This actually reminded me of how our local Savemart bakery used to make their Oreo Cake back in the late ’80s. This is heavy duty chocolate with the frosting and all, though the cake layers had a light crumb. It may not be as dense as some cakes, but it’s still a chocolate fist to the face.
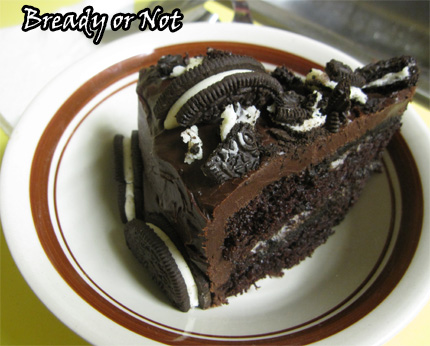
I was a little disappointed in the filling layer, though–it wasn’t even visible in the cut cake! Therefore, I modified the ingredients to double the cream and sugar there.
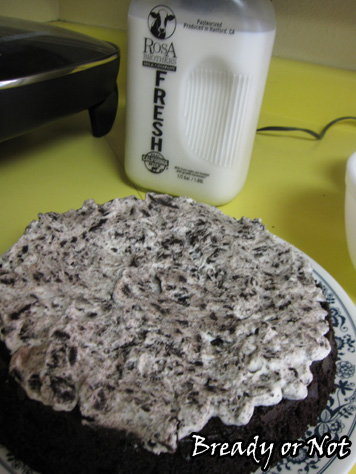
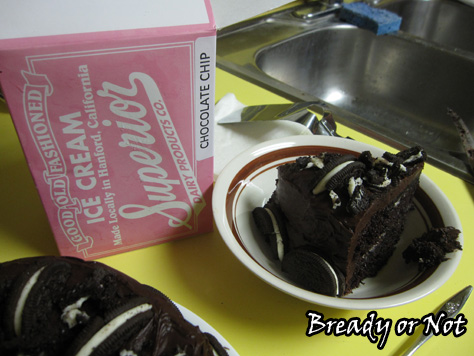
Since I was in my hometown, it was only right that I use local ingredients. I used Rosa Brothers milk–it comes in a glass bottle and everything! Then I had to serve the cake with Superior Dairy chocolate chip ice cream, the best ice cream anywhere. I’ve lived all over the country. I know.
Like most chocolate cakes, this one improved after a day in the fridge.
Yet another reason why chocolate cake is awesome.
Modified from version here.

Chocolate Oreo Cake
Ingredients
For cake:
- 2 cups white sugar
- 1-3/4 cups all-purpose flour
- 3/4 cup baking cocoa sifted
- 1-1/2 tsp baking powder
- 1-1/2 tsp baking soda
- 1 tsp salt
- 2 eggs room temperature
- 1 cup milk
- 1/2 cup vegetable oil
- 2 tsp vanilla extract
- 1 cup boiling water
- 10-15 Oreos twisted to separate cookies and reveal cream center
- 15 Oreos chopped directly in half through cookie [for final garnish]
For filling:
- 2/3 cup whipping cream
- 4 tsp confectioners' sugar
- 1/4 tsp vanilla extract
- black Oreo sides crushed
For icing:
- 1/2 cup unsalted butter melted
- 2/3 cup baking cocoa sifted
- 3 cups confectioners' sugar
- 1/3 cup milk
- 1 tsp vanilla extract
Instructions
Make the cakes:
- Preheat oven to 350-degrees. Prepare two 9-inch round baking pans by applying nonstick spray, lining with parchment, and then spraying again.
- Set 5-8 Oreo halves down in each pan. These will be the cream sides, with the cream facing up. Set the black halves aside to be used in the filling.
- In a large bowl, stir together the sugar, flour, cocoa, baking powder, baking soda and salt.
- Add the eggs, milk, oil and vanilla; beat on medium speed for about 2 minutes.
- Stir in the boiling water. The batter will be very thin. Pour it very carefully into the prepared pans. Don't be surprised if the Oreos float around.
- Bake the pans for 30 to 35 minutes or until wooden pick inserted in center comes out clean.
- Cool them for 10 minutes; run a knife around the sides to make sure they are loose, then carefully remove the cakes from pans. Set them on wire racks and remove the parchment from the tops. Let the cakes completely cool.
To make the filling:
- Beat together the cream, sugar and vanilla until they form stiff peaks. Gently fold in the cookie crumbs.
- Set up the bottom layer of the cake on the serving dish. Depending on consistency, pipe the filling onto the cake or spread it on with a spatula.
- Set the top layer in place. If need be, trim the sides of the cake to make them more even.
Make the frosting:
- Melt the butter. Mix in the cocoa. Alternately beat in the powdered sugar, milk, and vanilla. Add small amounts of milk until it reaches spreading consistency.
- Frost the cake around the top and sides. Apply the remaining halved Oreos around the bottom and the top; add any sliced-off cake crumbs as well.
Store the cake in the fridge, covered by a dome, foil, or wrap. Like most chocolate cakes, it actually tastes better after the first day. It can also be frozen in slices.
OM NOM NOM!