


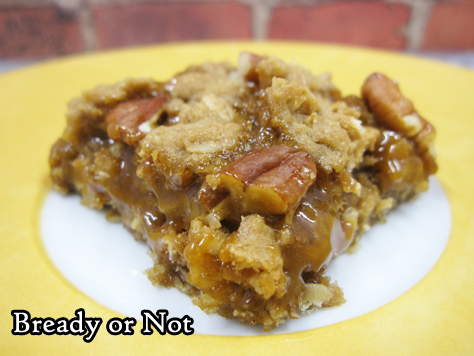
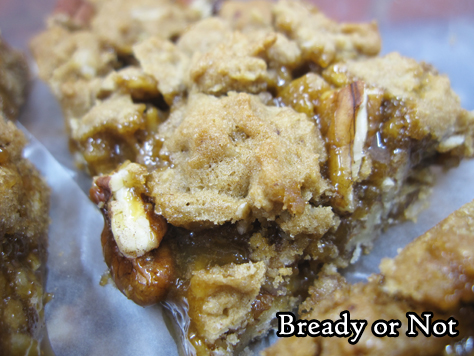
Bready or Not: Cappuccino-Caramel Oat Bars
Cappuccino-Caramel Oat Bars are essentially a casserole-sized platter of delicious homemade candy bars. That is reason enough to make them.
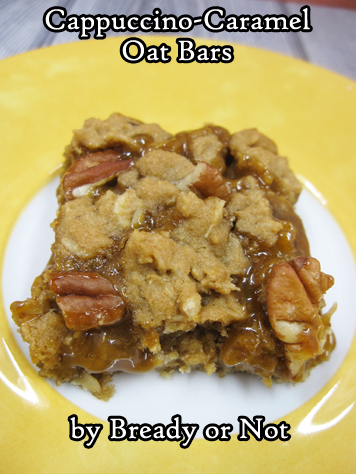
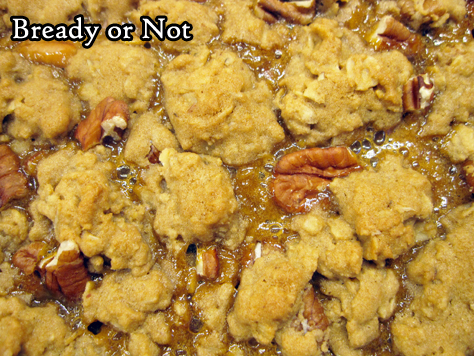
These are simultaneously chewy (from the oats), crunchy (because pecans), and sweet (caramel).
Oh yeah, then there’s the coffee flavor that is imbued throughout every bite. I don’t like drinking coffee, but espresso powder is sheer magic in baked goods.
Needless to say, these bars are perfect paired with a cup or coffee or tea.
Plus, if the number of bars seems excessive, the leftovers can be frozen. Just freeze and store them between waxed papers layers so you can easily thaw as many as you’d like at a time.
Modified from 100 Best Cookies Magazine.
Bready or Not: Cappuccino-Caramel Oat Bars
Ingredients
- 3 cups old fashioned oats
- 2 1/3 cups all-purpose flour
- 1 1/2 cup chopped pecans divided
- 1 teaspoon baking soda
- 1/4 teaspoon salt
- 1 cup unsalted butter softened
- 2 cups brown sugar packed
- 2 eggs
- 1 Tablespoon instant coffee crystals or espresso powder
- 2 teaspoons vanilla extract
- 3/4 cup caramel from jar
Instructions
- Preheat oven at 350-degrees. Line a 13x9 pan with foil and apply butter or nonstick spray.
- In a medium bowl, stir together oats, flour, 1 cup of pecans, baking soda, and salt. Set aside.
- In a big mixing bowl, beat the butter until creamy, then add brown sugar. Follow up with the eggs, coffee/espresso powder, and vanilla. Carefully stir in the dry ingredients; it looks like a lot, but it will fit in the pan! Reserve 2 cups of the dough for the topping.
- Spread the bulk of the oat mixture in the pan. Using floured hands or waxed paper and a heavy glass, press down the mix to form a solid even crust. Spread the caramel topping over it, bringing it to within 1/4-inch of the edges. Dollop the reserved oat mixture over the top, along with the remaining 1/2 cup pecans.
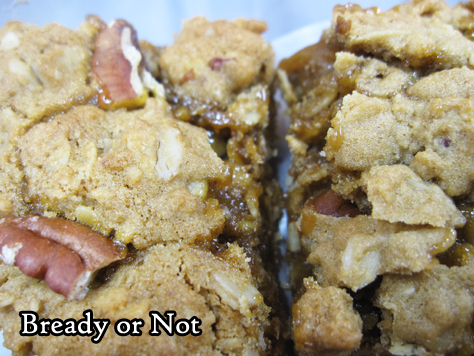
- Bake for 20 to 25 minutes, until the edges are set. Cool completely in pan before using the foil to lift it onto a cutting board to slice into bars. Store in sealed containers with parchment or waxed paper between the layers. Bars can also be frozen.
- OM NOM NOM!
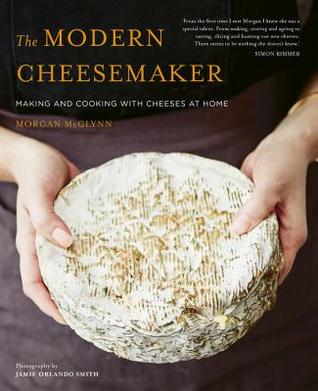
Book Blog: The Modern Cheesemaker: Making and cooking with cheeses at home by Morgan McGlynn
I review everything I read and post reviews on Goodreads and LibraryThing. That’s not enough. Good books are meant to be shared. Therefore, I’m spotlighting some of my favorite reads here on my site.
The Modern Cheesemaker: Making and cooking with cheeses at home by Morgan McGlynn
out now; Indiebound, B&N, and Amazon
I received an electronic galley of this book via NetGalley.
I am known for my passion for artisan cheese. For me, it’s a Pokemon-like gotta-catch’em-all joyful hunt. However, I’ve never tried making cheese, even though I’m a baker and I love experimenting with diverse recipes in the kitchen. What little I had read about home cheese-making left me very intimidated.
That attitude has shifted after reading this book. Morgan McGlynn is a cheese-monger and cheese-maker in the UK, and she has written a book in which I feel like she gently took me by the hand and showed me step by step how to make my own cheese. The book is organized by level of difficulty, too–start with fresh cheeses like mozzarella and ricotta, and work up to hard cheeses (hard in texture, harder and more time-consuming to make) like aged Cheddar and Brie.
This isn’t simply a recipe book, though it does indeed feature recipes for 18 cheeses plus some 40 recipes for utilizing that cheese. This is a book about the basics: the science of cheese explained in straightforward terms, a breakdown of the equipment needed to safely and successfully make cheese, and also information about professional cheese-makers along with a list of some of the best cheeses in the world to seek out. To make this all even better, there are abundant full-color photographs that illustrate the steps and show what the finished results should look like.
Oh, and I should add that all of the information is presented in measurements friendly for readers/cooks in Britain, America, and elsewhere. The recommended places to buy supplies are also not focused on one specific locale. McGlynn wants to help you make cheese, no matter where you live.
I think I’m going to get a large pot and a few other new additions for my kitchen and finally give homemade cheese a go. The idea does still intimidate me, but now I feel like I have a guide to help me on my way.
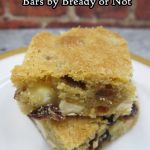
Read MoreBready or Not Original: Cranberry Candied Ginger Blondies
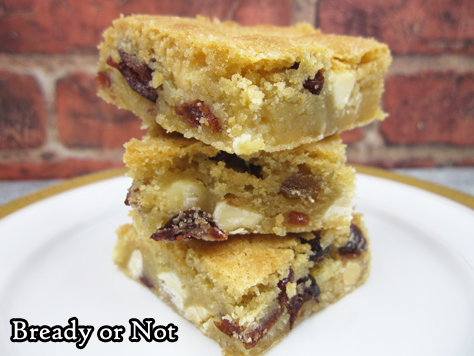
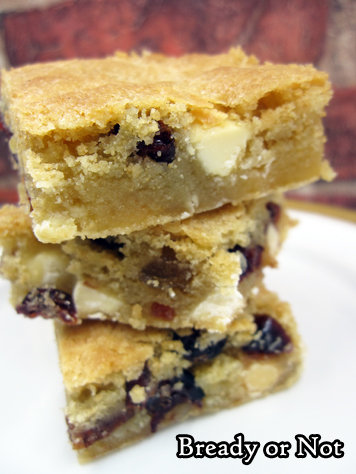
Cranberry Candied Ginger Blondies pack tart cranberries, zesty little nuggets of candied ginger, and mellow white chocolate in a chewy blondie base, to delicious results.
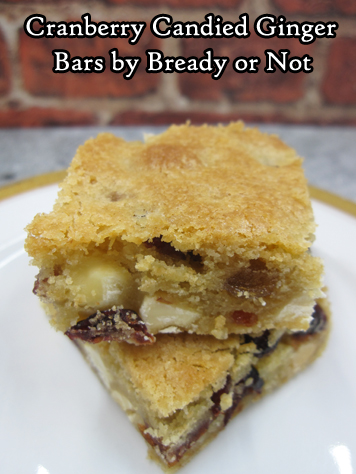
This begins a small spate of dried cranberry recipes that will be on Bready or Not over the next while.

This is because I bought a massive bag of dried cranberries on sale at Costco, and I had an existing stockpile to use up, too. Cue a “oh crap, I need to use up some of this stuff!” response.
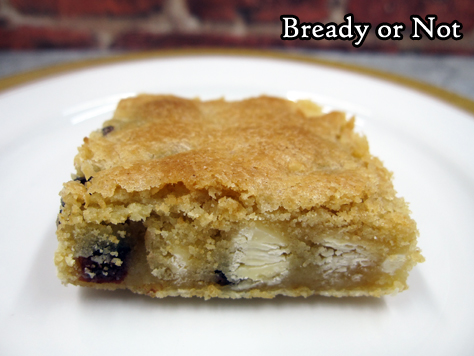
This recipe proved to be a fantastic one, too. The blondies are sweet and chewy, and that combination of dried cranberries, candied ginger, and white chocolate complements and contrasts in an amazing way.
I’ve been asked before about where to find candied ginger. Sometimes brands will sell it jarred alongside spices on the grocery store aisle. Also, check the bins at your local health food store or co-op. I’ve bought candied ginger at my local Sprouts.
The good news is that candied ginger (like dried cranberries) keeps well for ages, so you can stock up and enjoy it for months. Though space might be an issue if you’re buying at Costco…
Bready or Not Original: Cranberry Candied Ginger Blondies
Ingredients
- 1 cup unsalted butter softened
- 1 cup white sugar
- 1/2 cup brown sugar packed
- 2 large eggs room temperature
- 1 teaspoon vanilla extract
- 2 cups all-purpose flour
- 1 teaspoon baking powder
- 1/2 teaspoon fine sea salt
- 1 cup dried cranberries
- 1/3 cup candied ginger chopped
- 1 cup white chocolate chips
Instructions
- Preheat oven at 350-degrees. Line a 13x9 inch dish with aluminum foil and apply nonstick spray.
- Place butter and both sugars in a large bowl and beat until creamed together. Mix in eggs and vanilla. Follow up with the flour, baking powder, and salt, until just combined. Fold in the cranberries, candied ginger, and white chocolate chips.
- Spread batter in the ready pan and even out. Bake for 27 to 30 minutes, until edges are firm and the middle passes the toothpick test. Cool on a wire rack.
- Use foil to list contents onto cutting board. Slice into pieces. Store in an sealed container at room temperature.
- OM NOM NOM!
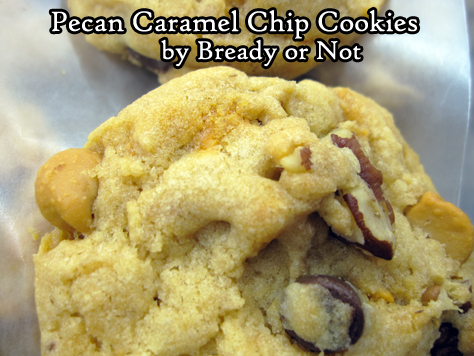
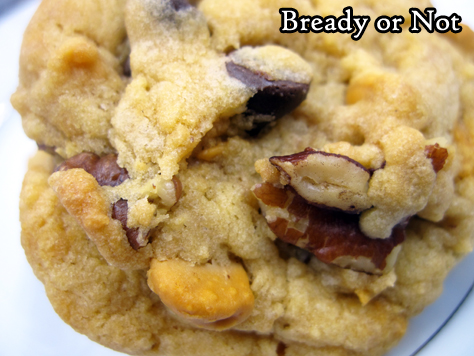
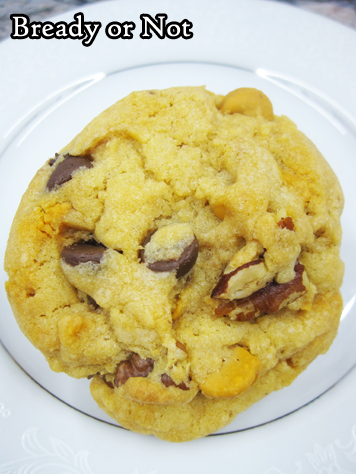
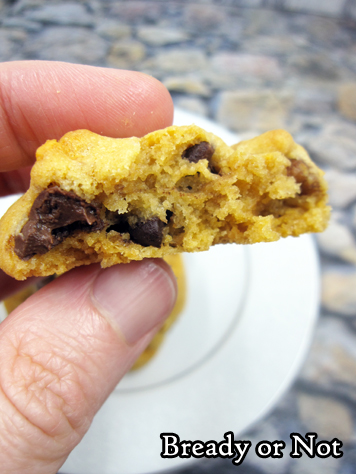
Bready or Not Original: Pecan Caramel Chip Cookies
I love creating new recipes using my favorite grocery find in recent years, caramel chips! This original recipe for Pecan Caramel Chip Cookies is sublime and delicious.
This recipe was inspired by my favorite recipe for White Chocolate Macadamia Nut Cookies. The secret to success in that recipe is white chocolate chips are melted and mixed into the dough.
I considered a bag of caramel chips and thought, hey, if it worked for white chocolate chips, why not caramel?
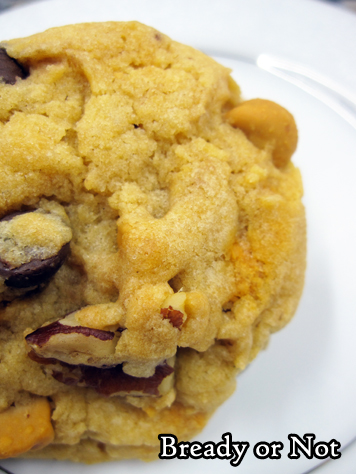
I opted to use pecans because 1) they go so well with caramel, and 2) they are cheaper and generally more accessible to people.
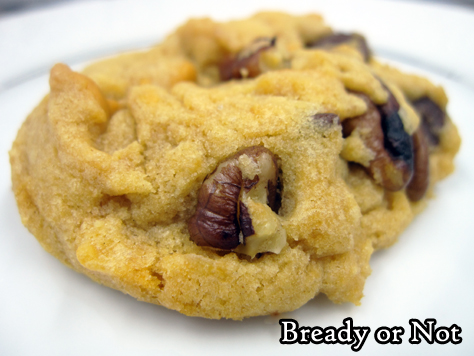
The melted caramel chips don’t simply add sweetness to the dough, but a smooth, silky texture that helps these cookies to bake up fat and chewy.
You might need to hunt around for caramel chips. I’m still mad that my local Walmart carried them for a year then stopped, but most grocery stores around still carry them. Kroger even stocks their own version, which doesn’t look or taste quite as amazing as Hershey’s or Ghirardelli’s, but it’s still good. And cheaper, for sure.
Bready or Not Original: Pecan Caramel Chip Cookies
Ingredients
- 1 bag caramel chips divided
- 1/3 cup white sugar
- 1/3 cup light brown sugar packed
- 11 Tablespoons unsalted butter room temperature
- 1 teaspoon vanilla extract
- 2 eggs room temperature
- 2 1/2 cups all-purpose flour
- 1 teaspoon baking soda
- 1 teaspoon cream of tartar
- 3/4 cup chocolate chips
- 3/4 cup coarsely chopped pecans
Instructions
- Preheat oven to 325-degrees. Place 1 cup of caramel chips in a microwave safe bowl. Microwave on 50% power in short increments, 20-25 seconds, and stop to stir between passes until the chips blend smoothly. Set aside to cool.
- In a large mixing bowl, beat together both sugars, butter, vanilla extract, and eggs until they're creamy. Mix in the melted chips. Stir in flour, baking soda, and cream of tartar. Fold in the remaining caramel chips, chocolate chips, and chopped pecans.
- Use a tablespoon cookie scoop or spoon to place dough in rounded lumps on cookie sheet. Bake 10 to 12 minutes, until the tops just begin to turn light golden brown. Cool on the sheet for several minutes, then move to a rack to cool.
- OM NOM NOM!
Book Blog: Sooner or Later Everything Falls Into the Sea by Sarah Pinsker
I review everything I read and post reviews on Goodreads and LibraryThing. That’s not enough. Good books are meant to be shared. Therefore, I’m spotlighting some of my favorite reads here on my site.
Sooner or Later Everything Falls Into the Sea by Sarah Pinsker
out now; Indiebound, B&N, and Amazon

I received this galley through LibraryThing Early Reviewers.
Sarah Pinsker is among my favorite writers, and I was thrilled to read her new collection from Small Beer Press a few months in advance of release. When I say she’s among my favorites, that also means I’d read most of the stories in this book before; four were new to me, but one sees its first publication in this book.
All of these stories are worth re-reading. Actually, they are worth studying on a technical level to understand why stories work. Pinsker doesn’t write about big drama. She writes about people being people in sometimes extraordinary circumstances. There’s a sense of subtlety to her works. In “A Stretch of Highway Two Lanes Wide,” a man loses his arm, and along with his prosthetic he gains an awareness of being a road in remote Colorado. “Remembery Day” addresses PTSD and the effects of war on the next generation, without ever becoming preachy. In “And Then There were (n-one),” one of my very favorite novellas, period, she brings a brilliant spin to Agatha Christie’s “And Then There Were None” by envisioning a cross-dimensional conference of hundreds of Sarah Pinskers on an isolated island in a storm–and one of them is murdered.
Because of this collection, I started my document to track my favorite 2019 releases to nominate for awards in 2020. Yes, this collection is that good.
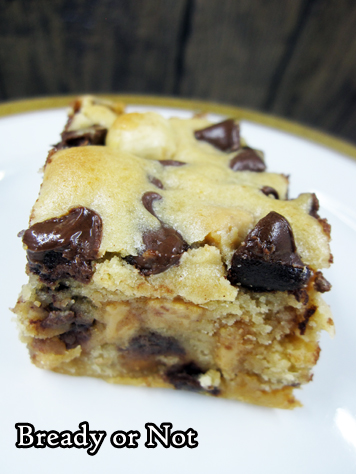
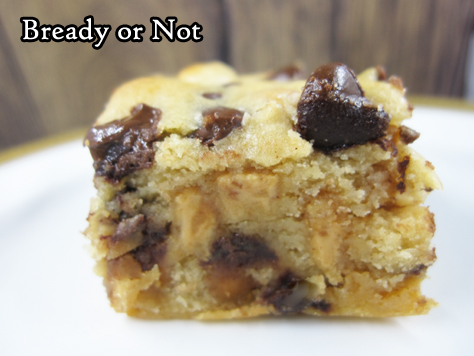
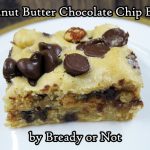
Read MoreBready or Not: Peanut Butter Chocolate Chip Bars
These are not mere blondies. No, these Peanut Butter Chocolate Chip Bars are practically cake.
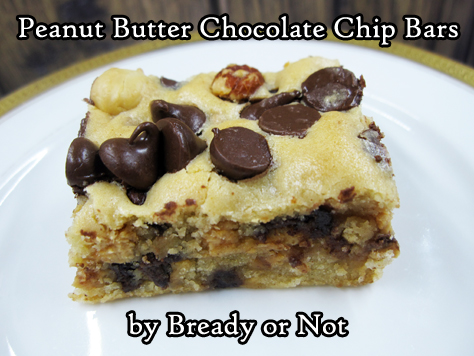
Seriously, this could work as a birthday cake for a chocolate-peanut butter lover. These bars are THICK and loaded with goodness.
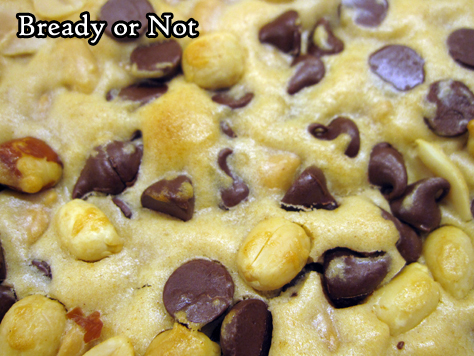
This recipe makes a full 13 by 9 pan, so there’s plenty to share. As dense as each bar is, you probably don’t want to cut them large.
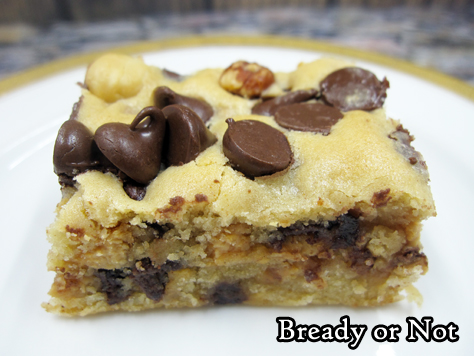
Bars like this freeze very well, too, so you can stash some away to enjoy later.

I can’t help but wonder how this recipe would be with Reese’s Peanut Butter Cups chopped into it, too. I should try that sometime.
Recipes are stories. There will always be other ways to twist them into something new and enjoyable.
Bready or Not: Peanut Butter Chocolate Chip Bars
Ingredients
- 1/2 cup unsalted butter room temperature
- 1 cup brown sugar packed
- 1/4 cup white granulated sugar
- 2 eggs
- 1/2 teaspoon vanilla extract
- 1 cup vanilla Greek yogurt
- 2 cups all-purpose flour
- 1/2 teaspoon cinnamon
- 1 teaspoon baking powder
- 1 3/4 cups peanut butter chips 1 bag
- 1 1/2 cups chocolate chips
- 1/2 cup chopped peanuts
Instructions
- Preheat the oven at 350-degrees. Line a 13X9 baking with aluminum foil and apply nonstick spray or butter.
- In a big bowl, cream together the butter and sugars until light and fluffy. Add the eggs, one at a time, scraping the bowl as necessary.
- Add the vanilla extract and vanilla yogurt next, followed by the flour, cinnamon, and baking powder. Fold in the peanut butter chips and 1 cup of the chocolate chips.
- Scoop the batter into the prepared pan. Sprinkle the remaining chocolate chips and the peanuts over the top and gently press them in.
- Bake pan for 30 minutes or until the center passes the toothpick test. Let cool completely. Use foil to lift contents onto a cutting board to slice into bars.
- Store in a sealed container at room temperature or in the fridge. Freeze bars between waxed paper in a sealed container to make them last even longer.
- OM NOM NOM!
