


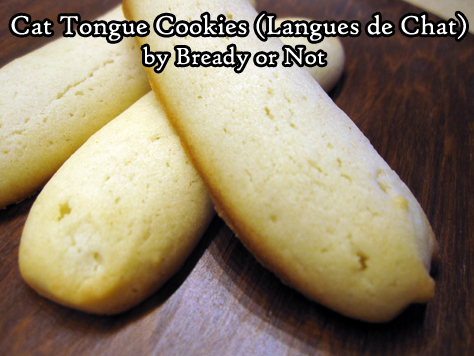
Bready or Not: Cat Tongue Cookies (Langues de Chat)
Cat Tongue Cookies! NO CATS WERE HARMED IN THE MAKING OF THESE COOKIES.
I first heard about these cookies on the Great British Bake Off, where they were used as part of another recipe. My curiosity was piqued.
I am trying out a lot more French recipes. This seemed like a good, basic one to try… even though I HATE piping things. Did I say hate? I meant LOATHE.
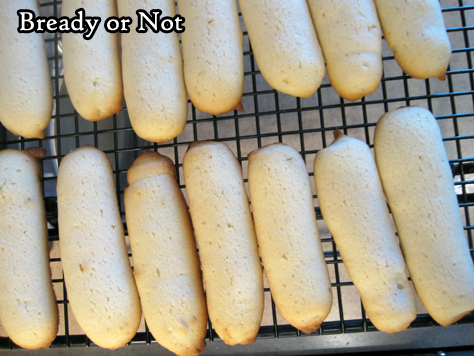
That said, this recipe wasn’t too awful in that regard. The dough wasn’t a big sticky mess. I used a gallon Ziploc bag and cut the corner off, the old basic method, and that worked just fine.
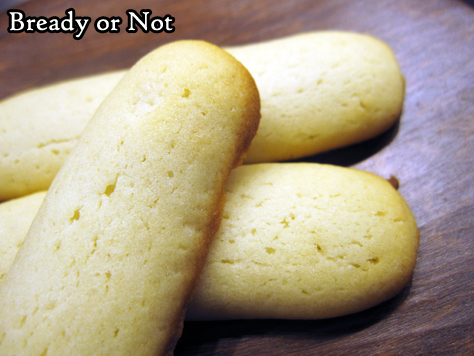
The end result reminded me a lot of the old American stand-by, Nilla Wafers. Nothing fancy by themselves, but crisp and refreshing. They would be easy to dress up by dipping them in chocolate, Nutella, jam, whatever–if you want.
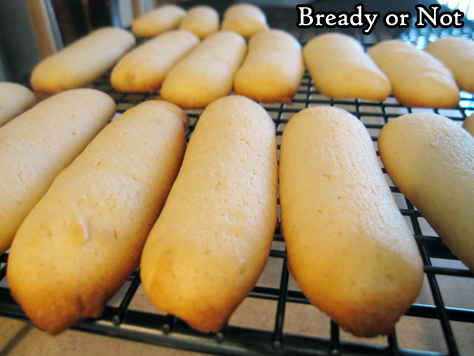
I thought they were just fine by themselves, with my cats lurking close by–tongues intact.

Bready or Not: Cat Tongue Cookies (Langues de Chat)
Equipment
- parchment paper
- piping bag or gallon Ziploc
Ingredients
- 9 Tablespoons unsalted butter softened
- 1/2 cup white sugar plus 2 Tablespoons
- 3 egg whites
- 1 1/2 teaspoons vanilla extract
- 1 1/2 cups all-purpose flour
Instructions
- Preheat oven at 400 degrees. Line a large baking pan with parchment. Use pencil to draw 3-inch lines spaced several inches apart in rows upon the paper, then flip over so the pencil lines still show through as guides.
- In a medium bowl, cream together butter and white sugar (1/2 cup and 2 Tablespoons) until smooth. Beat in egg whites one at a time until batter is light and fluffy. Stir in vanilla followed by flour. Dough might be stiff.
- Put about half of dough into a Ziploc bag (then cut off corner) or a piping bag with a medium star tip. Squeeze out dough onto the lines on parchment.
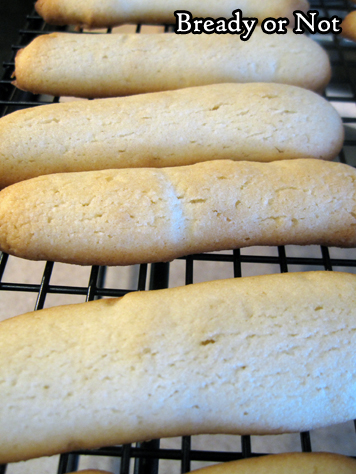
- Bake for 10 to 11 minutes, until edges are starting to brown. Move to cooling rack. Pipe and bake remaining dough, reusing parchment.
- Store in a sealed container. Good dipped into chocolate or spread with Nutella--or all by itself.
OM NOM NOM!
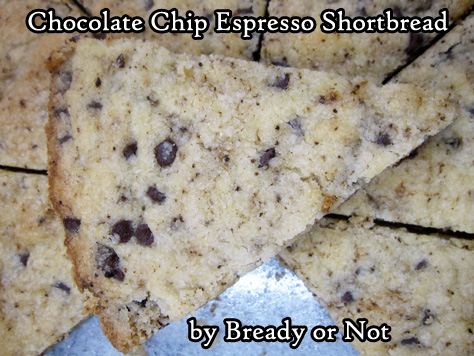
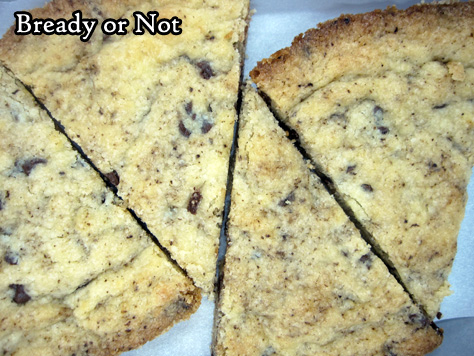
Bready or Not Original: Chocolate Chip Espresso Shortbread
Basic Scottish shortbread is one of the awesomest things in the world. It’s also a blank canvas for variations beyond count. Chocolate chips and a jolt of espresso add extra oomph to this new spin!
Pride O’ Scotland Shortbread was one of the first recipes I considered ‘mine’ as a teenager. It became the one thing I made each year for our family’s Thanksgiving potluck.
Appropriately, it’s also something I made for my husband the very first day I met him when I was 18. (Yes, he was an almost total stranger. Yes, I welcomed him with shortbread. Because that’s what I do.)
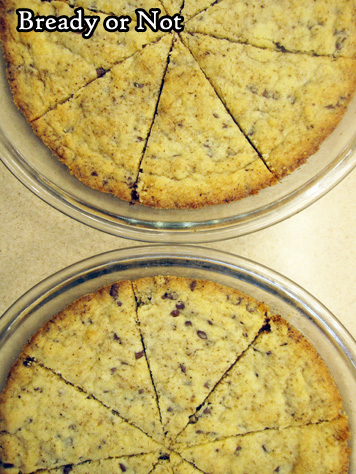
I considered the recipe sacrosanct the past two decades… and then I got an idea. Chocolate. Espresso powder. It had to be good, right? Or would it be a crumbly mess?

Yes indeed, it turned out to be delicious. No, it remained as cohesive as ever. Yay!
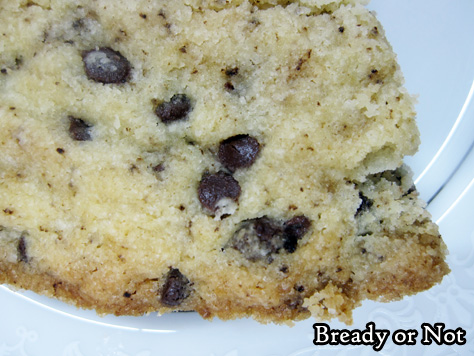
Espresso powder is fantastic along with chocolate; I include it in most every brownie recipe. The coffee flavor doesn’t come in strong (I actually hate coffee), but it make the chocolate taste bolder and more nuanced.
Bready or Not Original: Chocolate Chip Espresso Shortbread
Equipment
- two basic 9-inch pie plates
Ingredients
- 2 cups all-purpose flour
- 3/4 cups white sugar
- 1 teaspoon espresso powder
- 1/4 teaspoon salt
- 1 cup unsalted butter softened, 2 sticks
- 1 egg yolk
- 1 teaspoon vanilla extract
- 1/2 cup mini chocolate chips
Instructions
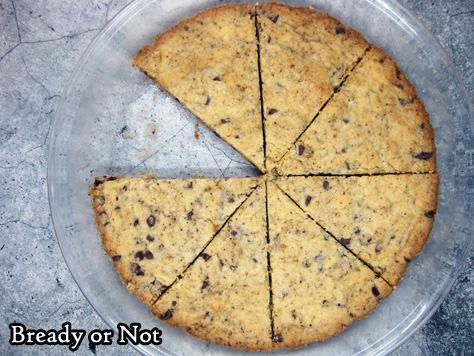
- Place flour, sugar, espresso powder, and salt in mixing bowl; add butter, egg yolk, and vanilla. Mix with fingers until dough holds together, then fold in the mini chocolate chips. Once chips are distributed, divide dough into two balls and press each ball into a pan. Flatten evenly with palms and prick surface all over with floured fork. Slash into wedges.
- Bake for 17 to 22 minutes, until the edges are golden brown. Remove from oven. Immediately cut again following slash marks and carefully run the blade around the edge of the crust to loosen the shortbread.
- Let shortbread cool. Cut again along slash marks and the crust, then remove wedges to eat. Shortbread keeps in sealed container for several days.
OM NOM NOM!
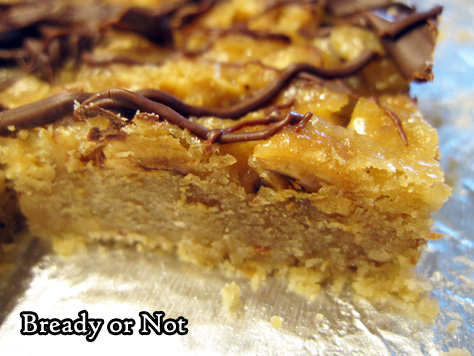
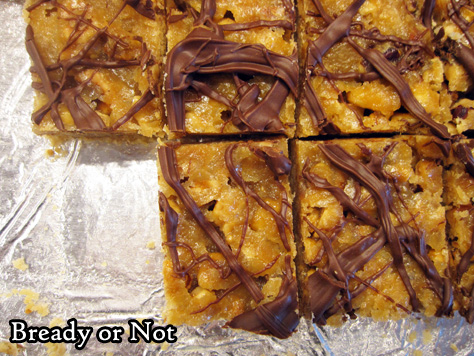
Bready or Not Original: Hazelnut Praline Bars
These delicious Hazelnut Praline Bars are a lot like praline candy, but it fantastic bar form.
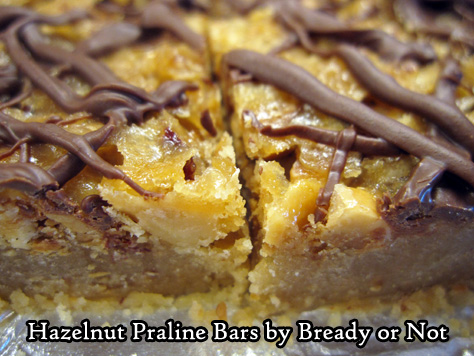
The top of these bars caramelizes. These things are very sweet, with the nuts rendered softly crunchy. The combination of textures is just divine.
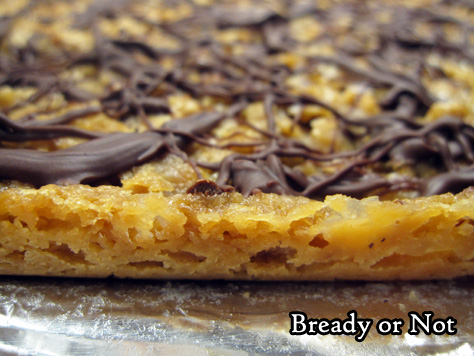
The slight drizzle of chocolate on top is the perfect accent, too. Funny how the tiniest bit of chocolate adds so much in terms of flavor.
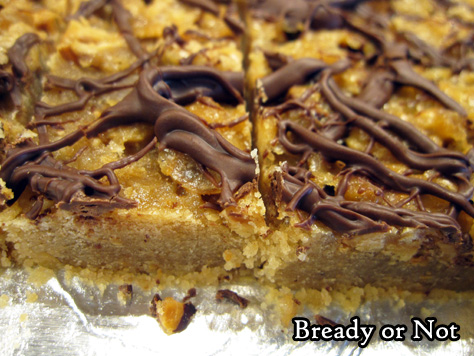
A 6 ounce bag of hazelnuts will be the perfect amount for both the crust and nut layer, too.
Can you use other nuts? I haven’t tried it in this recipe, but why not? Praline candy traditionally uses pecans, after all. I bet using other nuts–or a combo–would be fine.
Hazelnuts are sure delicious and fun, though!

Bready or Not Original: Hazelnut Praline Bars
Equipment
- 13x9 pan
- food processor
- small saucepan
Ingredients
Crust
- 1/2 cup hazelnuts
- 1 cup brown sugar packed
- 3/4 cup unsalted butter softened, 1 1/2 sticks
- 2 cups all-purpose flour
Nut Layer
- 1 cup hazelnuts
- 13 Tablespoons unsalted butter
- 1/2 cup brown sugar packed
Topping
- 1/2 cup milk chocolate chips
Instructions
- Preheat oven at 350-degrees. Line a 13x9-inch pan with foil and apply nonstick spray or butter.
- Place the 1/2 cup hazelnuts in a food processor. Process until finely ground.
- In a medium bowl, beat together the next two crust ingredients, the brown sugar and butter. Add the flour and ground hazelnuts. Press crust into pan; a piece of wax paper and a heavy glass makes it easy to form an evenly compressed layer. Bake for 10 minutes.
- In the meantime, put the remaining hazelnuts in the food processor and give them a quick pulse, just to coarsely chop them.
- As soon as the crust comes out, sprinkle the hazelnuts over the top. In a small saucepan, warm the butter and brown sugar to boiling at medium heat. Boil for a minute. Pour over hazelnuts.
- Bake for 15 to 18 minutes, until edges are bubbling and center is set. Cool completely.
- In a small microwave-safe bowl, zap the chocolate in 25 second bursts, stirring well between each pass, until it can be stirred smooth. Use a fork to drizzle the chocolate over the bars.
- Chill in fridge for 30 minutes, or until chocolate is set. Use the foil to lift contents onto a cutting board and slice into bars.
- Store in a sealed container at room temperature or in the fridge with waxed paper or parchment between the layers.
OM NOM NOM!
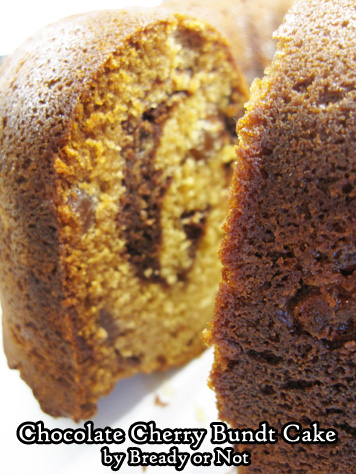
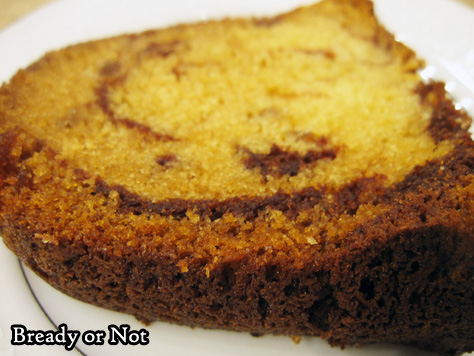
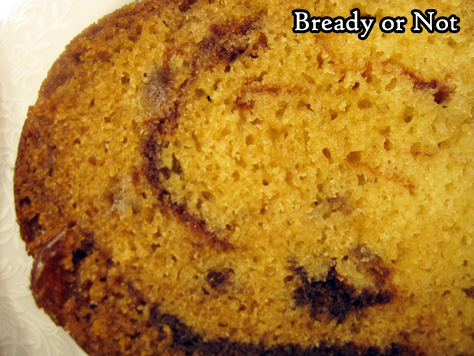
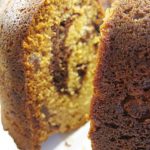
Bready or Not: Chocolate Cherry Bundt Cake
Chocolate and cherries team up to delicious results in this delicious Chocolate Cherry Bundt Cake!
I first encountered this lovely combo in the Queen Anne Cordial Cherries my parents would buy around Christmas. The combo is pretty amazing in cake form, too.
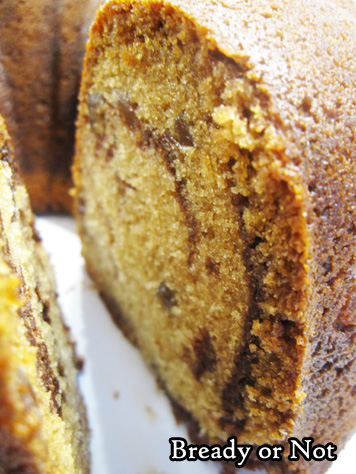
You use both cherries and cherry juice in this recipe. That infuses the crumb with cherry flavor, even if your bite lacks cherry chunks.
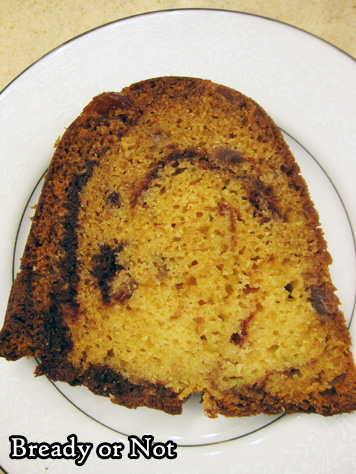
Chocolate is swirled throughout. Make sure you don’t swirl it too much–you want distinct layers of chocolate, not only for the flavor, but the lovely appearance.
This is a special kind of bundt cake, perfect for a birthday, brunch, special dessert, breakfast, and–of course–Valentine’s Day.
Bake up this beautiful thing and indulge. Plus, it can always be sliced up and frozen for later!
Bready or Not: Chocolate Cherry Bundt Cake
Equipment
- large bundt pan
Ingredients
- 13 1/2 ounces maraschino cherries with juice
- 3 3/4 cup all-purpose flour
- 2 1/4 teaspoons baking soda
- 1 cup unsalted butter 2 sticks, room temperature
- 2 cups white sugar
- 3 large eggs room temperature
- 1/4 cup water
- 2 teaspoons almond extract
- 1 1/2 cups sour cream or plain or vanilla Greek yogurt
- 1/2 cup semisweet chocolate chips
Instructions
- Drain juice from cherries into another bowl; reserve 1/2 cup of juice. Remove stems from cherries and roughly chop up the fruit. Set aside.
- Preheat oven at 350-degrees. Grease and flour a large bundt pan.
- In a medium bowl, stir together the flour and baking soda. Set aside.
- In a large bowl, beat together the butter and sugar until light and fluffy. Add in eggs one at a time. Pour in the cherry juice, water, and almond extract. Start adding the flour mix and the sour cream in small amounts, going back and forth until everything is just incorporated. Fold the cherries into the batter.
- In a microwave safe dish, heat the chocolate chips in short bursts until they can be stirred smooth.
- Spoon some cherry batter into the base of the bundt pan. Add dollops of chocolate, then more batter. Keep going back and forth until all of the batter and chocolate is in the pan. Drag a butter knife through--without touching the metal--to swirl everything together a bit more, then smooth the top.
- Bake for about 1 hour, until an inserted knife comes out clean. Set on a rack to cool for 20 minutes, then invert the cake and remove the pan so it can completely cool.
- Store covered at room temperature. Slices can also be frozen for later enjoyment.
- OM NOM NOM!
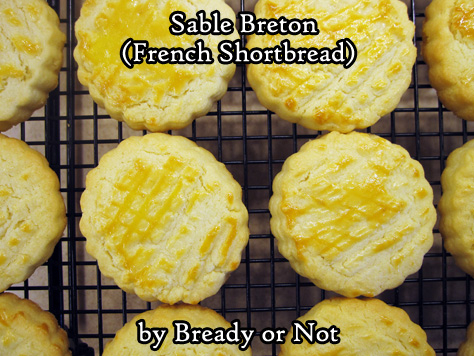
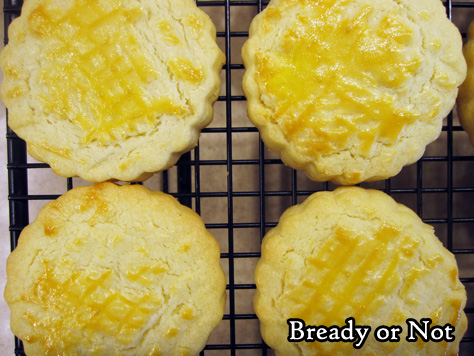
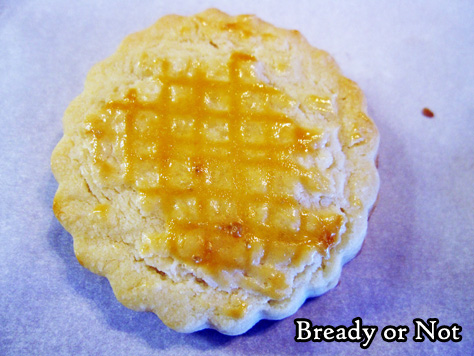
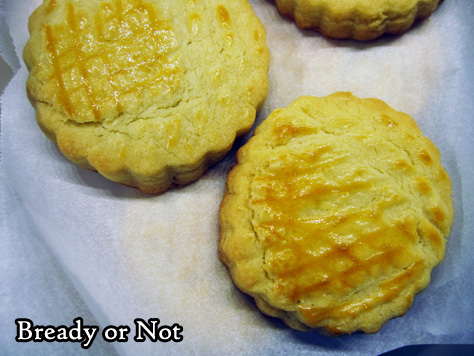
Bready or Not: Sable Breton (French Shortbread)
Last month I shared my recipe for Almond Sable. This time I present another French (from Brittany, to be specific) take on shortbread: Sable Breton!
These cookies are much more straightforward than the previous recipe. The ingredients are shortbread basics: butter, sugar, flour.
What sets this apart is, foremost, that it is not as sweet as its counterparts across the channel.
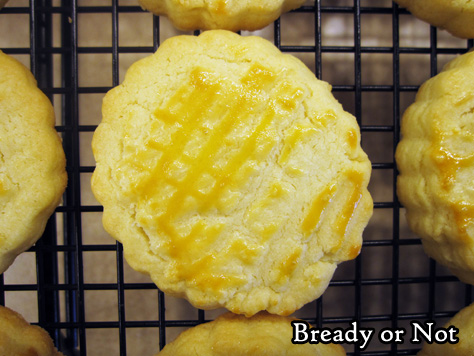
I also recommend that you use a kitchen scale to get that European-style precision–along with actual French butter. President-brand is expensive but widely available, even where I am in Arizona.
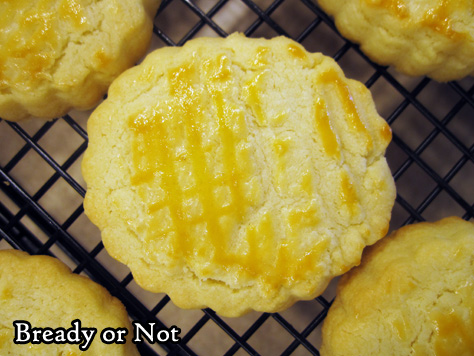
These cookies are downright pretty, too, with a crosshatched pattern and an egg yolk wash. They are perfect alongside a cup of coffee or tea!
Modified from the original at Mon Petit Four.

Bready or Not: Sable Breton (French Shortbread)
Equipment
- parchment paper
- small cookie cutter
- food scale
Ingredients
- 200 grams salted butter 1/2 cup plus 5 Tablespoons, President butter recommended
- 120 grams white sugar 1/2 cup plus 1 Tablespoon
- 3 egg yolks divided
- 1 teaspoon vanilla extract
- 280 grams all-purpose flour 2 cups plus 2 Tablespoons, plus more if needed to dust work surface
Instructions
- Preheat oven at 375-degrees. Line a large baking sheet with parchment paper or use a silicone mat.
- Beat together the butter and sugar until light and fluffy. Add two egg yolks and vanilla extract. Add flour until just incorporated.
- Lightly flour work surface and hands. Using rolling pin or hands, press dough to about 1/4-inch thickness.
- Use a small round cookie cutter on dough. Transfer rounds to cookie sheet, spaced out a bit. Use a fork to scratch a crosshatch pattern in the top, like a hashtag with more lines.
- Beat remaining egg yolk in a small bowl. Brush tops of cookies with yolk.
- Bake for 12 to 15 minutes, until cookies are a consistent golden color. Transfer to a rack to completely cool.
- Store in a sealed container.
- OM NOM NOM!
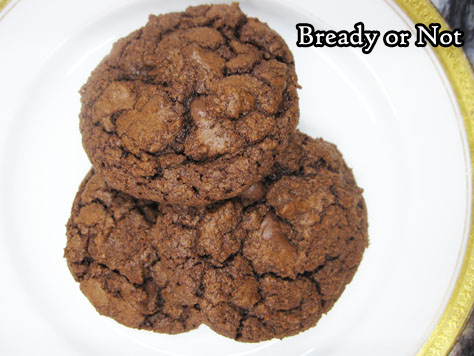
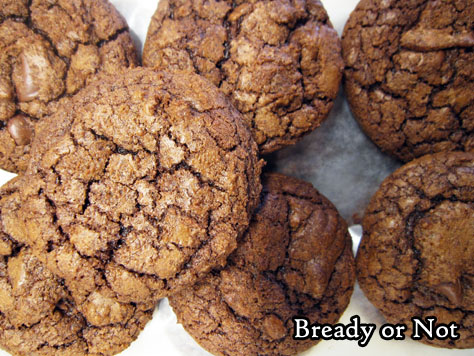
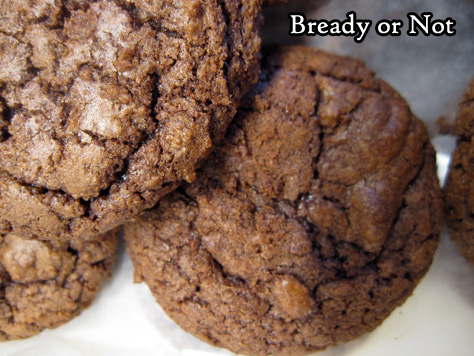
Bready or Not: Ultimate Chocolate Cookies
Ultimate Chocolate Cookies! Say that in a gravelly announcer-guy voice. ULTIMATE CHOCOLATE COOKIES!
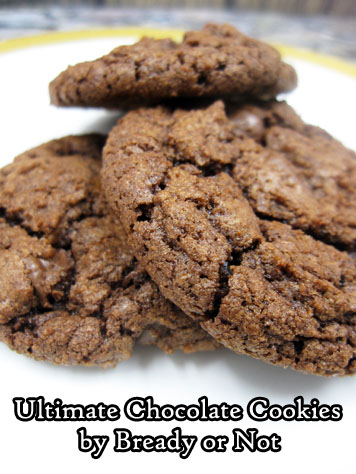
These are loaded with chocolate–melted into the dough and with bonus chocolate chips, too! Oh yeah, and cocoa!

The addition of espresso powder (or instant coffee) amps up that chocolate flavor, too. If you don’t keep that around for your cookies and brownies, it’s a good habit to start.
I mean, amping up chocolate flavor is DEFINITELY a good thing.
You might even say it makes things… ultimate.
Modified from AllRecipes Magazine February/March 2015.

Bready or Not: Ultimate Chocolate Cookies
Ingredients
- 12 ounces semisweet chocolate chips 1 bag, divided
- 1 cup all-purpose flour
- 1/4 cup cocoa powder Dutch process or regular unsweetened, sifted
- 1 teaspoon baking powder
- 1/2 teaspoon salt
- 5 Tablespoons unsalted butter room temperature
- 3/4 cup brown sugar packed
- 1/4 cup white sugar
- 2 eggs room temperature
- 1 teaspoon espresso powder or instant-coffee granules
- 1 teaspoon vanilla extract
Instructions
- On the stove top or in a microwave, melt 1 cup semisweet chocolate chips, warming until smooth. Set aside to cool.
- In another bowl, stir together flour, cocoa, baking powder, and salt.
- In a big bowl, beat together the butter and two sugars until light and fluffy. Beat in eggs, scraping bowl to make sure everything is combined. Follow up with espresso powder and vanilla, then the melted chocolate. Stir in flour mixture. Fold in the remaining chocolate chips.
- Cover mixing bowl and let dough stand for about 30 minutes so that the chocolate can set.
- Preheat oven at 350-degrees. Use a teaspoon scoop to place dough spaced out on parchment-covered cookie sheet or seasoned stoneware.
- Bake for 10 to 12 minutes. Remove from oven and let set on stove about 10 minutes before moving cookies to a rack to completely cool.
- Store in sealed containers at room temperature. Cookies may crisp up more after 1 day, but keep quite well.
- OM NOM NOM!
