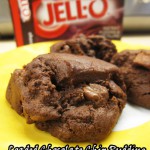
Bready or Not: Loaded Chocolate Chip Pudding Cookies
Hey, it’s been a few weeks since I featured chocolate, so let’s indulge hardcore with some Loaded Chocolate Chip Pudding Cookies.
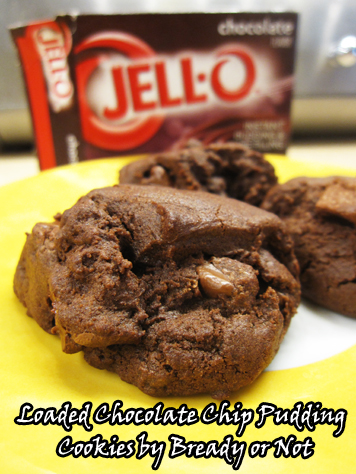
There are a lot of similar pudding-based chocolate chip cookie recipes on food blogs. Some use terms like double, triple, or quadruple chocolate. Me, I’m calling them LOADED.
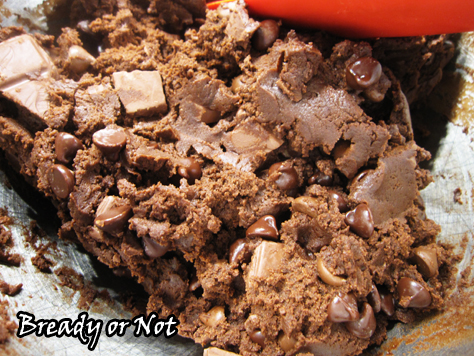
Use whatever chocolate you want. Mix ‘n match chocolate chips. Chop up some holiday candy bars. Throw in two cup’s worth, and these cookies will be good to go. In your mouth.
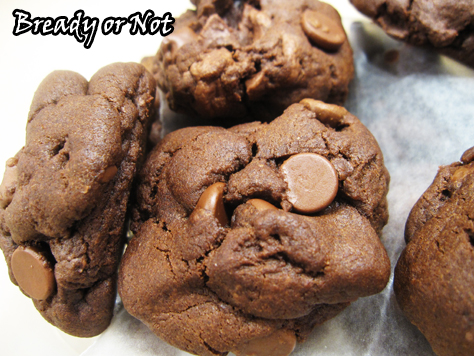
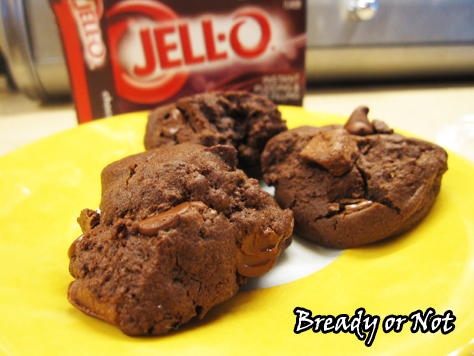
I’ve used pudding mix in other cookies and cakes before, with reason. It creates tender, delicious dough that also keeps well. In this case, it makes fat chocolate cookies. You’ll want to squish the dough balls, because they won’t spread much when they bake.

The result is a cookie that will make chocoholics flail in delight. These things are thick, luscious, and, well, loaded with chocolate.
Bready or Not: Loaded Chocolate Chip Pudding Cookies
Ingredients
- 2 1/4 cups all-purpose flour
- 1/2 cup Dutch-process cocoa powder sifted
- 1 teaspoon baking soda
- 3/4 cup unsalted butter softened
- 3/4 cup brown sugar packed
- 1/4 cup white sugar
- 3.9 ounce instant chocolate pudding 1 box, NOT Cook N' Serve or Sugar-Free
- 2 eggs room temperature
- 2 teaspoons vanilla extract
- 2 cups chocolate chips or chopped chocolate bars, any kind
Instructions
- In a bowl, mix together the flour, cocoa powder, and baking soda.
- In a large bowl, cream together butter, brown sugar, and granulated sugar until fluffy. Add the pudding mix powder.
- Beat in the eggs and vanilla extract. Slowly add the dry ingredients into the wet until just combined. Fold in the chocolate.
- Wrap the dough in plastic wrap and tuck into the fridge to chill for several hours or overnight.
- Preheat oven at 350-degrees. Use a tablespoon scoop to dollop the dough onto a cookie sheet. The cookies won’t spread much, so flatten them a bit. Bake for 9-12 minutes, or until the cookies are set. Let them settle on the cookie sheet for a few minutes and then transfer to a rack to completely cool.
- OM NOM NOM!
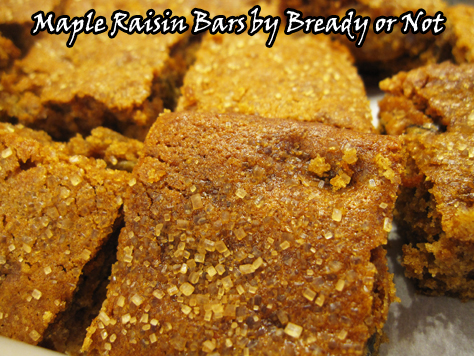
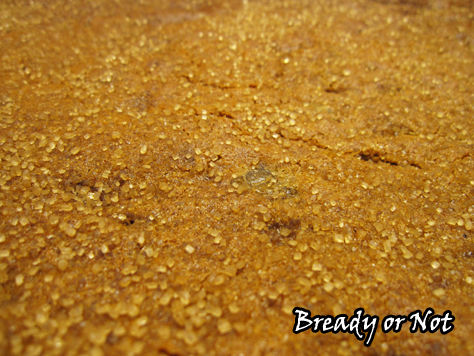
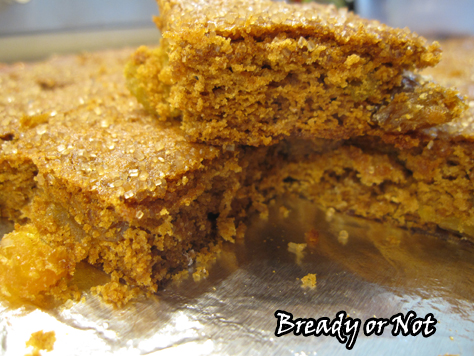
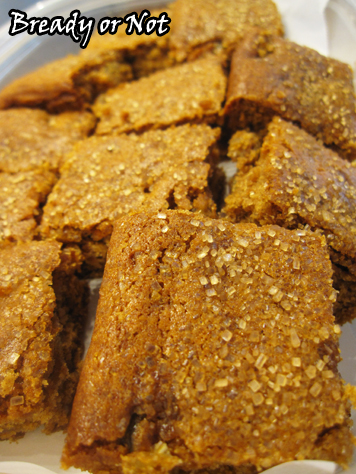
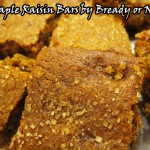
Bready or Not: Maple Raisin Bars
If you like chewy maple goodness, then these Maple Raisin Bars are for you!
So you ever look at a recipe and think, “Hey, that looks good, but I want to change half the ingredients around?” That’s how this recipe came about. I look at another recipe and decided to give it an overhaul. Golden raisins instead of apricots. Honey instead of molasses. And so on.
The result? Chewy, cakey bars with delightful gems of golden raisins sprinkled throughout. The turbinado sugar on top adds a special sparkle.
They taste kind of like gingerbread just, well, without any ginger. That’s the closest comparison I can make.
Even better, these keep well for days at room temperature, and they can also be frozen for later enjoyment.
Yep, these will be greatly enjoyed. Now or later.
Bready or Not: Maple Raisin Bars
Ingredients
- 1 cup bread flour
- 1/2 cup all-purpose flour
- 1 teaspoon baking soda
- 1 teaspoon ground cinnamon
- 1/2 teaspoon ground nutmeg
- 1/4 teaspoon ground cloves
- 1/4 teaspoon salt
- 1 cup golden raisins
- 3/4 cup maple sugar
- 1/2 cup avocado oil or canola oil
- 1/3 cup honey
- 1/2 cup milk or almond milk
- 3 teaspoons turbinado sugar
Instructions
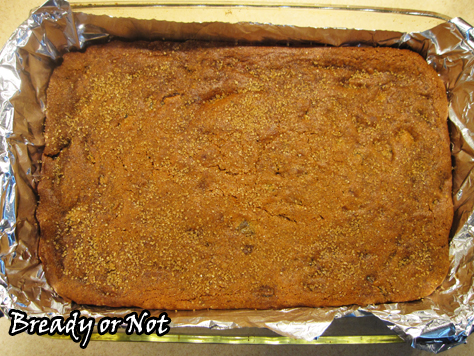
- Preheat oven at 350-degrees. Line a 9x13 pan with aluminum foil and apply nonstick spray or butter.
- In a large bowl, combine the flours, baking soda, cinnamon, nutmeg, cloves, and salt. Stir in the raisins. Set bowl aside.
- In a medium bowl, whisk together maple sugar, oil, honey, and milk. Slowly pour the wet ingredients into the dry until fully combined. Scrape the dough into the prepared pan, making sure the raisins are well distributed. Sprinkle turbinado sugar all over the top.
- Bake for 24 to 28 minutes, until the dough has puffed and it passes the toothpick test in the middle.
- Let it cool completely. Lift out of pan with the foil and cut into squares. Store in a sealed container with waxed paper or parchment paper between the layers. Will keep well at room temperature for days, or can be frozen for weeks.
- OM NOM NOM!

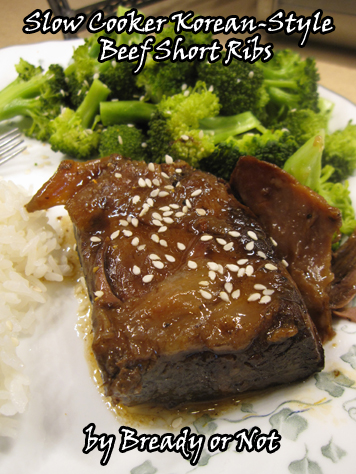
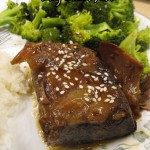
Bready or Not: Slow Cooker Korean-Style Beef Short Ribs
I’m presenting to you the recipe for one of the best dishes I’ve ever made in a crock pot: Korean-style beef short ribs.
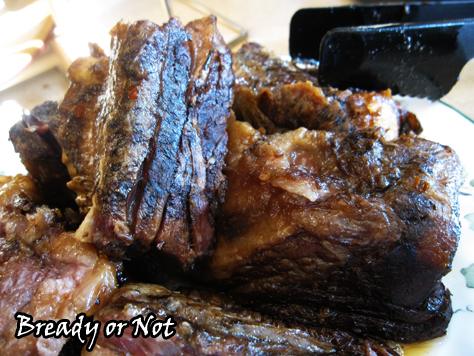
I have made this many times over now. I’ve even tried it using cheaper cuts like chuck roast and rump roast. Those worked out okay (though the meat really dries out before its soak in the juice at the end), but they are nowhere as delicious as the short rib version.
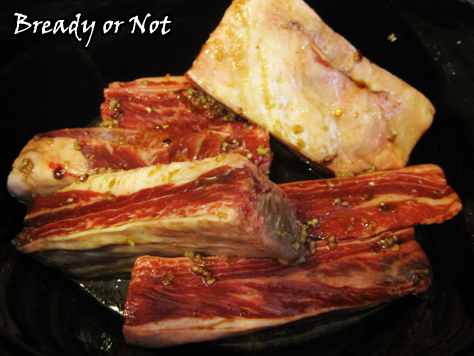
It turns out amazing whether you use boneless or bone-in ribs–a mix is a great way to go, too! Don’t trim the fat. You want all that flavor. The end result is a sauce that tastes like you added red wine, but you didn’t. It’s like MAGIC.
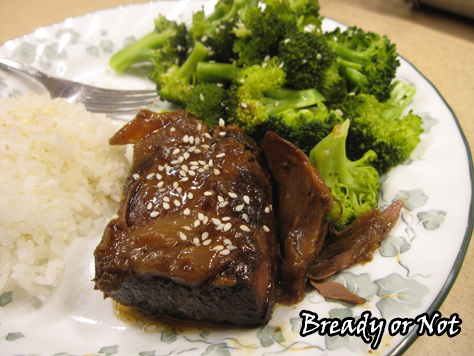
Seriously, these ribs taste like something from a great Asian restaurant. Pair it with some broccoli and a good spoonful of the sauce, and YUM.
Whenever I see beef short ribs go on sale, I do a little dance of joy because it means I get to make this recipe again.
Modified from Heather’s Bytes.
Bready or Not: Slow Cooker Korean-Style Short Ribs
Ingredients
- 1/2 cup low-sodium soy sauce
- 1/3 cup light brown sugar packed
- 2 Tb sesame oil
- 2 Tb rice vinegar
- 1/2 teaspoon ground ginger
- 4 cloves minced garlic
- 1/2 tsp red pepper flakes
- 5 lbs beef short ribs boneless, bone-in, or a mix
- 1-2 Tb cornstarch
- sesame seeds optional
Instructions
- In a small bowl, mix together soy sauce, brown sugar, oil, vinegar, ginger, garlic and red pepper. Place the ribs in a 5 or 6-quart slow cooker; pour the sauce over them. Cover and cook on HIGH for 4 hours or on LOW for 9 hours. Depending on how the ribs are stacked in the cooker, you may want to quickly stir them at some point halfway through.
- Use a slotted spoon to remove the ribs from the cooker. Place a tablespoon of corn starch in a small bowl and add some juice from the cooker. Whisk them together to create a slurry without lumps, and add back into the crock pot. Stir. If the juice doesn't start to thicken, repeat the process with some more corn starch.
- Either keep the ribs intact, or pull meat into chunks and discard the bones and fat. Place meat in cooker again on WARM setting for 10 minutes or so to soak in flavors. Serve. Great with rice, broccoli, and perhaps a sprinkling of sesame seeds!
- OM NOM NOM!

Read More
Pi Day! Celebrate with Bready or Not
It’s March 14th and that means it’s PI DAY (3.14). Therefore, it’s only right to celebrate by making and eating some pie, right? I have a whole subcategory of pie recipes in Bready or Not, but let’s highlight some favorites.
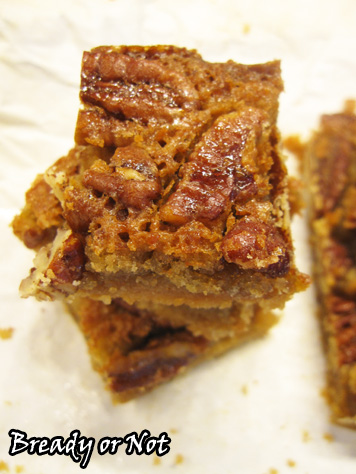
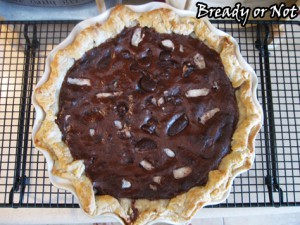
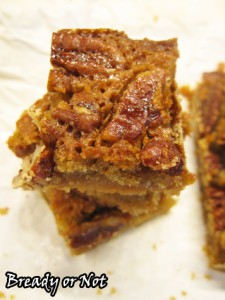 Maple Pecan Pie Bars
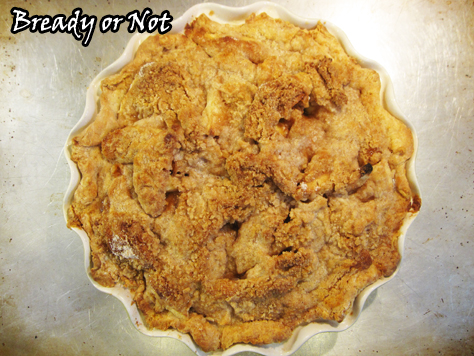
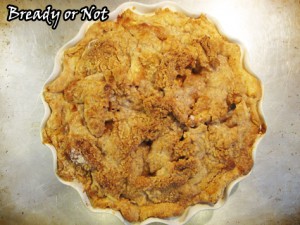 Maple Apple Pie
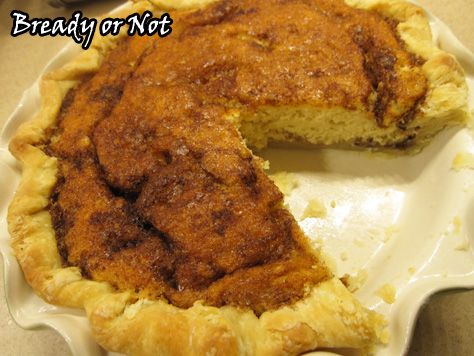
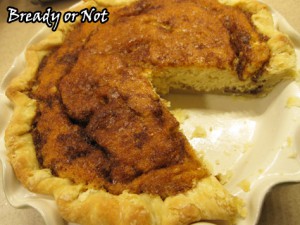 Snickerdoodle Pie
 Peppermint Brownie Pie

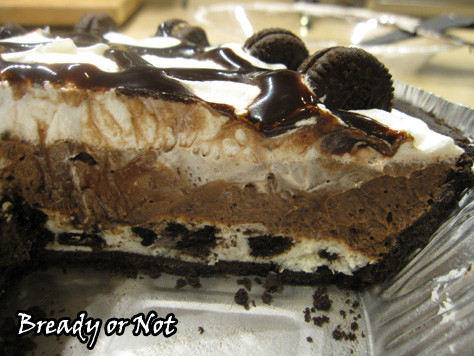
 No-Bake Cookies and Cream Chocolate Pie
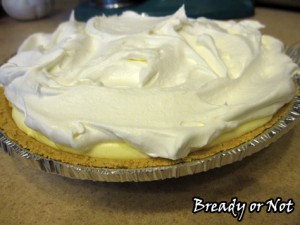 No-Bake Triple Layer Lemon Pudding Pie

Om nom nom! #SFWAPro
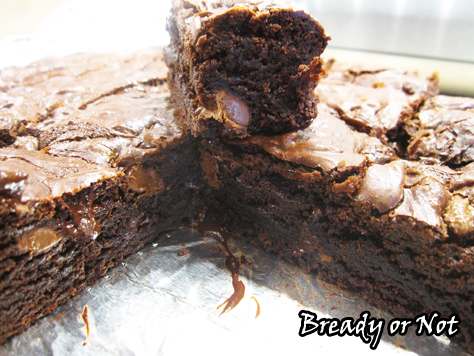
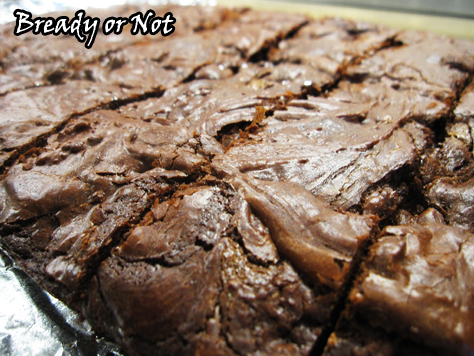
Read MoreBready or Not: Chili Spice Chocolate Brownies
This recipe, originally posted at the Holy Taco Church, adds a kick to regular ol’ brownies.
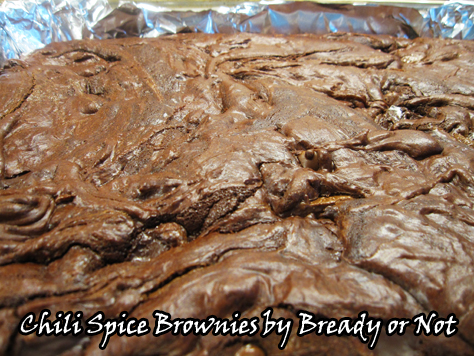
If you’ve browsed the candy aisles of late, you noticed that gourmet chocolate bars are all the rage. Take advantage of this when it comes to baked goods. Flavored chocolate adds an extra level of nuance to brownies and cookies.
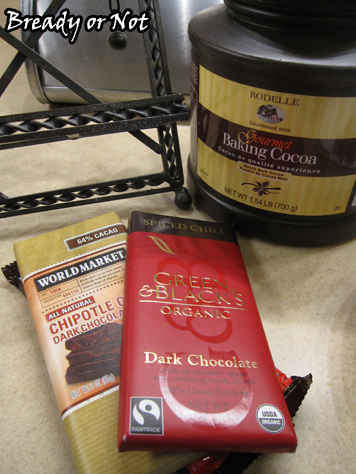
For these Chili Spice Chocolate Brownies, I chopped up a combo of Green & Black Spiced Chili Chocolate and World Market’s Dark Chocolate Chipotle, but any type of amped-up chocolate will work here.
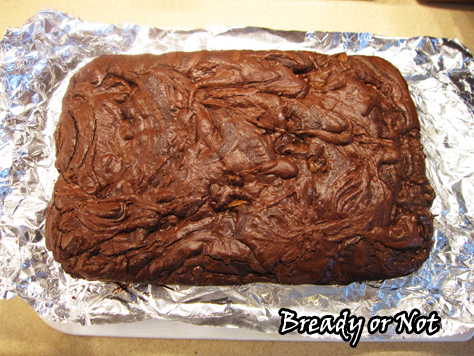
Note that I can’t handle really hot stuff–hello, burning skin and inability to breathe and feeling like a taun-taun kicked me in the intestines–but these brownies aren’t spicy in THAT way. There’s an occasional zing of chili here and there, but the main flavor is of the cinnamon and the milder chocolate.
Modified from Cinnamon-Spiced Chocolate Brownies at King Arthur Flour.
Bready or Not: Chili Spice Chocolate Brownies
Ingredients
- 1 cup unsalted butter two sticks, melted
- 2 1/4 cups white sugar
- 1 1/4 cups baking cocoa or Dutch-process cocoa, sifted
- 1 teaspoon salt
- 1 teaspoon baking powder
- 1 teaspoon espresso powder
- 1 tablespoon ground cinnamon
- 1 tablespoon vanilla extract
- 4 large eggs room temperature
- 1 1/2 cups all-purpose flour
- 2 bars spiced chocolate bars 3 ounces, such as chipotle or chili, chopped
- 6 ounces milk chocolate chips or semi-sweet
[toggle the chocolates to be more or less spicy based on your tastes, but equal 12 ounces total]
Instructions
- Preheat the oven to 350-degrees. Line a 9x13 pan with parchment paper or aluminum foil and grease the surface.
- In a medium-sized saucepan set over low heat, melt the butter, then add the sugar. Stir to combine. Heat the mixture briefly, just until it's hot throughout; it'll become shiny as you stir it. Set on a cool burner or trivet.
- Stir in the cocoa, salt, baking powder, espresso powder, cinnamon, and vanilla.
- Whisk in the eggs, stirring until smooth. Add the flour, again stirring until smooth. Fold in the chopped spicy chocolate and mild chocolate.
- Spoon the batter into the pan, spreading it to the edges. It will be extremely thick and lava-like.
- Bake the brownies for 34 to 36 minutes, until a cake tester inserted into the center comes out clean. The brownies should feel set on the edges, and just barely set in the center.
- Remove from the oven. Allow to cool completely in the pan before cutting.
- OM NOM NOM!
Read More
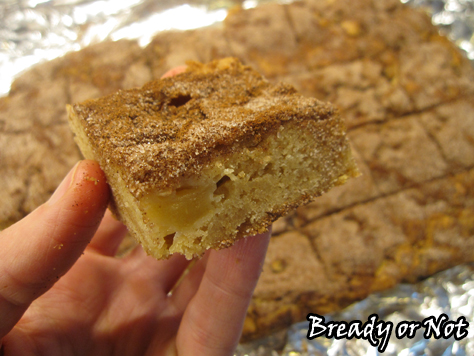
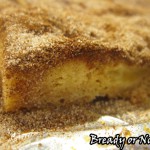
A Bready or Not Original: Apple Snickerdoodle Bars
I have shared many takes on snickerdoodles and many versions of apple cake and pie. This time, I combine apple cake and snickerdoodles to make something especially awesome.
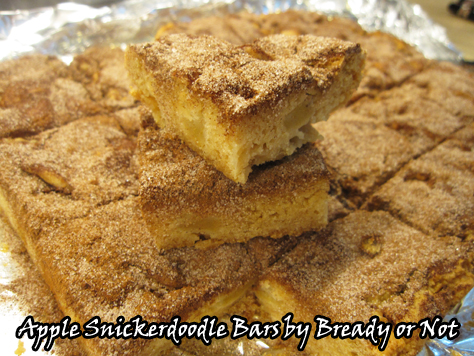
These Apple Snickerdoodle Bars are incredibly straightforward to make. The most time-consuming thing is peeling and dicing the apples. The batter comes together fast, the apples mix right in, and you top the whole thing with a cinnamon-sugar layer.
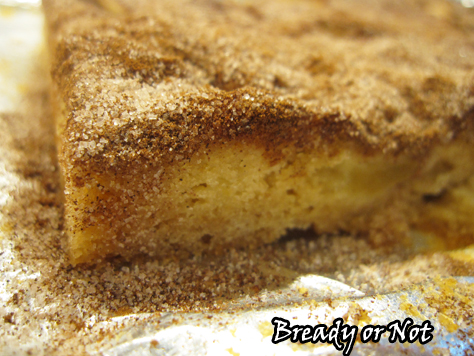
In under thirty minutes of baking, BOOM. You have created a masterpiece.
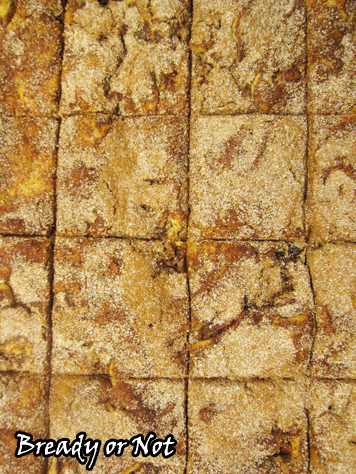
Seriously, if you love apples and snickerdoodles, a piece of this will be like heaven. It is dense and tender, not crumbly at all. The topping crisps up in an amazing way.
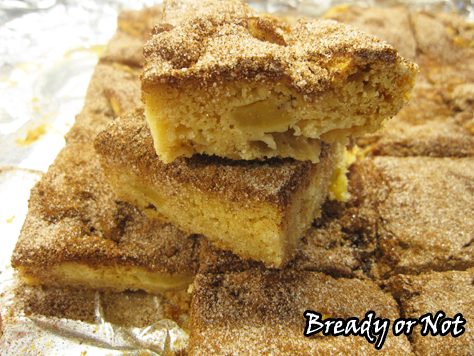
I store these cut-up between wax paper layers in the fridge. They also freeze well.
If you’re bonkers for these bars, freezing them might help with the matter of restraint.
A Bready or Not Original: Apple Snickerdoodle Bars
Ingredients
Bars
- 2 cups baking apples 2 medium apples, peeled & diced
- 2 cups all-purpose flour
- 1 tsp salt
- 2 teaspoons baking powder
- 1 tsp cream of tartar
- 1/2 cup butter 1 stick, melted
- 2 cups brown sugar packed
- 2 eggs room temperature
- 2 teaspoons vanilla extract
Topping
- 1/4 cup white sugar
- 3 teaspoons cinnamon
Instructions
- Line a 13x9 pan with aluminum foil or parchment paper. Apply nonstick spray or butter. Preheat oven at 350-degrees.
- Peel and dice the apples; stir in some flour to lightly coat to prevent browning as you prepare the batter.
- In a medium bowl, combine the flour, salt, baking powder, and cream of tartar. Set aside.
- In a large bowl, mix the melted butter and brown sugar. Add the eggs and vanilla. Slowly stir in the dry ingredients. Once that is just combined (it will be very thick), add the diced apples.
- Dollop the batter into the prepared pan and spread it out evenly. In another small bowl, combine the white sugar and cinnamon. Use a spoon to cover the top of the batter with the cinnamon-sugar.
- Bake for 28 to 32 minutes, until the top is set and the middle passes the toothpick test. Let cool at room temperature and then chill in the fridge. Use the parchment or foil to lift the bars out for easy cutting on a board. Store bars in a sealed container in the fridge.
- OM NOM NOM!