


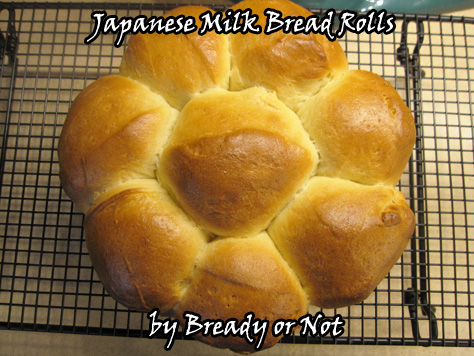
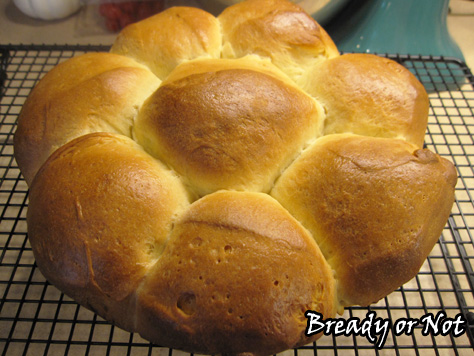
Bready or Not: Japanese Milk Bread Rolls
This recipe for Hokkaido-style milk bread rolls makes 8 delicious soft, airy, amazing rolls.
I couldn’t help but be intrigued when I saw this recipe featured in a King Arthur Flour catalog. It relates to the cultural fusion that plays a major role in my latest book, Breath of Earth.
See, yeast breads in Japan were a real life kind of steampunk innovation. European bakeries began to open in major Japanese cities in the 1800s, but they didn’t become more popular until later in the century when bakers began to fuse more Japanese flavors like adzuki paste into rolls. These kinds of sweet bread (kashi-pan) play a small yet vital role in my next book, Call of Fire.
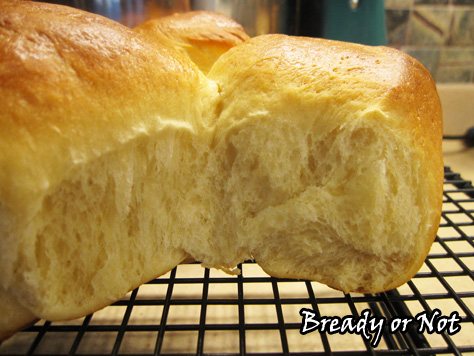
This particular roll isn’t sweet unless you add some jam on your own. These are more of a combination between a standard dinner roll and an egg-based bread like challah.
I usually don’t make breads that involve a pre-ferment stage, but I was pleased with how easy this was to make. I had the dough mix and rise in my bread machine, but you can mix this by whatever method you choose.
This is modified from the recipe at King Arthur Flour. They note there that this can also be made in loaf form. I also have my own recipe for doing a full loaf of Japanese-style Milk Bread (Shokupan). This is my usual load bread that I make about twice a week.
I can tell you, my husband wouldn’t mind if I made these rolls a lot more frequently as well.

Bready or Not: Japanese Milk Bread Rolls
Ingredients
Tangzhong (starter)
- 3 Tablespoons water
- 3 Tablespoons whole milk or half & half
- 2 Tablespoons bread flour
Dough
- 2 1/2 cups bread flour
- 2 Tablespoons nonfat dry milk
- 1/4 cup white sugar
- 1 teaspoon salt
- 1 Tablespoon instant yeast
- 1/2 cup whole milk or half & half
- 1 large egg
- 1/4 cup unsalted butter 4 Tablespoons, melted
- 1 egg optional, or extra milk to use as a wash
Instructions
To make the tangzhong:
- Combine the starter ingredients in a small saucepan on low heat. Whisk until no lumps remain and continue to beat until it's thick and the whisk leaves no lines across the bottom of the pan; this takes 3 to 5 minutes. Pour it into a cup and set it aside to cool to room temperature.
To make the dough:
- Combine the remaining dough ingredients and add the tangzhong. Continue to knead by hand, mixer, or bread machine until a smooth, elastic dough forms. Add more milk or flour if necessary to achieve the right texture.
- Shape the dough into a ball and set it in a lightly greased covered bowl for about 60 to 90 minutes. It should be puffy, not necessarily doubled in size.
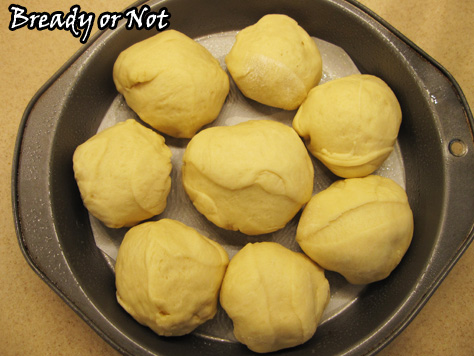
- Prepare a small cake pan by lining the bottom with a cut round of parchment paper. Use nonstick spray on the base of the pan so the parchment stays in place, then spray the top of the paper and the sides of the pan.
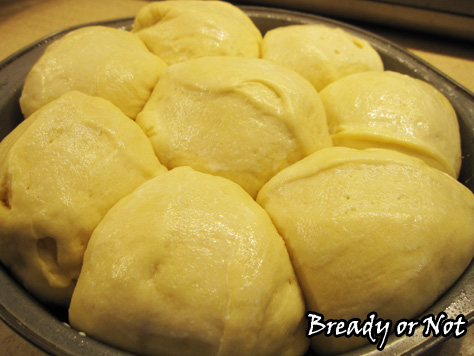
- Gently deflate the dough and divide it into 8 equal pieces. Shape each piece into a ball and place them in the pan. Cover it with plastic wrap and let the rolls rest for 30 minutes to an hour; keep an eye on them in case they rise fast!
- Preheat the oven at 350-degrees. Gently brush the rolls with milk or an egg wash (1 egg beaten with 1 Tablespoon water).
- Bake the rolls for 25 to 30 minutes, until they are golden brown on top. To check for doneness, use a digital thermometer inserted into the center of the middle roll to see if it is at least 190°F. If the rolls must cook longer, cover them with foil if they are very brown.
- Remove rolls from the oven. Let them cool in the pan for 10 minutes, then transfer them to a rack to cool completely.
- OM NOM NOM!
Read More
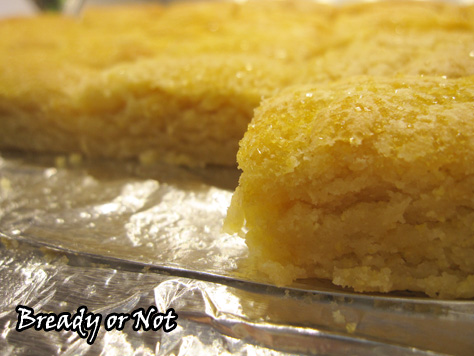
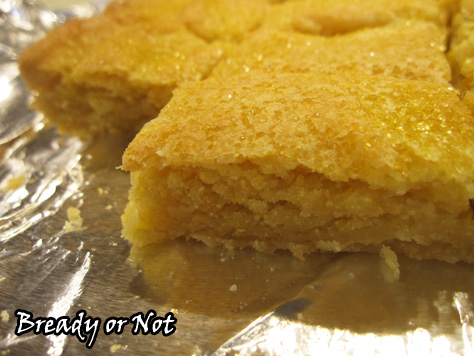
Bready or Not: Citrus Cornmeal Shortbread
Almost exactly a year ago, I shared my recipe for Lemon Cornmeal Shortbread. Now I’m sharing a slight twist: Citrus Cornmeal Shortbread!

If you have oranges growing or catch a good deal at the store, use them for this shortbread! You could also use Clementines or other citrus; I’m not sure how many you’d need, but you want almost 1/2 cup of juice.
One of the wonderful things about this shortbread–like its predecessor–is that it’s fantastic to pack and ship or bring on trips. These cookies are firm and durable while still soft to eat, and they keep for at least a week.
These cookies have the signature buttery-soft texture of shortbread complemented by the slight grit of cornmeal. The orange in these cookies makes them milder than the all-lemon version. If you have orange extract, use that as well!
Not only are these cookies delicious, but they look pretty, too.

Bready or Not: Citrus Cornmeal Shortbread
Ingredients
- 1 1/2 cups unsalted butter 3 sticks, room temperature
- 2 cups confectioners' sugar
- 2 oranges zested and juiced
- 1/2 cup fresh orange juice
- 1 teaspoon lemon extract or orange extract
- 2 1/2 cups all-purpose flour
- 1/2 cup yellow cornmeal
- 1/2 teaspoon salt
- turbinado sugar or sparkling sugar
Instructions
- Preheat oven at 325-degrees. Line a 9x13 pan with aluminum foil and apply butter or nonstick spray.
- In a mixer bowl, combine the butter, sugar, orange zest, and extract. Beat until it's light and creamy, about 2 to 3 minutes. Add orange juice and stir.
- In a separate bowl, sift together the flour, cornmeal, and salt. Slowly mix into the wet ingredients until it is just mixed. Dump the dough into the ready pan and use an uneven spatula to even it out.
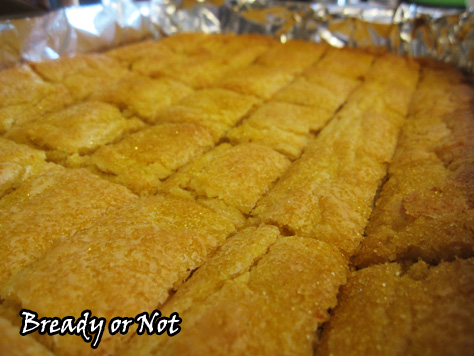
- Use a knife to score the bars, gently cutting through to establish where it will be sliced again after baking. The dough is very sticky; wipe the blade between passes, and dab the excess back into the top. It doesn't need to look neat. Completely sprinkle the top with turbinado sugar or sparkling sugar.
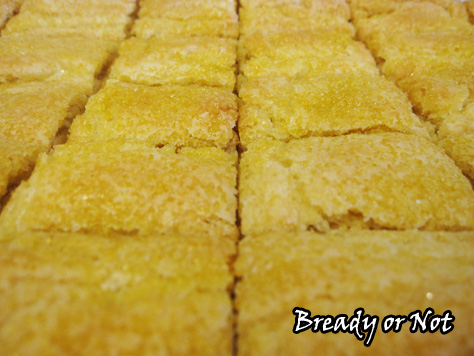
- Bake until the shortbread looks dry and golden, about 35 to 40 minutes. Immediately use a knife to follow the previous lines and slice the shortbread into bars (when cool, the shortbread will likely crumble when cut). Set the whole pan on a rack to cool, eventually lifting them out by the aluminum foil to finish cooling.
- Store in sealed containers at room temperature. This citrus cornmeal shortbread is excellent for travel and shipping as it keeps well for at least six days.
- OM NOM NOM!
Read More
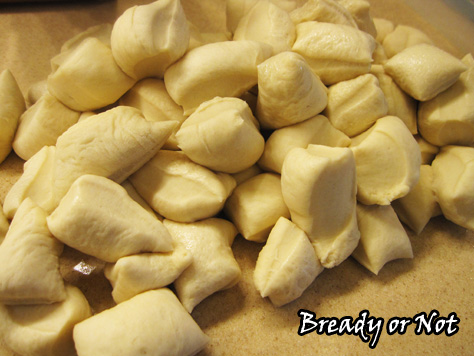
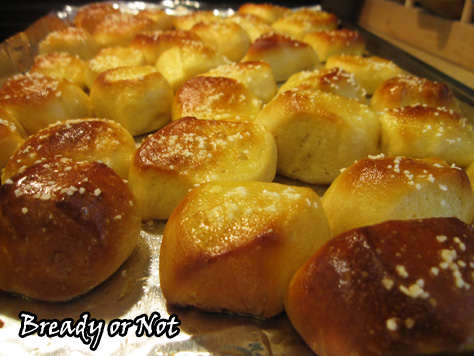
Bready or Not: Soft Pretzel Bites
These soft pretzel bites are bready perfection that fits in the palm of your hand.

I first featured this recipe on my old LiveJournal back in 2012. It’s one I’ve continued to make a couple times a year in the years since. The recipe is reliable and delicious!
If you’re intimidated by yeast dough, this is a good starter recipe. The dough comes together quite easily and it’s not persnickety to work with. I include directions for making it in a stand mixer and bread machine, but you can certainly make it by hand–it just takes some wrist work.
You don’t need fancy ingredients for this, either. It doesn’t even call for bread flour. Mind you, if you do plan to make pretzels often, I highly recommend grabbing pretzel salt. Unlike kosher salt, it doesn’t absorb into the baked dough, but maintains its crystalline texture and great taste. (I’ve been working on a tub of this stuff for almost four years! It doesn’t go bad, so hey.)
These pretzel bites taste best within a day of being made, but the fabulous thing is that these keep very well in the freezer. Just freeze them in a single layer on waxed paper, drop them in a gallon freezer bag, and ta-da! Pull out the whole bag or a few here and there when you need a pretzel bite fix over the next few weeks.
Because trust me, these things are addictive.
Modified from Jamie Cooks It Up!

Bready or Not: Soft Pretzel Bites
Ingredients
Dough:
- 1 1/2 cups warm water 90 to 100-degrees
- 2 Tb brown sugar packed
- 1 Tb instant yeast
- 6 Tb unsalted butter melted
- 2 1/2 teaspoons salt
- 4 1/2 - 5 cups all-purpose flour
Water bath:
- 12 cups water
- 3/4 cup baking soda
- 1 egg beaten until frothy
- pretzel salt or kosher salt
Instructions
If making with a stand mixer
- Pour 1 1/2 cups warm water into your mixer; use the standard paddle attachment. Add 6 tablespoons melted butter, 2 tablespoons brown sugar and 1 tablespoon instant yeast. Mix on low for 30 seconds or so. (If using active yeast, let it sit for about five minutes to get frothy.)
- Add 2 1/2 teaspoons salt and 2 cups of the flour; put dough hook on mixer. Turn mixer to low and add the rest of the flour, 1 cup at a time as the mixer runs. The flour is adequate when the dough pulls itself away from the sides of the bowl.
- Turn mixer to medium speed and let it knead for 5 minutes.
- Remove bowl from stand and cover with plastic wrap. Let the dough rise for 1 hour, or until doubled in size.
If making with a bread machine
- Place ingredients in machine in specified order. In many, that means liquids first. Add in brown sugar, melted butter, salt, 4 1/2 cups flour, and yeast.
- Set machine on a basic dough cycle. Monitor as it starts mixing and add more dough as needed to produce a soft, non-tacky dough; this will likely be 1/4 to 1/2 cup more. Let machine complete dough cycle and rise.
Now, regardless of how you start the dough
- Rub counter space with butter or apply cooking spray, and likewise prepare two rimmed cookie sheets. Using a sharp knife or pizza cutter, slice the dough into eight equal portions. Let dough rest for 5 to 10 minutes.
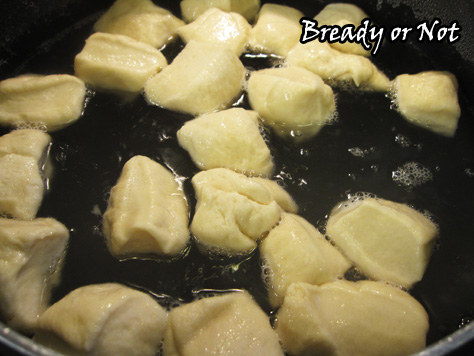
- While the dough is resting, pour 12 cups of water into a large pot; bring to a boil. Pour in 3/4 cup baking soda; it will get very frothy. Turn down the heat if necessary, keeping the water to a low boil.
- Preheat oven at 425-degrees.
- Return to the dough and roll each piece into a long rope. Cut each rope into little chunks about 2 inches wide.
- Carefully drop the chunks into the boiling water. Let them boil for 1 minute. Do a dozen or so at a time.
- Use a strainer or slotted spoon to remove dough pieces from the boiling water. Place pieces on the prepped cookie sheets. Continue until all the bites have had their bath.
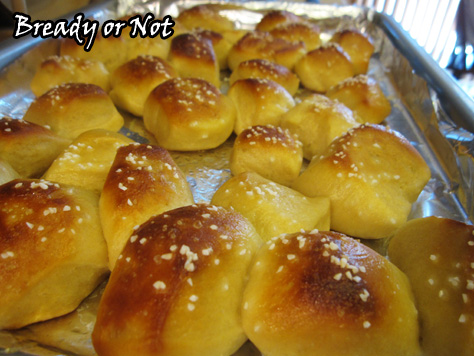
- Brush the beaten egg over the top of each dough piece and then sprinkle a bit of salt over the tops.
- Bake the bites for 10-14 minutes or until golden brown. They cook fast, so keep an eye on them.
- Let pans cool at least 10 minutes before you begin to indulge. Pretzels bites taste best eaten within a day, but can also be kept frozen for a few weeks and they thaw quickly. Eat at room temperature or slightly warmed.
OM NOM NOM!

Read More
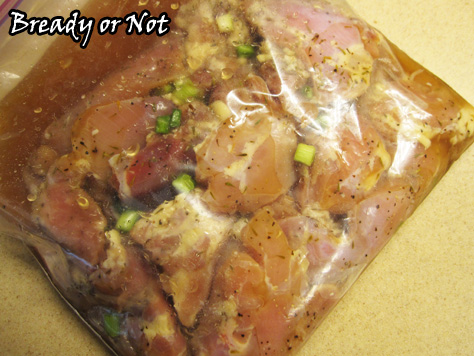
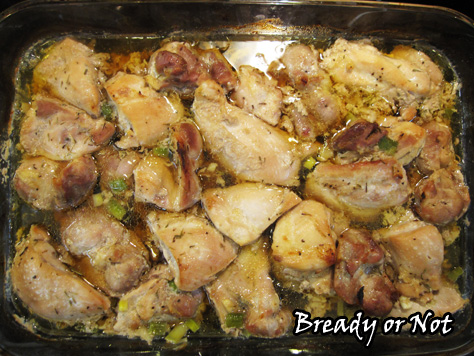
Bready or Not: Maple Chicken Thighs
You know I love maple-flavored sweets. Maple works in a savory way, too–and creates meaty magic in this recipe for Maple Chicken Thighs.

This is some seriously good chicken. It marinates for up to a day in the fridge, resulting in tender, lightly-sweetened chicken. It does not create a heavy glaze and it’s not like teriyaki. It is… just plain delicious.
Honestly, I think the leftovers are even better. This chicken is phenomenal cut up in a salad or used with a touch of dressing in a wrap.

This is yet another recipe inspired from the cookbook Maple by Katie Webster. (Seriously, if you love maple, get this book.) The original version of this recipe included shallots (which I never buy) and apples and pears (which I knew my husband wouldn’t want with his supper).
Give this chicken recipe a try, and discover a new way to love maple!

Bready or Not: Maple Chicken Thighs
Ingredients
- 3/4 cup apple cider or apple juice
- 1/2 cup pure maple syrup
- 1 Tablespoon apple cider vinegar
- 3 green onions white parts only, chopped
- 1 teaspoon ground ginger
- 1 teaspoon dried thyme
- 3/4 teaspoon salt
- 1/2 teaspoon black pepper
- 2 1/2 - 3 lbs boneless skinless chicken thighs each thigh cut into thirds
Instructions
The day or night before serving
- In a medium bowl, whisk together the apple cider/juice, maple syrup, vinegar, white portions of green onions, ginger, thyme, salt, and pepper. In a gallon-size re-sealable bag, place the cut-up chicken. Pour in the marinade and seal the bag.
- Refrigerate the bag for 12-24 hours, turning the bag every so often.
To cook
- Preheat oven at 425-degrees. Place the chicken in a 13x9 baking dish with all or some of the marinade; the chicken shouldn't be fully covered.
- Bake for about 40 minutes, turning chicken once at the halfway point.
- Chicken is fabulous fresh and as leftovers! Cooked chicken can also be portioned and frozen.
OM NOM NOM!

Read More
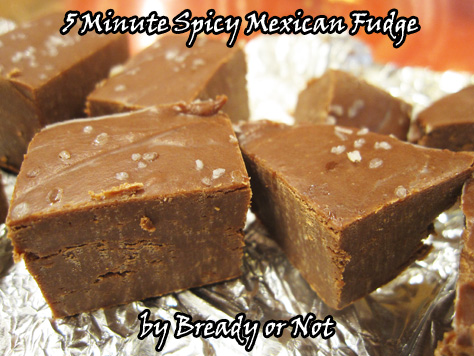
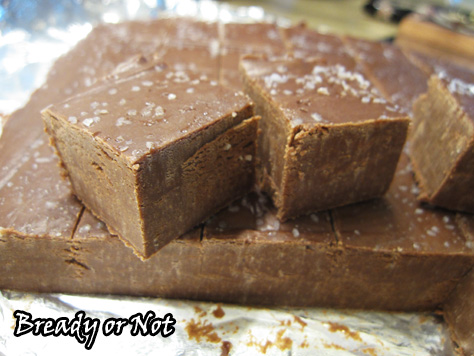
Bready or Not: Five-Minute Spicy Mexican Fudge
I am here today to preach about fudge inclusiveness as I share a recipe for Five Minute Spicy Mexican Fudge.
I do not sneer at some fudges as being “better” or “real.” To me, it does not matter if the fudge is produced on stove top with a candy thermometer, or with a jar of marshmallow cream, or melted in the microwave.
When it comes to fudge, what matters is this:
Does the fudge taste good? Is the texture pleasing to the palate? Does it make me mutter, “Calories be darned to heck,” and reach for another piece?
That is the criteria by which fudge should be judged.
That said, I present to you a fudge that is zapped in the microwave and assembled all of five minutes. Let it set in the fridge for a few hours, and ta-da! You have a fudge that will keep well for days. It also holds up well at room temperature if you’re serving it at a party.
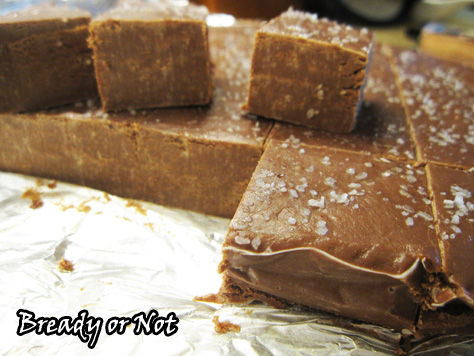
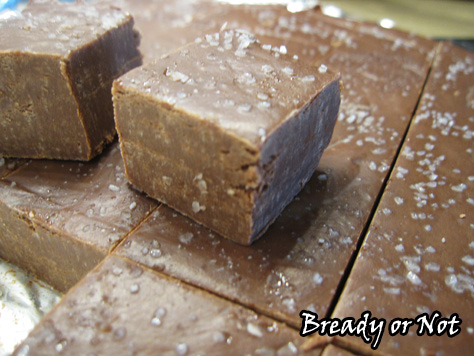
The Mexican spice element comes from cinnamon and cayenne pepper. I used the minimal amount of pepper, 1/8 teaspoon, which provides complexity but absolutely no discernible heat. Tweak the scorch level to your personal taste. Do, however, sprinkle coarse salt to add some lovely contrast.
Originally featured at the Holy Taco Church. Recipe adapted from Wine and Glue.
Bready or Not: Five-Minute Spicy Mexican Fudge
Ingredients
- 3 cups milk chocolate chips about a bag and a half
- 14 ounce sweetened condensed milk can
- 1 tsp vanilla extract
- 1 tsp cinnamon Mexican cinnamon preferred
- 1/8 - 3/4 tsp cayenne pepper
- kosher salt or coarse sea salt
Instructions
- Line an 8 or 9-inch square pan with aluminum foil or parchment paper. Lightly grease it.
- Use a microwave or sauce pan to melt together the chocolate and sweetened condensed milk. If you're using the microwave, use short bursts of 20-30 seconds and stir well between each.
- Once the chocolate mix is smooth, pour in the vanilla extract, cinnamon, and cayenne pepper. (Note that 1/8 teaspoon provides a little flavor, not much heat, so add cayenne and taste to adjust to desired heat level.)
- Immediately pour the fudge into the prepared pan. Smooth out to edges and sprinkle salt all over the top. Let set in fridge at least four hours before cutting. Keeps in covered dish in fridge for upwards of a week.
- OM NOM NOM!

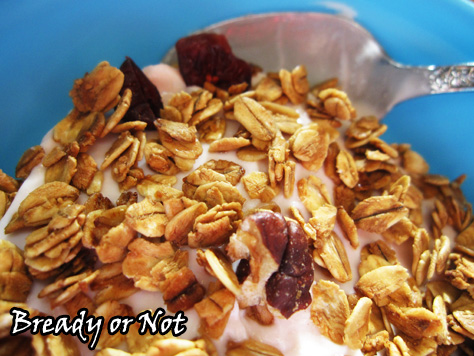
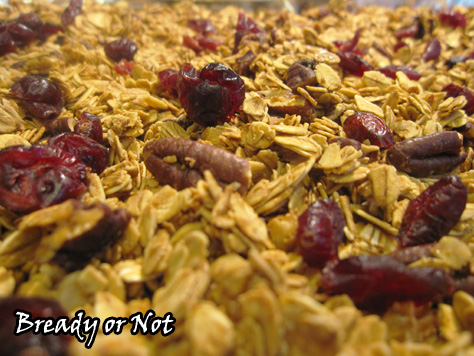
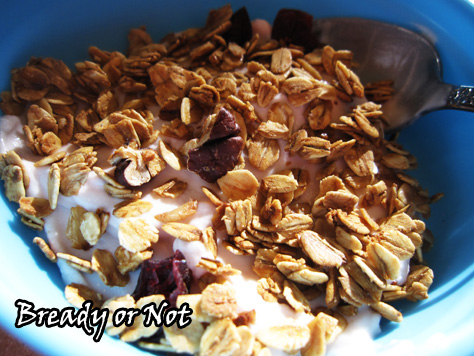
Bready or Not: Maple Cranberry Pecan Granola
Let’s start off 2017 with something delicious and healthy: Maple Cranberry Pecan Granola.

It’s super easy to make granola at home, and wow, is it cheaper than buying the stuff at the store. If you have a nearby store that sells oats in bins, that’s the way to go–my Sprouts often puts their oats on sale, too.
It’s easy to customize this to your preferences. Switch out the pecans for walnuts. Use raisins or dried blueberries for the cranberries. Whatever. Make it your own.
If you need gluten-free food, that’s easy, too–just use gluten-free oats! Ta-da.

Eat this granola by itself, or with milk or almond milk as cereal, or as a topping for yogurt or ice cream. Heck, you could even use it in cookie or granola bar recipes.
However you eat it, know that it’s delicious–and good for you, too!

Bready or Not: Maple Cranberry Pecan Granola
Ingredients
- 2 cups old-fashioned rolled oats
- 1/4 cup pecans chopped
- 1/4 cup pure maple syrup
- 1/2 Tb avocado oil or olive oil
- sprinkle salt
- 1/4 cup dried cranberries
Instructions
- Preheat oven at 325-degrees. Line a large, rimmed cookie sheet with foil and apply nonstick spray.
- In a large mixing bowl, stir together all of the ingredients EXCEPT the cranberries. Spread the mixture on the cookie sheet. Bake for about 20 minutes, gently stir the granola, and bake for another 10 to 15 minutes, until it's crisp and golden. Let set out on stove top to cool; it will continue to crisp up.
- Once it is room temperature, gently stir in the cranberries. Store in a sealed container up to 1 month.
- OM NOM NOM!
Read More
