


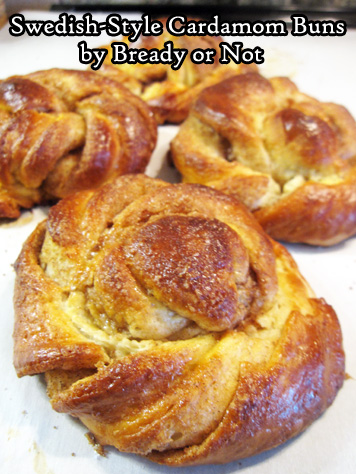
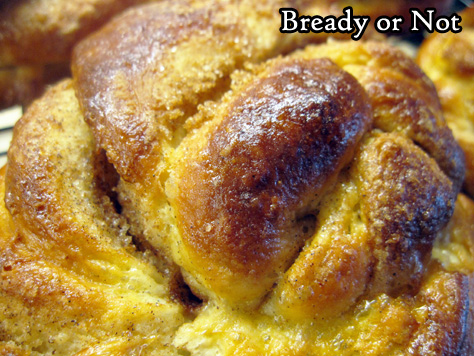
Bready or Not: Swedish-Style Cardamom Buns
These Swedish-Style Cardamom Buns are as delicious as they are beautiful, and that’s saying a lot.
This enriched dough is light and luscious, and almost melts in the mouth. It’s also somewhat tricky to work with as the dough warms quickly as the rolls are formed. I was dismayed as the dough became tacky as I did the final rolls, but you know what?
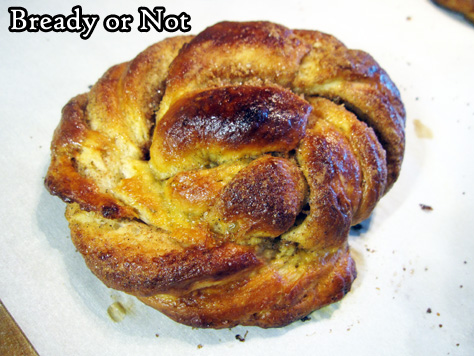
These rolls are beautiful as they are. Sure, Paul Hollywood would criticize them for not all being the exact same, but I’m not on Great British Bake Off–and neither are you. Embrace the wabi-sabi of these rolls, the perfection in imperfection.
Plus, when it comes down to it, the flavor and texture are fantastic. The buttery crumb is perfect with a likewise buttery center swirl that’s packed with cardamom and cinnamon.
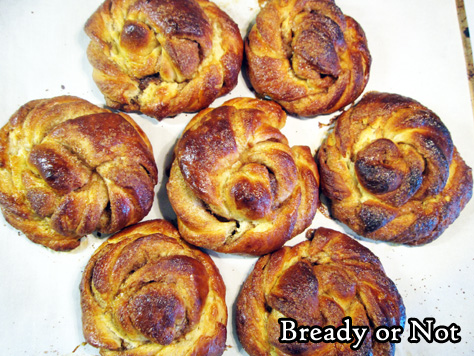
These buns taste best when slightly warm. Eat them fresh, and after that, give them a quick toast in the oven to wake up the flavor.

The buns will keep for up to 3 days at room temperature, but be sure they are in a sealed container. They can also be frozen and thawed later, no problem.
Make these buns to really impress guests–and yourself. Like me, I bet you’ll find this recipe to be a keeper.
Modified from Saveur Magazine Volume 4 2018.
Bready or Not: Swedish-Style Cardamom Buns
Equipment
- stand mixer
- parchment paper
- kitchen brush
Ingredients
Dough
- 1/2 cup cold milk or half & half
- 1 Tablespoon instant yeast
- 3 large eggs room temperature
- 1 teaspoon pure vanilla extract or vanilla bean paste
- 3 1/4 cups all-purpose flour plus more as needed
- 1/4 cup white sugar
- 1 1/4 teaspoons kosher salt
- 2 sticks unsalted butter (16 Tablespoons) cold, cut into cubes
Filling
- 1/4 cup white sugar
- 1/4 cup light brown sugar packed
- 1 Tablespoon ground cardamom
- 1 teaspoon ground cinnamon
- 1/2 stick unsalted butter (4 Tablespoons) softened
Instructions
- In a small bowl, whisk together the milk, 2 of the eggs, and the vanilla. Set aside.
- In the bowl of a stand mixer with a paddle attachment affixed, mix together the flour, sugar, and salt. Mix in the chilled butter cubes until they are broken down to the size of peas, which will take a minute or two. Keep the mixer running as the milk mixture is drizzled in. Everything should come together as dough.
- Turn out dough onto a lightly floured surface. Knead it into a ball and wrap it tightly in plastic wrap. Chill it in fridge for at least 6 hours, or a full day.
- About 2 1/2 hours before the buns are to be served, prepare to shape them. Line 2 baking sheets with parchment paper. In a small bowl, mix together the filling’s two sugars, cardamom, and cinnamon. In another bowl, beat the remaining egg with a splash of water and set it aside.
- Lightly flour a large, clean work surface and a rolling pin. [Note for bakers who have hot kitchens: you may need to move fast here, as high-butter content dough can be finicky as it warms.] Roll out the dough into a 12×16 rectangle. Use an uneven spatula or the back of a spoon to evenly spread the softened butter over the surface, leaving a 1-inch border along the top and bottom edges.
- Sprinkle the sugar and spice mixture over the butter. Brush the edges with the beaten egg; set aside the egg to use again for a wash in a short while. Fold the dough in half so that the two egg-washed edges meet. Then use a knife, pizza cutter, or bench knife to make ten even slices perpendicular to the fold.
- One at a time, pick up a strip at the two short ends and twist them each in opposite directions while pulling and stretching gently. Coil the strand to make a bun, tucking the outermost end underneath the round. Set on prepared sheet and continue to form more with several inches of space between them.
- Cover formed buns with plastic wrap and set aside to rise until puffed, about 1 1/2 hours.
- Preheat oven at 400-degrees and situate racks inside to have five inches of space between them.
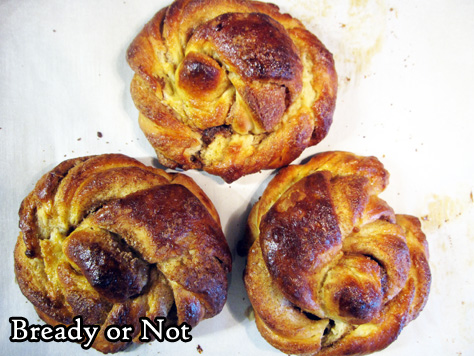
- Remove the plastic wrap and brush the buns with the remaining egg wash. Bake for 12 minutes, then swap the pan positions in the oven, then bake another 8 to 12 minutes. Buns should be a consistent brown, and a digital thermometer discreetly plunged into a center roll should be over 190-degrees.
- Let rolls cool slightly before indulging. Rolls will keep for up to 3 days in a sealed container at room temperature, and will taste best warmed slightly in an oven or toaster oven. Rolls can also be frozen for later enjoyment.
OM NOM NOM!
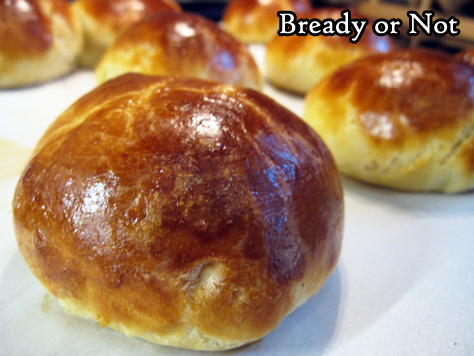
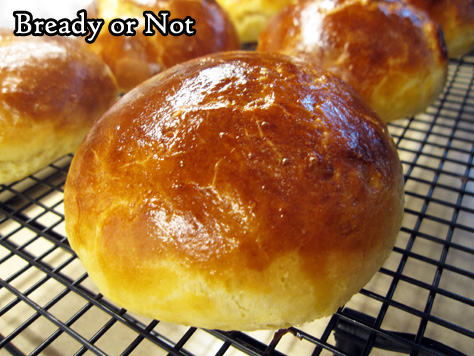
Bready or Not Original: Food Processor Brioche Rolls
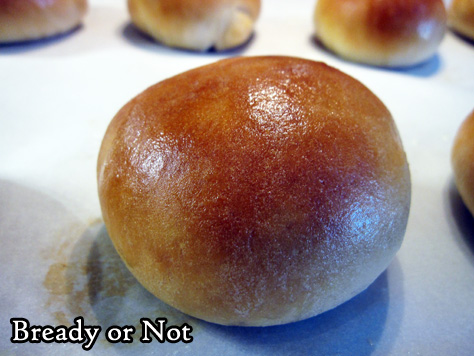
My no-fuss Food Processor Brioche Rolls recipe will dazzle your mind because they are SO EASY. Enriched doughs like this have a reputation (that is well-earned) to be time-consuming and aggravating. Not anymore.
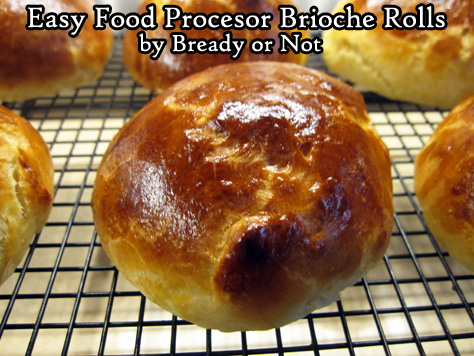
The food processor is what makes this easy-peasey. It mixes the dough in no-time, and aerates the butter and eggs into the flour and develops that all-important gluten.
These rolls are good for any variety of uses, as they can be eaten with things sweet and savory. As the bread is nice and durable, we found they worked well for shredded pork sandwiches, with barbecue sauce and all.
Once these are baked-up, they are fantastic to freeze and thaw, too. They really are best eaten within a day–I suppose they still had to be fussy in at least one way!
Bready or Not Original: Food Processor Brioche Rolls
Equipment
- food processor
- food scale
Ingredients
1-lb batch
- 1/4 cup warm water no hotter than 130-degrees
- 2 1/4 teaspoon dry yeast 1 packet
- 1 3/4 cups all-purpose flour
- 3 Tablespoons white sugar
- 1/4 teaspoon salt
- 2 large eggs room temperature
- 6 Tablespoons unsalted butter melted
2-lb batch
- 1/2 cup warm water no hotter than 130-degrees
- 4 1/2 teaspoons dry yeast 2 packets
- 3 1/2 cups all-purpose flour
- 6 Tablespoons white sugar
- 1/2 teaspoon salt
- 4 large eggs room temperature
- 12 Tablespoons unsalted butter melted (1 1/2 sticks)
For egg wash
- 1 large egg room temperature
- 1 Tablespoon milk or half & half
Instructions
Follow these same directions, regardless of the batch size.
- Affix steel S-blade inside food processor.
- In a cup, stir together the dry yeast and water. Place the flour in the work bowl, followed by the yeast-water, sugar, and salt. Pulse a few times. Add the eggs and spin until they are mixed in, no more than 10 or 15 seconds.
- Start the processor on low and pour in the melted butter in a solid stream. Stop mixing after about 20 seconds. The dough will be very sticky and fluid.
- Apply nonstick spray or butter in a big mixing bowl. Pour in the dough. Cover with plastic wrap and let the dough rise at room temperature until it has tripled in size, no more than 3 hours. Keep an eye on it, because it can expand fast.
- Flour hands and punch down dough.
- Cover bowl with plastic wrap again, and stash the bowl in the fridge. Keep it there overnight, at minimum, or up to a day. It will rise a bit but nowhere near as much as the initial rise.
- To make rolls, prepare a baking sheet with parchment or nonstick spray.
- Prepare egg wash. Crack egg into a bowl. Beat in milk. In addition, add water to a small saucer and set it within reach.
- Grab small handfuls of dough. To get amounts even, use a kitchen scale to measure out 4-ounces worth. Working fast, pat into a ball. Dip fingers in water then stroke dough to smooth out rough spots. Set rounds on prepared sheet, spaced out. If the dough gets too sticky to work with, place in fridge briefly to chill again.
- Once rolls are formed, brush them with the egg wash. Let them rise for an hour, until nicely puffed.
- Preheat oven at 400-degrees.
- Gently brush on more egg wash. Place in oven and bake for 12 to 15 minutes, until browned and set. Doneness can be double-checked by jabbing a thermometer into a subtle spot along the bottom to ensure the middle is over 190-degrees.
- Rolls are best eaten within a day, but they keep very well frozen. Eat them warm or at room temperature.
OM NOM NOM!
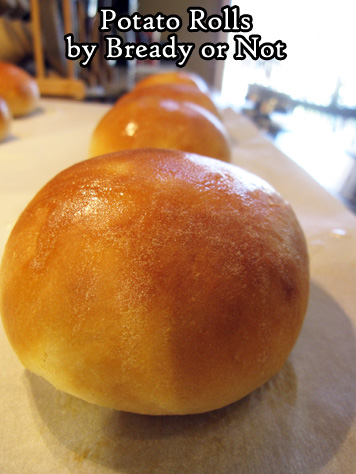
Bready or Not: Potato Rolls
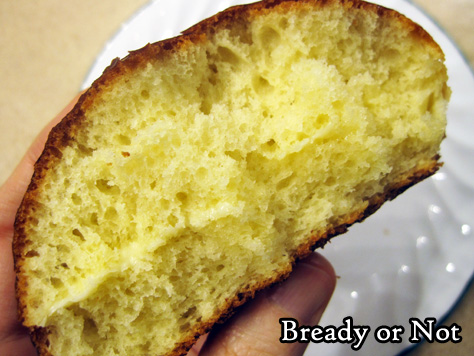
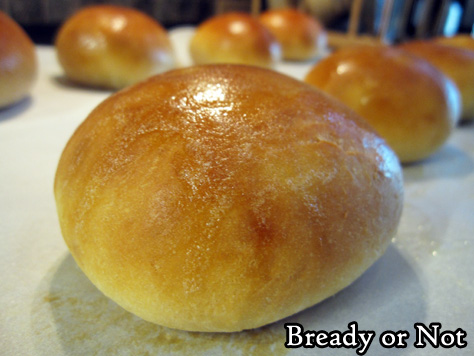
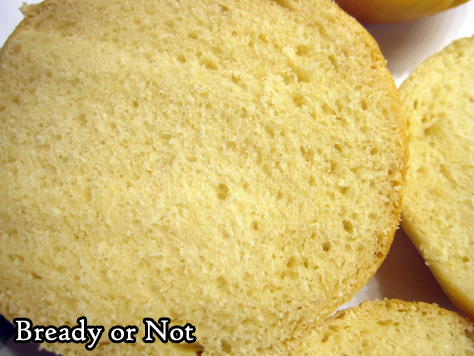
These Potato Rolls are perfect for a hearty sandwich with a wet filling like BBQ sauce.
The ‘potato’ here is potato flour, a not-so-secret ingredient to create soft bread with a tender crumb. It handles moisture in a different way than standard wheat flours.
It’s not the kind of thing carried by a standard grocery store, but the internet comes to the rescue! I use the kind sold by King Arthur Flour (an all-around fantastic purveyor of bready goods), but it is also sold by Bob’s Red Mill and (of course) Amazon. Check your local natural goods store, too.
Nonfat dry milk powder IS sold by many grocery stores, but I like the results of King Arthur Flour’s version best.
I’ve made these rolls several times and I find they didn’t double for me during the rise stages, but did they puff, and at the end the crumb showed a good texture inside.
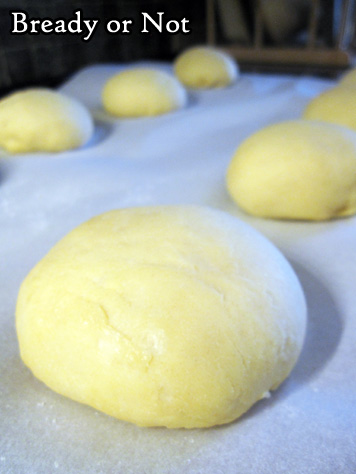
I found that dividing by 8 made for good-sized sandwich rolls, but you can make these as big or small as you want, and any shape, too.
Modified from Food & Wine Magazine June 2020.
Bready or Not: Potato Rolls
Equipment
- parchment paper
- food scale
- basting brush
Ingredients
- 2 2/3 cups bread flour
- 1/3 cup potato flour available from King Arthur Flour and Bob's Red Mill
- 1/3 cup nonfat dry milk powder
- 2 1/2 Tablespoons white sugar
- 2 teaspoons kosher salt
- 2 1/4 oz active dry yeast or one store-bought envelope
- 1 cup warm water 100 to 110-degrees
- 5 Tablespoons unsalted butter divided
Instructions
- In the bowl of a stand mixer, combine the warm water and 4 Tablespoons of melted butter. Add the bread flour, potato flour, milk powder, sugar, salt and yeast, and mix using the dough hook. Beat until the dough is cohesive, about 3 minutes.
- Increase the mixer’s speed and beat for another 6 minutes to make it smooth and elastic. Dough might be sticky. Grease another large bowl and dump the dough in there. Cover with plastic wrap or a towel and let it rise for 45 minutes to 1 hour.
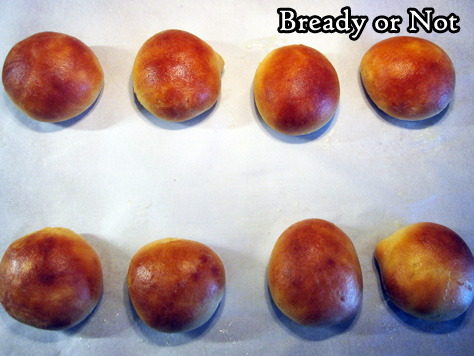
- Place parchment paper on a large baking sheet. Use the food scale to weigh the dough. To make rolls of a good sandwich size, divide the total by eight; if smaller rolls are desired, go smaller. Pull off pieces of dough and shape into rounds. To smooth the surface, keep a saucer with water in it nearby, and use moistened fingers to smooth the dough. Set rounds spaced out on parchment. Loosely cover rolls with plastic wrap or a towel and let rise until they are puffy, about 35 to 45 minutes.
- Preheat oven at 350-degrees. Remove plastic wrap or towel. For sandwich-sized rolls, bake for 15 to 19 minutes, until the outside is nicely browned. Dip the basting brush into the remaining tablespoon of butter, and paint butter atop each roll to make glossy.
- Let rolls cool at least 15 minutes before cutting in. Rolls will keep for at least 2 days in a sealed bag at room temperature. They can also be frozen and thawed for later consumption.
OM NOM NOM!
Bready or Not Original: Mini Cookie Butter-Chocolate Babkas
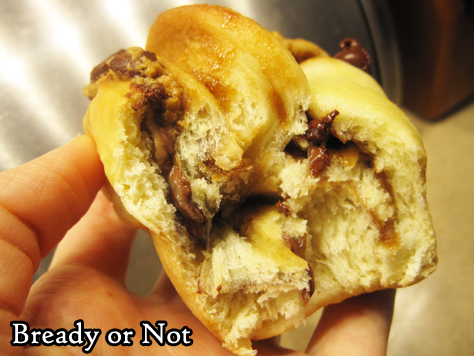
I hope it gets your attention when I say that these Mini Cookie Butter-Chocolate Babkas are among the best things I have ever made.
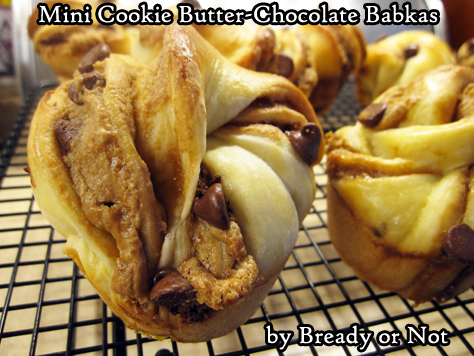
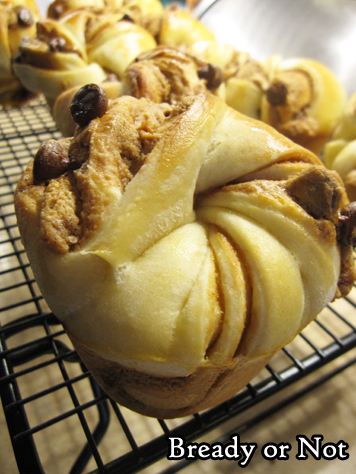
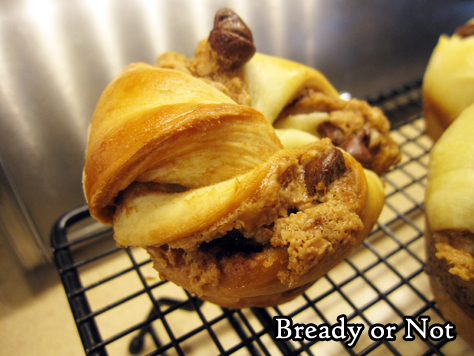
Really, these have it all going on. A tender enriched dough. Gooey chocolate. The sweet joy of cookie butter. Plus, the presentation is stunning with the dough coiled to reveal the layers of goodness.
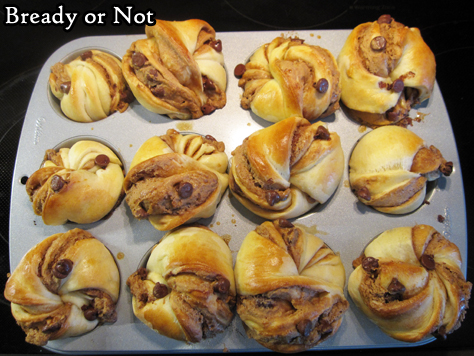
Even better, this recipe is great about portion control. You don’t have a babka loaf to worry about. Each babka is muffin-sized. This makes it easy to take on the go, and they are also convenient to freeze.
If you’re unsure what cookie butter is, it is essentially sliced cookies pureed with oil to be the same consistency as peanut butter. It tastes like cookie dough in its purest form minus the risk of salmonella poisoning from raw eggs or flour. Find it near the peanut butter in a lot of stores; Biscoff is the most common brand, and it’s called Speculoos at Trader Joe’s.
You can, of course, substitute a smooth peanut butter in this recipe–which is what the original recipe in Bake from Scratch was all about. But me, nah, I’m a rebel. And my husband doesn’t like peanut butter, and he’s the one who needs to eat these things.
Modified greatly from Bake from Scratch Magazine July/August 2019; also online.
Bready or Not Original: Mini Cookie Butter-Chocolate Babkas
Equipment
- 12-cup muffin pan
- nonstick spray
- pastry brush
Ingredients
- 4 1/4 to 4 1/2 cups all-purpose flour divided
- 1/2 cup white sugar
- 2 1/4 teaspoons instant yeast or one store-bought packet
- 1 1/2 teaspoons kosher salt
- 1 cup plus 1 Tablespoon water divided
- 1/2 cup plus 1 Tablespoon unsalted butter melted and divided
- 2 large eggs room temperature and divided
- 1 large egg yolk room temperature
- 1 cup creamy cookie butter
- 1/4 cup confectioners’ sugar
- 1 teaspoon vanilla extract
- 1/3 cup semisweet chocolate chips plus extra
Instructions
- In the bowl of a stand mixer fitted with the paddle attachment, stir together 4 cups flour, white sugar, yeast, and salt.
- Using a saucepan or the microwave, heat 1 cup water and 1/2 cup (1 stick) butter until it is 120 to 130-degrees on an instant-read thermometer. Pour the water mixture into the flour mixture. Beat at medium speed for 2 minutes. Add one egg and egg yolk, and beat for another 2 minutes. Beat in a 1/4 to 1/2 cup more flour until a soft, sticky dough forms.
- Switch to the dough hook attachment. Beat at low speed until dough is soft, smooth, and elastic, 6 to 8 minutes.
- Add nonstick spray to a large bowl. Shape dough into a smooth ball, and place in bowl. Roll it briefly to coat in oil. Cover the bowl and let the dough rise in a warm spot until doubled in size, about 45 minutes.
- Use nonstick spray on a 12-cup muffin pan.
- In a small microwave-safe bowl, melt 1 Tablespoon butter. Add to it the cookie butter, confectioners’ sugar, and vanilla, stirring until smooth.
- On a lightly floured surface, roll the dough into roughly a 20x12-inch rectangle. Spread cookie butter mixture onto dough. Sprinkle with chocolate chips. Fold rectangle crosswise into thirds as if folding a sheet of paper for an envelope, forming a smaller rectangle, about 12x6 inches.
- Cut rectangle crosswise into 12 (about 1 inch) dough strips. Gently stretch and twist one to coil it inside a prepared muffin cup, tucking the end inside edge of cup to create a rounded top. Repeat 12 times. If desired, press a couple of additional chocolate chips into the top of each babka, but try to place them so they won't melt off the pan during baking.
- Cover and let rise in a warm spot until they are puffed, about 30 minutes. Meanwhile, preheat oven to 325-degrees.
- In a small bowl, whisk together the last egg with 1 Tablespoon water. Brush tops of dough with egg wash.
- Bake until babkas are golden brown, about 17 to 25 minutes. An instant-read thermometer inserted in center should register 190-degrees.
- Babkas are much better served warm--eat them fresh, or heat up later with a 20-30 burst in the microwave! This makes the dough soft and the chocolate gooey. They keep well sealed at room temperature for up to 3 days, but can also be frozen and thawed later.
OM NOM NOM!
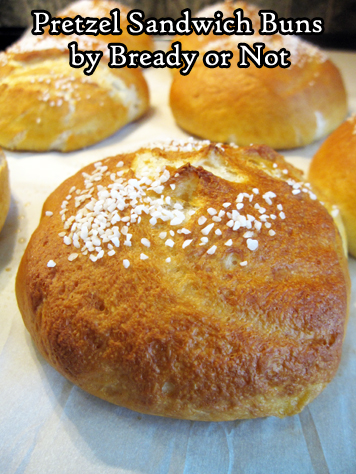
Bready or Not: Pretzel Sandwich Buns
If you need a good, sturdy sandwich roll, these Pretzel Sandwich Buns are delicious bready conveyances.
With my husband home a lot more in 2020, I revisited some bread recipes I hadn’t made in years. This is one of them, which I originally featured on Bready or Not in 2014.
I rewrote the recipe to clarify some things. The recipe is a fine one to do in a KitchenAid (yay, bread hook!), but I really like making this dough in my bread machine. Add the ingredients in whatever order is specified by your machine; for me, that means liquid ingredients first.

When it is time to do the water bath, be vigilant! That baking soda makes the water especially turbulent and foamy.
These rolls are great for things like shredded pork with BBQ sauce. They don’t get soggy and dissolve in your hands. Also, these are just straight-up good split in half, buttered, and heated in the oven.

2020 was a sucky year, but at least it enabled me to rediscover some recipes like this one!
Modified from King Arthur Flour.
Bready or Not: Pretzel Sandwich Buns
Equipment
- large pot
- slotted spoon
Ingredients
Dough
- 1 3/4 cups warm water
- 2 Tablespoons unsalted butter softened
- 3/4 teaspoon salt
- 4 1/2 cups all-purpose flour or bread flour
- 1/4 cup nonfat dry milk
- 2 teaspoons instant yeast
Topping
- pretzel salt or substitute kosher salt
Water Bath
- 2 quarts water
- 1 Tablespoon salt
- 1/4 cup baking soda
Instructions
- Mix and knead the dough ingredients by hand, mixer, or bread machine to make a smooth, slightly sticky dough. If making by hand or mixer, allow the dough to rise in a lightly greased bowl, covered, for about 1 hour, until doubled. In a bread machine, let the full dough cycle run through.
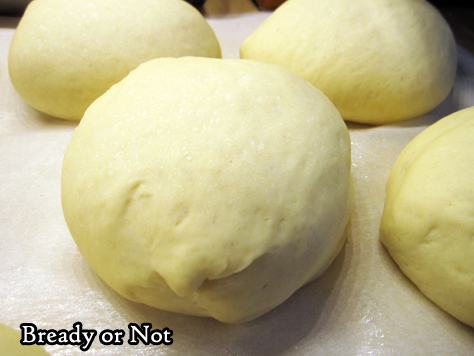
- Gently deflate the dough, and transfer it to a lightly floured work surface. Shape the dough as necessary. This can mean weighing the dough then dividing it into portions, or using a biscuit cutter or other shaper to slice. Note that if the dough is being cut, keep it thick, as it won't double on the second rise. Recipe can make about 5 to 6 big sandwich rolls. Roll dough with hands with smooth out the shape.
- Place the balls on a lightly greased baking sheet, cover with plastic wrap, and let rest for 15 minutes.
- While dough rests, preheat the oven to 400-degrees and prepare the water bath for the stovetop. In a large pot, bring the water, salt, and baking soda to a boil.
- Use a slotted spoon to gently lower several dough balls at a time into the water bath. Cook for 30 seconds, flip over, and cook for 30 seconds longer. Using the slotted spoon, return the buns to the baking sheet.
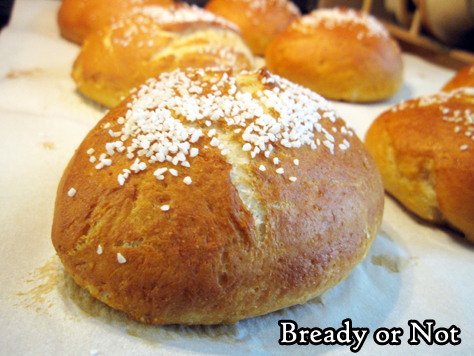
- Use scissor or a sharp knife to cut half-inch deep crosses into the center of each bun. Sprinkle with coarse salt.
- Bake buns for 20 to 24 minutes (or a lower time, if they are shaped smaller). They should be nicely brown all over. Transfer to a rack to cool.
- Buns will keep well in a sealed bag at room temperature for up to 2 days. The bread is great at room temperature or warmed in an oven or toaster oven. The rolls can be frozen, but note that the top can sog slightly when they are thawed, which isn't a problem if the rolls are heated/toasted to be eaten.
OM NOM NOM!
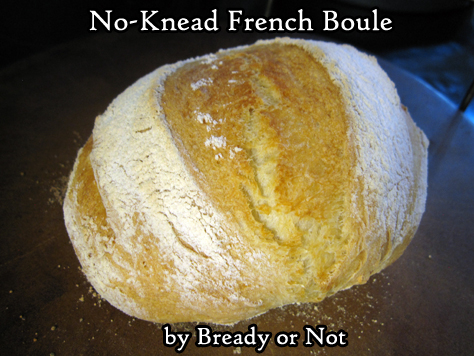
Bready or Not: No-Knead French Boule (French Bread Round)
French bread is one of the best things in the world and it is super-easy to make. All you need are four ingredients and some time.
The time element is not that much of an issue, though, because this takes all of five minutes to mix up. After an initial rise, the dough can then be tucked away in the fridge for up to two weeks.
If this technique looks familiar, it’s because it’s similar to the recipe I shared in February for my favorite pizza dough. They are both modified from the book Artisan Bread in Five Minutes a Day.
The boule, or bread round, is the most traditional form of French bread. The baguette is actually an innovation from the 1920s. The boule was first, and is, arguably, the best.
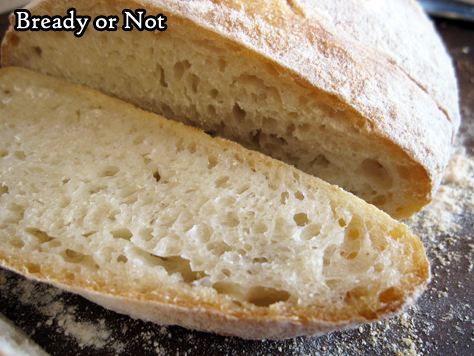
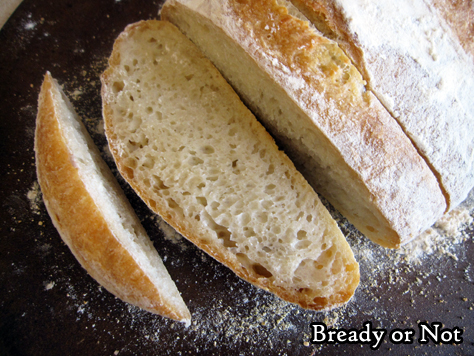
This bread is perfect to slice up, butter, and toast. It’s great for sandwiches. For charcuterie and cheese. To make French toast. Any way you can eat bread, really.
It’s also great to freeze and thaw for later enjoyment! This is really a recipe that is all about convenience, before and after baking.
Bready or Not: No-Knead French Boule (French Bread Round)
Equipment
- baking stone or baking steel
- small metal cake or casserole pan
Ingredients
- 1 1/2 cups lukewarm water
- 2 1/4 teaspoons active yeast or one store packet
- 3 1/4 cups all-purpose flour
- 2 1/4 teaspoons kosher salt
Instructions
- Warm the water to just above body heat, about 100-degrees. Pour it into a large bowl. Add the yeast, flour, and salt. Stir until everything is uniformly moist, no dry patches to be found.
- Loosely cover the bowl with plastic wrap, waxed paper, or an off-kilter lid, and set in a warm spot in the kitchen.
- After about 2 hours, it should double in size and flatten out on the top; a colder kitchen may need as long as 5 hours, which is fine.
- The dough can be used now, but is very sticky. It's easier to work with if it has chilled in the fridge for at least 2 hours, but can idle in there overnight or for as long as 2 weeks. Keep loosely covered so that it doesn't dry out.
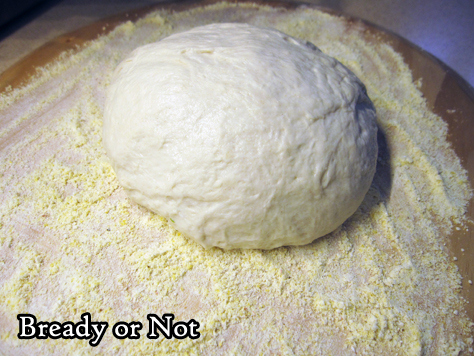
- Prepare a piece of parchment with a dusting or flour, semolina, or fine cornmeal. To shape the dough into a round, dust hands with flour then gently shape dough into a ball, tucking and smoothing rough bits into what will become the bottom. Set dough on prepared parchment. Let rise for 20 to 30 minutes. It may not rise a lot, but should puff a bit.
- Start preheating oven at 450-degrees. Place baking stone or steel in the middle rack of the oven. Place the empty metal cake or casserole pan beneath it. Let the oven heat for 20 minutes.
- Measure out 1 cup of water.
- After the bread has risen for about 40 minutes, lightly dust the top of the dough with flour. Use a lame or serrated knife to slash lines across the top.
- Pull the hot stone or steel from the oven. Use the parchment to carefully transfer the dough onto the hot surface. Set baking sheet into oven. Pull out the heated pan on the shelf below. With care, pour the water into the pan; do not overfill! Gingerly push the shelf back into place and close the oven so that the steaming water can work its magic on the baking bread.
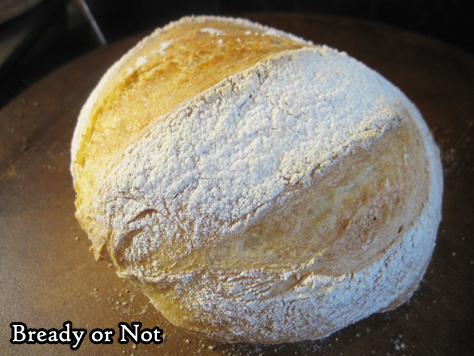
- Bake for about 30 minutes. Do NOT open the oven until the end of that time! The bread should look crusty and golden over the top. Pull out the pan and let the bread cool. It may emit a crackling sound as it cools down. If the bottom is carefully thumped, the bread should sound hollow.
- Let cool about 20 or 30 minutes before cutting into the bowl. Store in a sealed bag for up to 2 days. If freezing portions of the bread, do so within the first day so they will be as fresh as possible.
OM NOM NOM!
Follow me


