


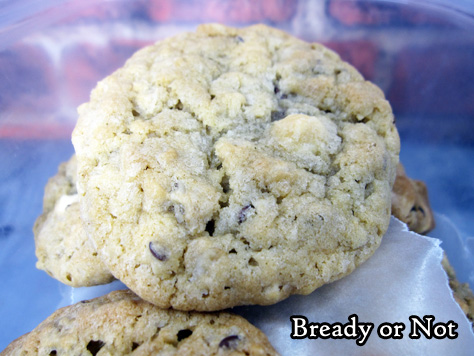
Bready or Not: Apple Butter Oatmeal Cookies
If you love apples and oatmeal cookies, this unique recipe combines those loves in a delicious new form!
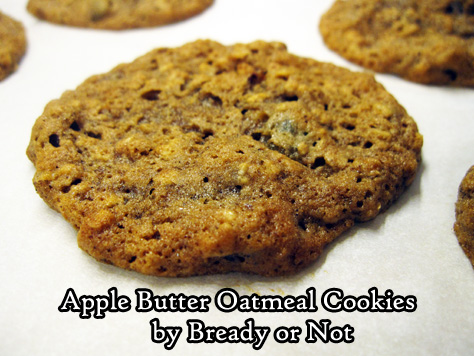
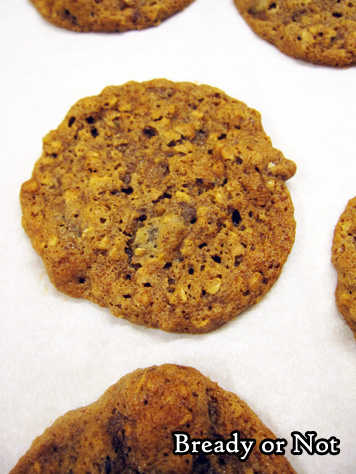
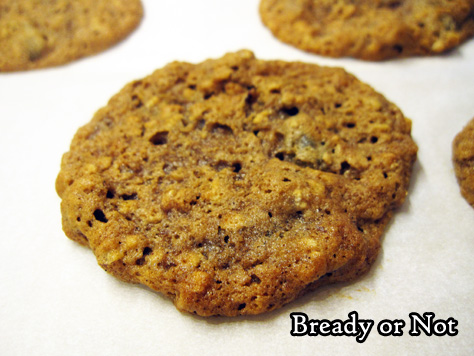
These Apple Butter Oatmeal Cookies are thin and super chewy. Don’t substitute applesauce here. You need real apple butter, homemade or store-bought.
The dough can be finicky to work with. I use well-seasoned stoneware for my cookies, and I was surprised that my first batch completely stuck to the pan. After over a decade of seasoning the stoneware, that almost never happens!
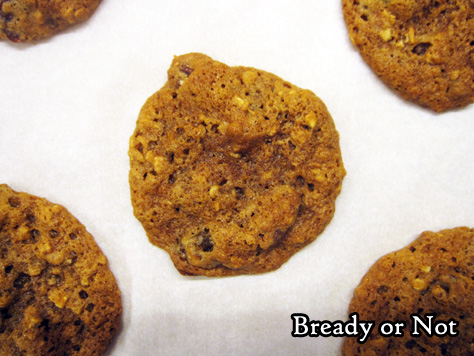
The solution is simple: parchment paper. Keep it on the paper to bake and to cool, allowing the cookies to completely set. That doesn’t take long.
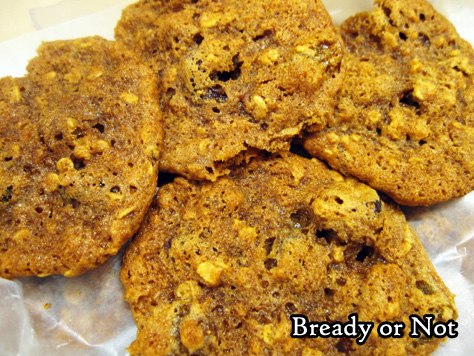
The end result is a thin, chewy oatmeal cookie with a rich apple flavor. I’ve never had anything quite like them!
Modified from Apple Butter Cookies in Best Loved Cookies & Bars by Taste of Home.
Bready or Not: Apple Butter Oatmeal Cookies
Ingredients
- 1/4 cup unsalted butter half stick, softened
- 2 cup brown sugar packed
- 1 egg
- 1/2 cup quick oats
- 1/2 cup + 2 Tablespoons apple butter
- 1 cup all-purpose flour
- 1/2 teaspoon baking soda
- 1/2 teaspoon baking powder
- 1/2 teaspoon salt
- 1/2 cup pecans chopped
- 1/2 cup golden raisins
Instructions
- In a large bowl, cream together the butter and sugar. Beat in the egg, oats, and apple butter.
- In a separate bowl, sift together the dry ingredients. Gradually mix them into the butter mix, followed by the pecans and raisins. Cover dough with plastic wrap and refrigerate for several hours or overnight.
- Preheat oven at 350-degrees. Prepare a baking sheet with parchment paper; note that the paper is a necessity, as this dough is very sticky. Scoop dough by teaspoonful, with lots of space between each dollop to account for spreading.
- Bake for 15 minutes or until set. Use parchment paper to lift the cookies onto a rack to cool, and put fresh paper on the cookie sheet. Prepare the next batch. By the time the next cookies are baked, the previous batch should be set and ready to move off the cooling rack.
- Pack cookies with parchment or wax paper between layers, as they might stick together.
- OM NOM NOM!
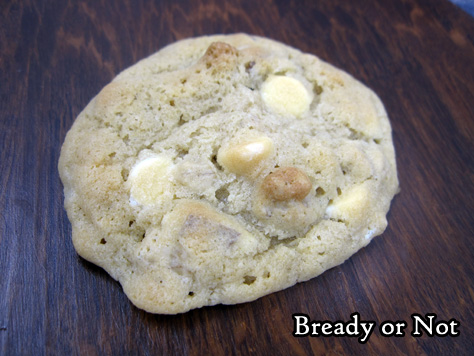
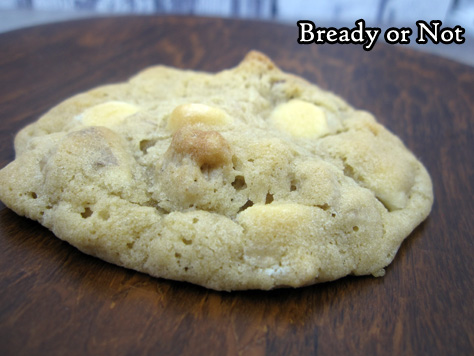
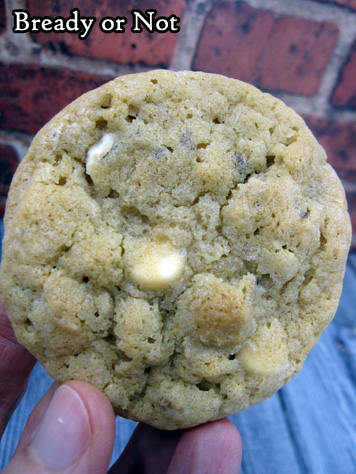
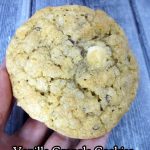
Bready or Not Original: Vanilla Granola Cookies
Vanilla Granola Cookies! Because granola makes everything healthier, right?
The clearance aisle at the grocery store bequeathed me with super-cheap vanilla granola with a close expiration date, so I decided to make cookies with it.
Weirdly enough, there weren’t many granola cookie recipes out there–and certainly none that appealed to me. I decided to greatly modify a couple oatmeal cookie recipes to get what I wanted.
I was most worried about getting the balance of sugar just right, since granola is already sweet on its own. Keep that in mind when you make this, too–granolas vary a lot, so tweak the sugar as necessary!
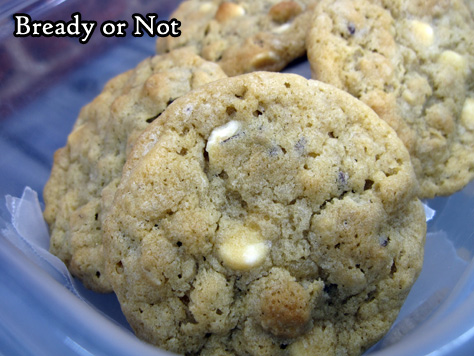
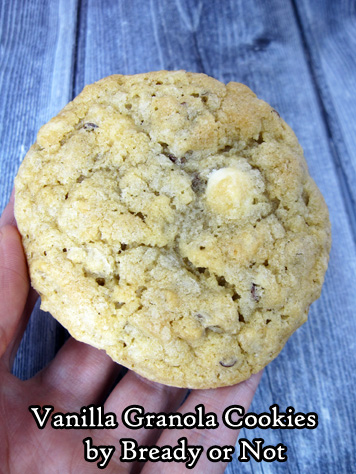
These cookies have a great, unique texture. I tried not to break up granola clumps too much, and the mix of granola throughout creates sporadic crunchiness in otherwise soft cookies.
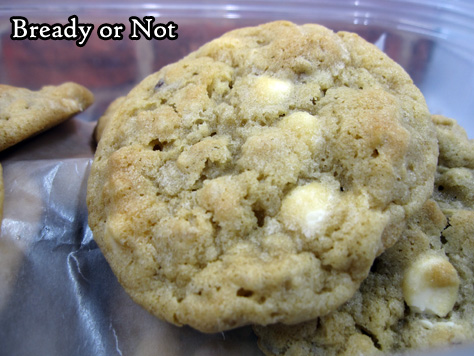
Notice the different backdrops for my food pictures? That’s my new Shotbox in action! Most of my new recipes from here on will include at least some pictures from the Shotbox. It’s a cool, collapsible, and portable photo light studio.
I love my Shotbox. (And no, I’m not being paid anything to say that. I bought this during a Kickstarter and I had to wait a long time for the product to arrive. Totally worth the wait.)
Bready or Not Original: Vanilla Granola Cookies
Ingredients
- 2 cups all-purpose flour
- 1/2 teaspoon baking soda
- 1/2 teaspoon salt
- 3/4 cup unsalted butter 1 1/2 sticks, room temperature
- 3/4 cup brown sugar packed
- 1/2 cup white sugar
- 1 Tablespoon pure vanilla extract
- 2 eggs
- 2 cups vanilla granola
- 1 cup white chocolate chips
Instructions
- Preheat oven to 325-degrees. Line cookie sheet with parchment paper.
- In a medium bowl, mix the flour, baking soda and salt; set aside.
- In a large bowl, cream together the soft butter, brown sugar, and white sugar until fluffy. Beat in the vanilla extract and two eggs until the mix is light. Gradually stir in the flour mixture. Gently blend in the granola, trying to not break apart all of the clumps, and the white chocolate chips.
- Place tablespoon-sized dollops of dough on the ready sheet, spacing them out to allow for expansion. Bake for 10 to 13 minutes, until the edges are slightly brown and the middle is still soft. Let the cookies rest on the cookie sheet for 10 minutes before transferring to a cooling rack.
- Cookies keep for days in sealed container at room temperature.
- OM NOM NOM!
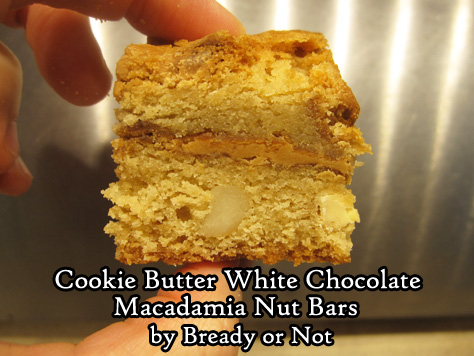
Bready or Not Original: Cookie Butter White Chocolate Macadamia Nut Bars
Cookie butter makes everything better. This is a maxim of life. It is proven true yet again with these Cookie Butter White Chocolate Macadamia Nut Bars.
Cookie butter is found by the peanut butter in most grocery stores in the US these days. The most popular brands are Biscoff and Speculoos, but Walmart, Kroger, and Sprouts even have their own jars now!
What does cookie butter taste like? Well… rich, buttery cookie dough rendered into peanut butter-like form. That’s the only way to describe it.
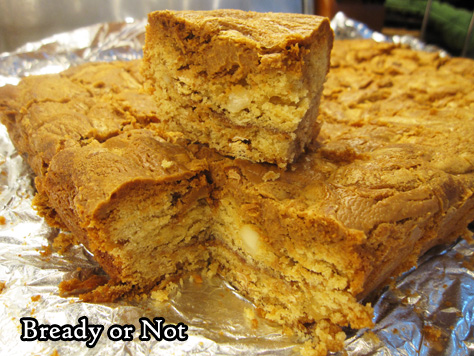
In this recipe, the cookie butter flavor amps up the inherent baked-good yumminess of these bars. Add white chocolate and macadamias along with that? Oh yeah.
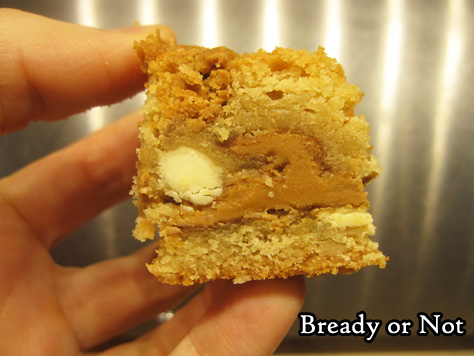
You end up with a ribbon of cookie butter through the middle and swirls across the top. These effectively acts like a thin frosting, as these otherwise aren’t heavy duty on sweetness.
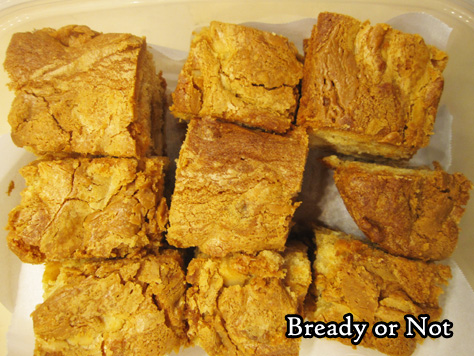
The bars rise a lot as they bake and end up quite cakey. They hold together well, so you can cut them small, if you want.

I want to mention macadamia nuts again. They are lovely in this recipe, adding a sporadic crunch and buttery flavor that goes oh-so-well with everything else.
Bready or Not Original: Cookie Butter White Chocolate Macadamia Nut Bars
Ingredients
- 1 1/2 cups unsalted butter 3 sticks, softened
- 1/2 cup white sugar
- 2 cups brown sugar packed
- 4 large eggs room temperature
- 1 Tb vanilla extract
- 4 cups all-purpose flour
- 1 teaspoon salt
- 2 teaspoons baking powder
- 1 cup white chocolate chips
- 1 cup macadamia nuts chopped
- 2/3 cup + 1/2 cup creamy cookie butter spread divided
Instructions
- Preheat oven to 350-degrees. Line a 9x13 pan with aluminum foil and apply nonstick spray.
- In a large bowl, cream butter until light and fluffy. Add in both sugars, followed by the eggs one by one, then the vanilla.
- In a separate bowl, sift together the flour, salt, and baking powder. Gradually mix into the wet ingredients until just incorporated.
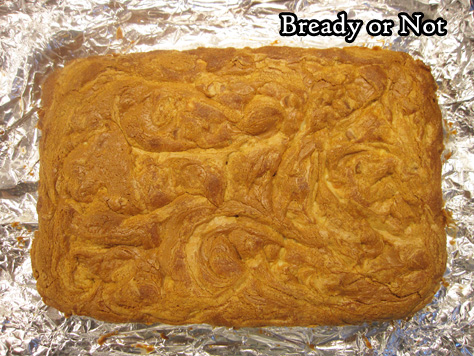
- Spread half of the dough in the bottom of the pan. Mixture will be thick. Use an uneven spatula to spread 2/3 cup cookie butter in an even layer over the dough.
- Top with remaining dough and spread to edges. Dollop the 1/2 cup of cookie butter here and there over the top, then use a butter knife to swirl it into the dough.
- Bake for 40 to 45 minutes, until the top is golden brown and the middle passes the toothpick test. Dough will rise a great deal.
- Cool completely in pan. Use the foil to lift up bars for easy cutting. Store sliced pieces in a sealed container at room temperature for as long as a week.
- OM OM NOM!
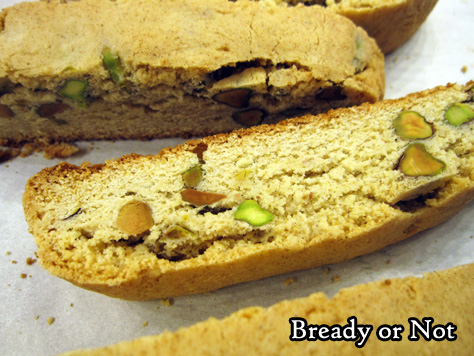
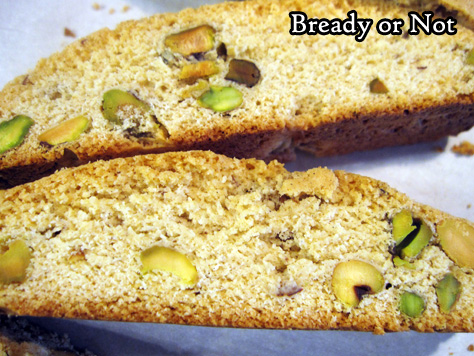
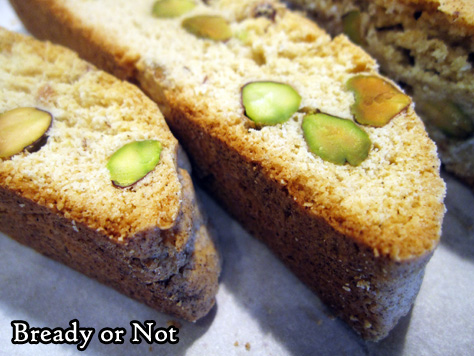
Bready or Not: Pistachio Cardamom Biscotti
Bake up these biscotti, and your house will smell absolutely glorious!
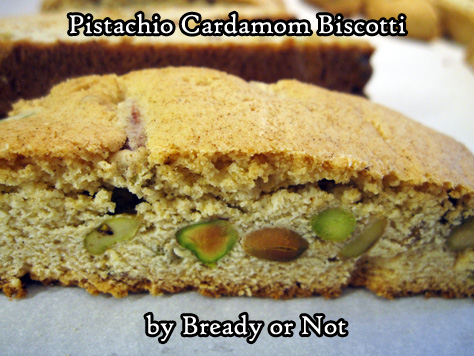
That’s the power of cardamom. It’s one of my favorite spices to use in baking AND in writing (heck, see my story in Uncanny last year, “With Cardamom I’ll Bind Their Lips.”)
The combination of cardamom and vanilla here creates a very fresh taste. Really, these are a delight to the senses.
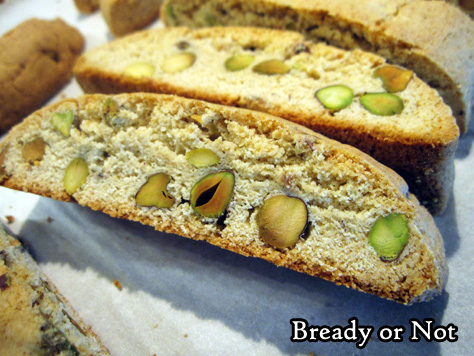
There are just enough pistachios included to add pretty green dapples and some extra crunch, but they didn’t make the biscotti harder to cut (the almonds in my Chocolate Almond Biscotti were a lot more annoying in that regard).
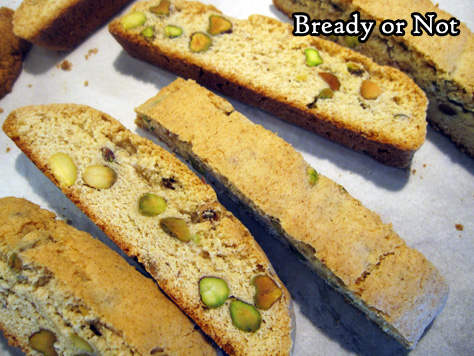
Store these biscotti for a few weeks. These are also great to ship because they do keep so well.
Serve them up with some hot tea or coffee, and start the day off right!
Bready or Not: Pistachio Cardamom Biscotti
Ingredients
- 4 Tablespoons unsalted butter softened
- 3/4 cup white sugar
- 2 eggs room temperature
- 3/4 cup salted pistachios shelled, chopped
- 1 teaspoon ground cardamom
- 1 teaspoon vanilla extract
- 2 cups all-purpose flour
- 1 teaspoon baking powder
Instructions
- Line a large baking sheet with parchment paper. Preheat oven at 350-degrees.
- In a large bowl, mix together the butter and sugar until they are light and fluffy. Add eggs one at a time. Add the pistachios, cardamom, and vanilla extract. Stir in the flour and baking powder until just combined.
- Divide the dough in half on the prepared baking sheet. Form each into a log about 4 inches wide and 10 inches long; make sure there is space between the two logs, as they'll grow in the oven.
- Bake for 25 minutes, until the dough is slightly golden. Remove the baking sheet from oven, but leave the oven on.
- Let the biscotti cool for 10 minutes. Use a large knife, such as a bread knife, to diagonally slice the logs 1/2-inch apart. Use a straight-down motion to cut; don't saw.
- Arrange the biscotti spaced out on the baking sheet. Stand them up if possible, or lay them on their sides. Bake for another 20 to 25 minutes, flipping them over halfway if necessary, to equally crisp both sides.
- Cool completely on the baking sheet. Store in an airtight container as long as a few weeks.
- OM NOM NOM!
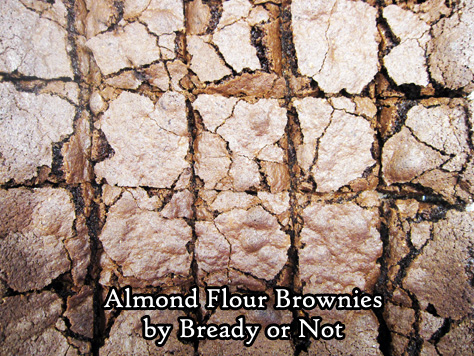
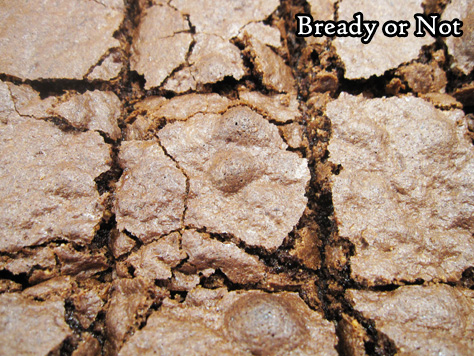
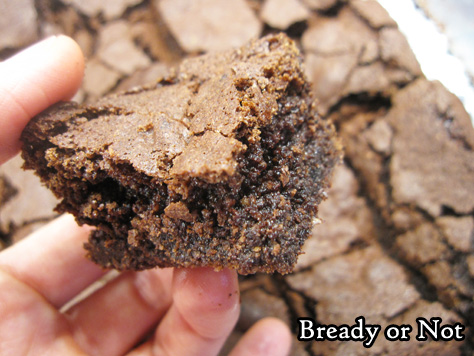
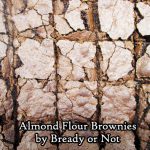
Bready or Not: Gluten-Free Almond Flour Brownies
I often get requests for more gluten-free sweets. Here you go. These brownies are so good, people won’t even know they lack gluten.
They also happen to be grain-free. Just don’t give them to people who have almond allergies!
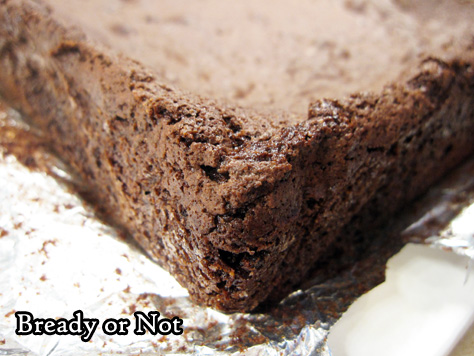
These brownies are fast to assemble. The end result tastes like standard brownies. I didn’t find them super moist, but they were nice and chewy.
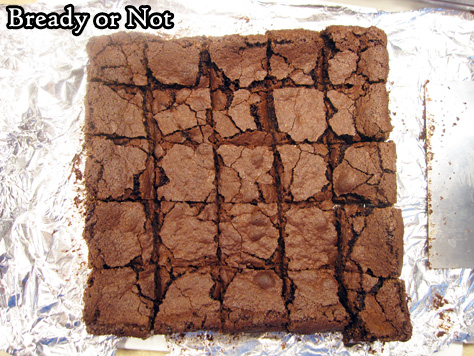
They kept pretty well in a sealed container for several days, too. The cut edges dried out a bit, but they were still delicious.
Here’s a tip for you: almond flour, because of its high fat content, can spoil. Keep it in the freezer! It won’t freeze solid but it will get clumpy. Hence my note in the ingredients list to sift the almond flour.
Modified from King Arthur Flour.
Bready or Not: Gluten-Free Almond Flour Brownies
Ingredients
- 5 Tablespoons unsalted butter
- 1 3/4 cups white sugar
- 1/2 teaspoon salt
- 1 teaspoon vanilla extract
- 3/4 cup cocoa powder sifted
- 3 large eggs room temperature
- 1 1/2 cups almond flour sifted
- 1 teaspoon baking powder
Instructions
- Preheat oven at 350-degrees. Line an 8x8 or 9x9 pan with foil and apply butter or nonstick spray.
- In the microwave, melt the butter in a medium-sized bowl. Stir in the sugar, salt, vanilla, cocoa, and eggs. Add in the almond flour and baking powder. Pour batter into the ready pan.
- Bake for 33 to 38 minutes, until the top is set and the middle just passes the toothpick test. Let cool, then cut into blocks. Store at room temperature in a sealed container or freeze for later enjoyment.
- OM NOM NOM!
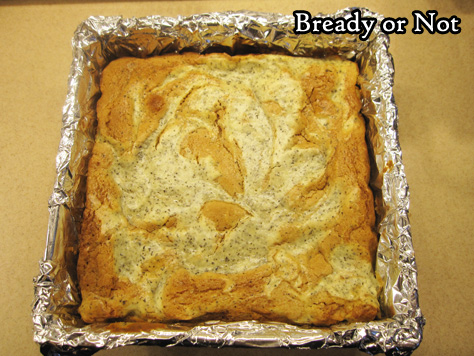
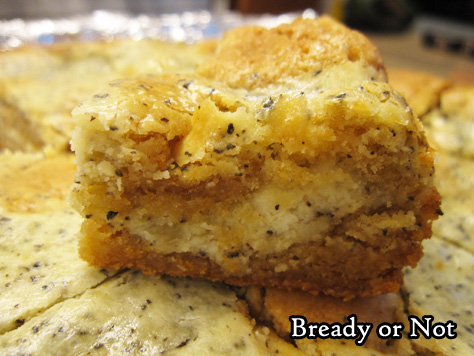
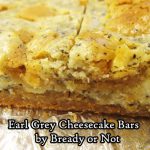
Bready or Not Original: Earl Grey Cheesecake Bars
Earl Grey tea and cream cheese team up in delicious bar form in these delicious Earl Grey Cheesecake Bars.
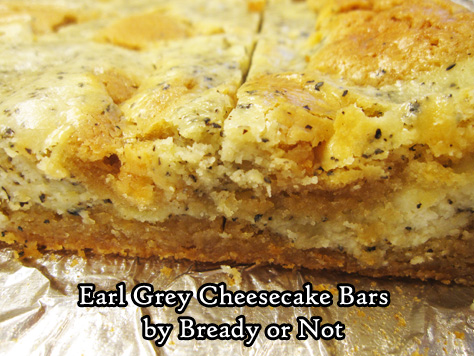
Last August, I featured Matcha Cheesecake Bars. I decided to modify that recipe using Earl Grey.
The result: WOW. Earl Grey has a slight heat to it when eaten in baked goods (like, say, Earl Grey shortbread).
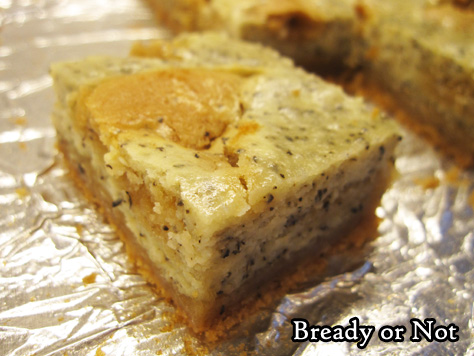
Here, that contrasts wonderfully with the smooth and creamy cheesecake swirls. I’m not a big cheesecake person, but I’m in awe of how good this basic recipe is.
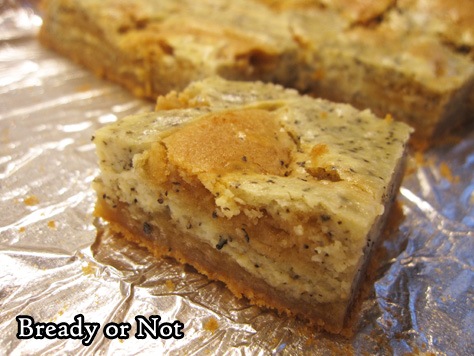
This is a recipe to make cheesecake haters love cheesecake. That’s not a statement I’d make lightly.

I’ve been told these are excellent with coffee… but if I may, I suggest indulging while enjoying some Earl Grey tea. Hot. Captain Picard-style.
Bready or Not Original: Earl Grey Cheesecake Bars
Ingredients
Crust
- 1 1/2 cups all-purpose flour
- 1 tsp baking powder
- 1/2 tsp salt
- 10 Tb unsalted butter softened
- 1 1/2 cups light brown sugar packed
- 2 eggs room temperature
- 1 Tb vanilla extract
Cheesecake layer
- 8 oz cream cheese softened
- 1/4 cup sugar
- 2 Tb unsalted butter softened
- 2 Tb all-purpose flour
- 2 tea bags Earl Grey scant 1 tablespoon
- 1 egg room temperature
- 1/2 tsp vanilla extract
Instructions
- Preheat oven at 325-degrees. Line an 8x8 or 9x9 pan with aluminum foil and apply nonstick spray.
- In a medium bowl, sift together the flour, baking powder, and salt. Set aside.
- In a large mixer bowl, cream together the softened butter and brown sugar for about 3 minutes, until light and fluffy. Add 2 eggs and the vanilla extract, followed by the combined dry ingredients.
- Use an uneven spatula to smooth out HALF of the batter in the prepared pan. Place the other half in another bowl for now. Clean the bowl before the next stage, if desired.
- To make the cheesecake layer, beat together the softened cream cheese, sugar, butter, flour, and the contents of two bags of Earl Grey. Mix in the egg and vanilla until it is mostly smooth.
- Pour about HALF of the cream cheese mix on top of the batter in the pan and smooth it out. Dollop the remaining crust and cheesecake batters over the top, and use a butter knife to swirl them together.
- Bake for 45 to 55 minutes, until it passes the toothpick test in the middle. Let cool at room temperature for an hour, then place in fridge to continue to chill and set for another hour or two.
- Lift it up by the aluminum foil and place on a cutting board to slice into bars. Store in a lidded container in fridge, with waxed paper or parchment between stacked layers.
- OM NOM NOM!
