


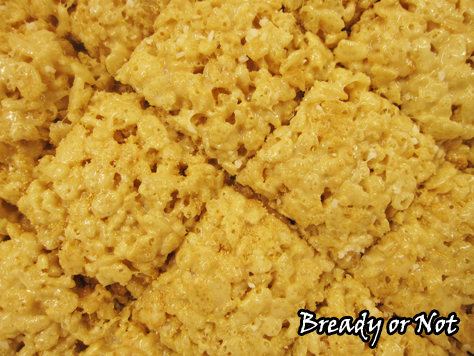
Bready or Not: Maple Krispy Treats
Regular Bready or Not readers know that I espouse that everything is better with maple. Case in point: Rice Krispy Treats, now with maple.
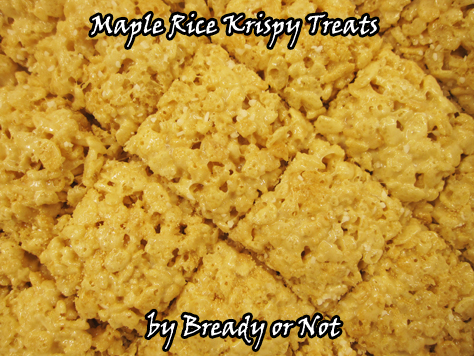
I had to make this several times to get the right flavor and balance. An onerous task, I assure you. In the end, I created an original recipe that’s perfect for maple lovers.
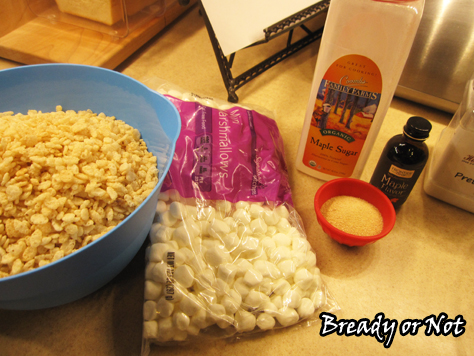
This recipe can be made in the microwave or on the stovetop. Just make sure you’re using a large bowl or pot, as you need room to stir in a lot of cereal, and take care when heating. Burned marshmallows are a bad, bad thing.
If you do this in the microwave, which is my preference, you will have ready to eat treats in under 30 minutes.
Even more importantly–for people in hot environs like me–you won’t heat up the house when it’s already a zillion degrees outside. That makes this the perfect summer recipe.
Did someone scoff at that because of the maple flavor? Pfft. Maple flavor knows no season. If it’s tasty and you like it, make it, no matter what the calendar says.

A Bready or Not Original: Maple Krispy Treats
Ingredients
- 6 tablespoons unsalted butter
- 2 Tablespoons maple sugar or use brown sugar and more maple flavor
- 2 teaspoons maple flavor
- 10 ounces miniature marshmallows 1 bag
- 1/4 teaspoon kosher salt
- 6 cups Rice Krispies or similar puffed rice cereal
- sprinkle maple sugar optional, or kosher or pretzel salt for the top
Instructions
- Line an 8-inch square pan with aluminum foil then coat the surface with butter or non-stick spray. Stage the maple sugar, maple flavor, and marshmallows so they are ready to add quickly.
- These treats can be made in the microwave or on the stovetop. Either method: on low, gradual heat, melt the butter in a large bowl.
- Once the butter is melted, remove from heat and stir in the maple sugar and maple flavor. Add marshmallows and stir. This will just barely start to soften the mix, so continue to heat gradually until the marshmallows become smooth goop; in the microwave, use 20 second zaps and stir well between each pass. Stir until no white streaks remain. Remove from heat again, if needed.
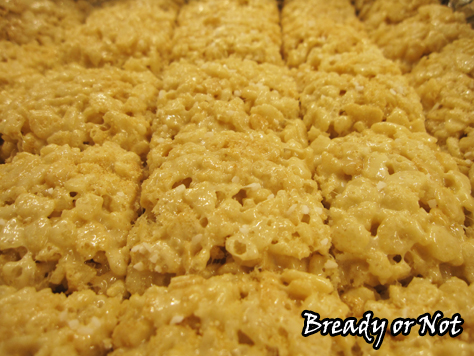
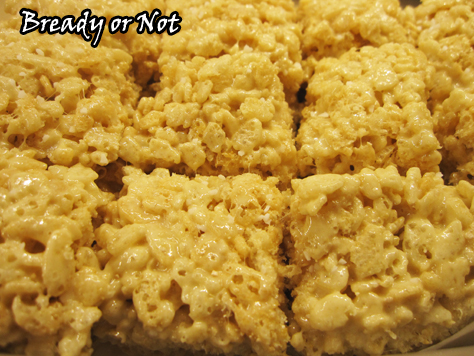
- Add the cereal and 1/4 teaspoon salt. Mix until everything is coated, then pour into the prepared pan. Quickly spread it to the corners and evenly press it down with a rubber spatula. (If the goop sticks to the spatula too much, quickly use nonstick spray on it or rub it with butter.)
- When the cereal mix is even, sprinkle coarse salt and maple sugar on the top, if desired.
- Let the pan cool for at least 15 minutes. Slice into bars while everything is still in the pan, then use the foil to lift them all out at once. Store for up to two days in a sealed container, with waxed paper between layers to prevent sticking.
- OM NOM NOM!
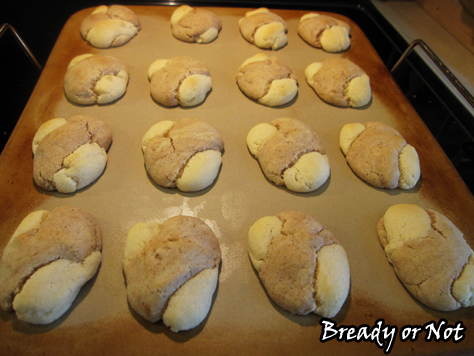
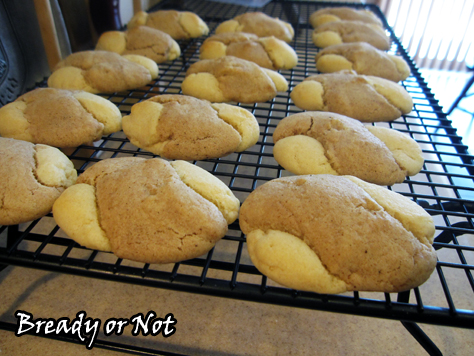
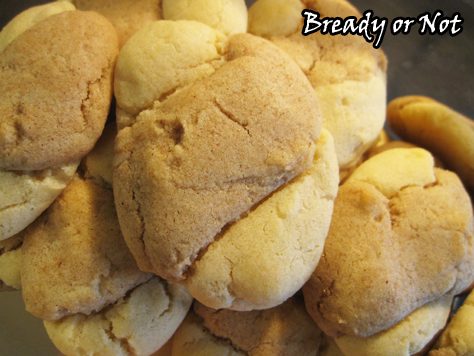
Bready or Not: Cinnamon Twist Cookies
These Cinnamon Twist Cookies give you an opportunity to play with cookie dough.
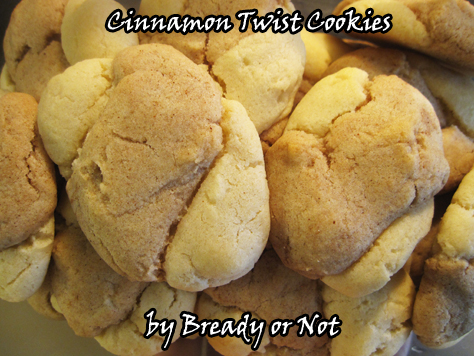
You divide the dough in half and mix cinnamon into one half. Then you twist the doughs together, creating delicious braided cookies!

This would actually be a great recipe to involve kids or grandkids! Just keep in mind that the cookies spread as they bake, so you don’t want them too large.
This is one the first cookie recipes I claimed as “mine.” I found it on the Betty Crocker website back in my newlywed days when I was hunting for new cookies that would please my husband.
I made these cookies all the time for about five years, and then the recipe became buried in my growing collection of clippings and print-outs. I was stunned to realize recently that I hadn’t made these cookies in years.

These cookies keep well for several days and they’re durable to pack and bring with you places. They have a kind of snickerdoodle vibe going with that kick of cinnamon, but they’re not messy at all.
Most importantly of all, they are delicious.

Bready or Not: Cinnamon Twist Cookies
Ingredients
- 1/2 cup unsalted butter 1 stick, room temperature
- 1 cup white sugar
- 2 teaspoons vanilla extract
- 1 egg
- 1 3/4 cups all-purpose flour
- 2 teaspoons baking powder
- 1/2 teaspoon salt
- 1 teaspoon ground cinnamon
Instructions
- Preheat oven at 375-degrees.
- In a large bowl, mix the butter, sugar, vanilla, and egg. Stir in the flour, baking powder, and salt.
- Divide dough in half. Stir cinnamon into one half until it's mixed in and brown.
- Grab equal pinches of both kinds of dough, place them side by side, and gently twist into a short rope. Place on cookie sheet, with several inches around each to account for expansion. Repeat with remaining dough.
- Bake 8 to 10 minutes, until the cookie is set with the pale dough just tinted brown. Let cookies cool on wire rack. Store in a sealed container for several days.
- OM NOM NOM!
Read More
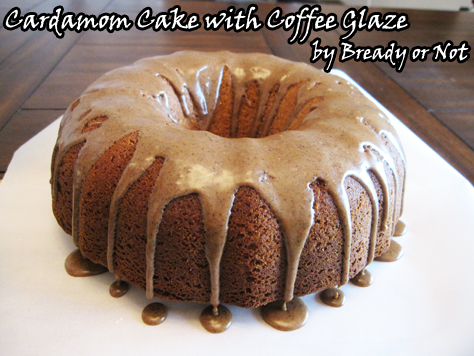
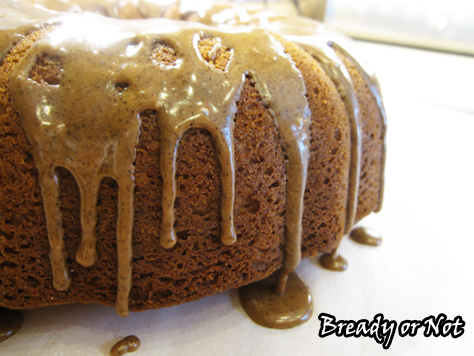
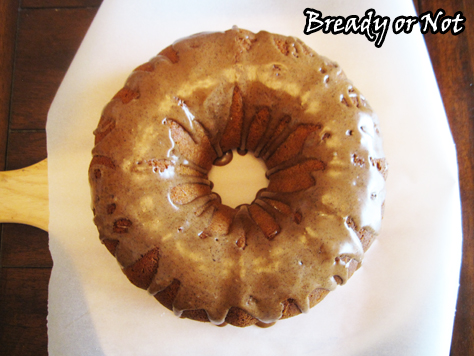
Bready or Not: Cardamom Bundt Cake with Coffee Glaze
It’s June and hey, let’s eat cake! Cardamom Cake with Coffee Glaze. A bundt cake full of sugar and glory and cardamom-y goodness.
I read a lot of books. I also read a lot of magazines. One of my favorite things to do is hit up a good used book store or library book sale and buy stacks of older food magazines to raid for recipes.
That’s how I found the original recipe for this in an October 2013 issue of Country Living. I modified it, removing pistachios and tweaking here and there, and created a cake that earned the utter adoration of my husband’s co-workers.
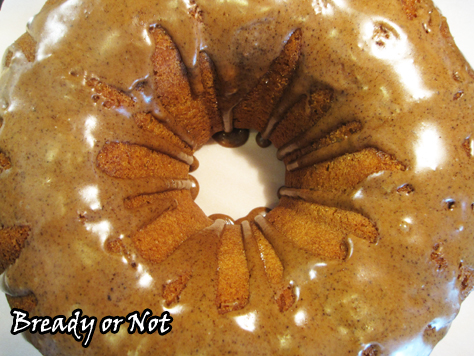
Coffee and cardamom is a fantastic flavor combination. You might remember the Cardamom Coffee Pound cake I posted last fall. This bundt cake is like that awesome loaf cake, and so much more.
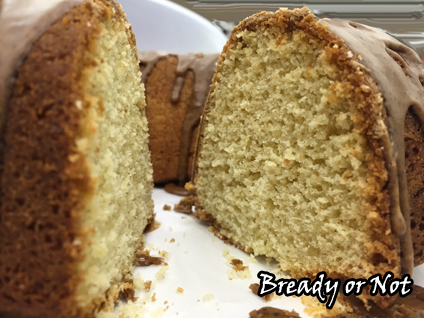
It’s bigger, for one, being a full-size cake. It has a kinda pound cake thing going, too. The sour cream does miraculous thing for cake texture, creating crumb that is dense, not crumbly.
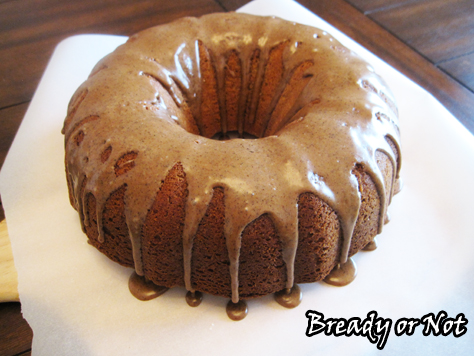
This is a cake you can eat out of hand, no saucer required. And you’ll want to lick your fingers clean, too, because the glaze includes espresso powder (one of my favorite ingredients to keep around) and sugar.
If the caffeine doesn’t boost your day, you know the sugar will!

Bready or Not: Cardamom Bundt Cake with Coffee Glaze
Ingredients
Bundt cake
- 1 cup unsalted butter 2 sticks, room temperature, plus more to grease pan
- dried breadcrumbs fine texture, to dust pan
- cooking spray
- 2 1/3 cups cake flour
- 1 1/2 teaspoons ground cardamom
- 1 1/2 teaspoons baking powder
- 3/4 teaspoon baking soda
- 1/2 teaspoons salt
- 1 1/2 cups white sugar
- 4 large eggs room temperature
- 1 teaspoon vanilla extract
- 1 cup sour cream 8 ounces
Coffee glaze
- 2/3 cup confectioners' sugar sifted
- 1 teaspoon espresso powder
- 1/4 teaspoon unsweetened cocoa powder
- 1 Tablespoon milk or half & half, plus more if needed
Instructions
- Preheat oven to 350-degrees. Generously butter a 10 or 12-cup Bundt pan. Dust the pan with fine bread crumbs; a toasted and pulverized half heel of bread will do. Apply cooking spray over the bread crumbs.
- In a medium bowl, whisk together flour, cardamom, baking powder, baking soda, and salt; set aside.
- In a large bowl, use a mixer on medium to beat the butter and sugar until light and fluffy. Add eggs one at a time followed by the vanilla extract, beating until very pale yellow.
- Reduce the mixer speed and alternate between adding the flour mix and the sour cream into the butter blend.
- Pour the batter into the prepared pan, using a rubber spatula. Bake cake until a wooden toothpick inserted into the cake comes out dry with only a few moist crumbs attached, 45 to 50 minutes. Transfer pan to a wire rack to cool for 30 minutes, then invert cake onto rack to completely cool. Once cool, move cake to cake plate and prepare glaze.
- Whisk together sugar, espresso powder, and cocoa powder. Add milk and stir, adding more milk as needed until glaze is just thin enough to drizzle. Dribble over cake.
- OM NOM NOM!
Read More
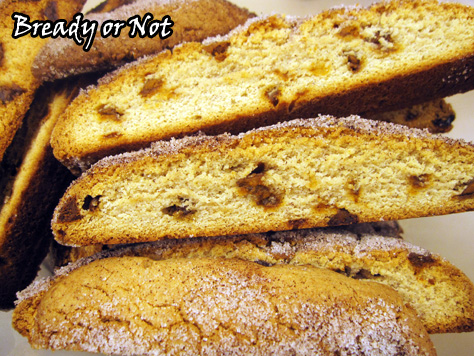
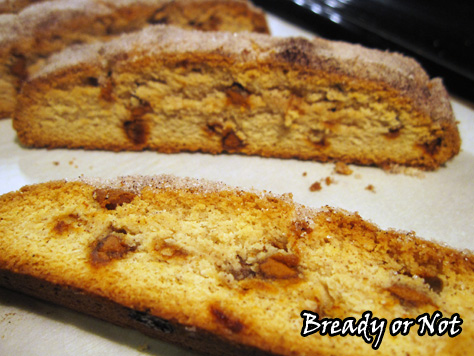
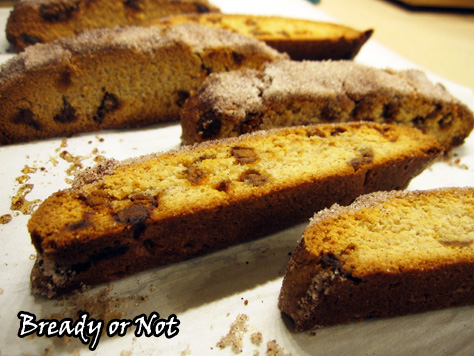
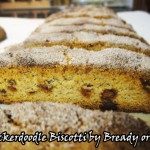
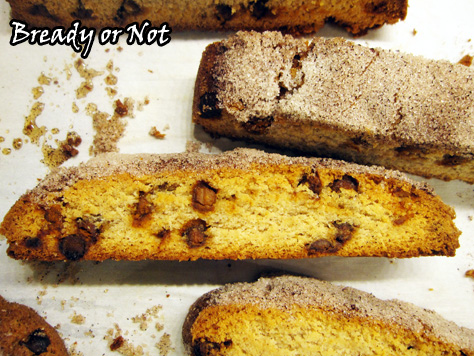
Bready or Not: Snickerdoodle Biscotti
Brace yourself: I’ve been experimenting with biscotti, and this Snickerdoodle version is the first of several you’ll see this year!
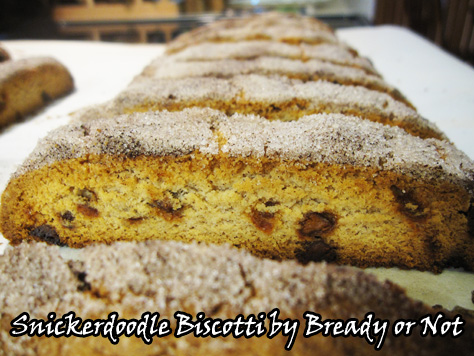
Yes, these really do taste like Snickerdoodles, only in a crisper, more dunk-able form. I even added cream of tartar to the recipe, to amp up the Snickerdoodliness. (That should totally be a word.)
For years, I have said that I dislike biscotti. That’s because the only kind I ever tried came from the grocery store, and it was HARD. Like, “this could break my teeth,” hard. It didn’t help that I don’t drink coffee and therefore had nothing to dip the biscotti into to soften it.
Then the Great British Bake Off featured biscotti and my interest was piqued. The bakers made it look easy. Doable. And the fresh version was supposed to be crisp, not teeth-shatteringly hard.
I hunted down some recipes. I started baking. I discovered, once again, that the Great British Bake Off abounds in wisdom. Homemade biscotti is easy and tasty.
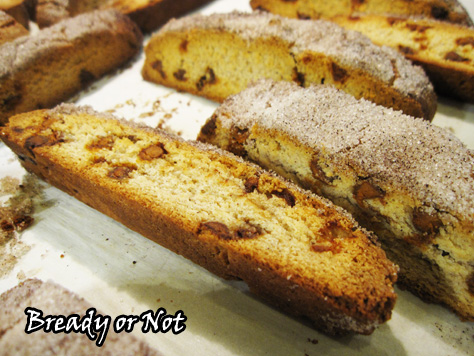
These Snickerdoodle Biscotti are fantastic for Snickerdoodle lovers. The cinnamon-sugar top makes these even look and smell like the cookie version, and the flavor….!
Oh yeah. Snickerdoodliness.
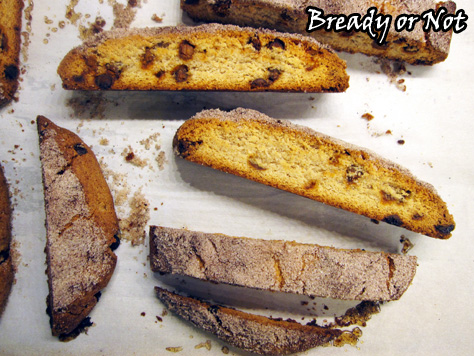
Because these are biscotti, they keep well for a few weeks, too. That makes these great to stash away or to even ship across distances.
And even if they go stale, I bet you they are still a million times better than the grocery store version.
Modified from Brown Eyed Baker.
Bready or Not: Snickerdoodle Biscotti
Ingredients
biscotti
- 2 3/4 cups all-purpose flour
- 1 1/2 teaspoons ground cinnamon
- 1 teaspoon baking powder
- 1/2 teaspoon cream of tartar
- 1/2 teaspoon salt
- 1/2 cup unsalted butter 1 stick, room temperature
- 1 cup white sugar
- 2 eggs room temperature
- 1 teaspoon vanilla extract
- 1/2 cup cinnamon chips
topping
- 1/4 cup white sugar
- 1 teaspoon ground cinnamon
Instructions
- Preheat oven to 375-degrees. Line a baking sheet with parchment paper; set aside.
- In a medium bowl, whisk together the dry ingredients: flour, cinnamon, baking powder, cream of tartar, and salt.
- In a large bowl, cream together the sugar and butter on medium speed until light and fluffy, 3 to 5 minutes. Scrape the sides of the bowl often. Add the eggs, one at a time, followed by the vanilla. Gradually add the dry ingredients, mixing just until a dough forms. Finally, mix in the cinnamon chips.
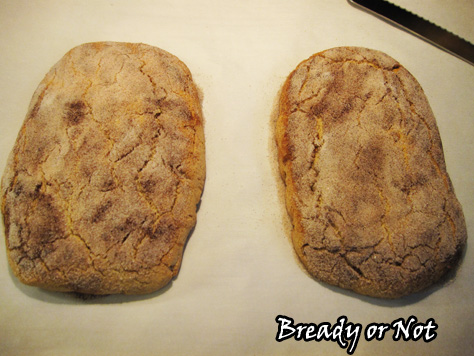
- Divide the dough in half on the prepared baking sheet. Form each into a log about 4 inches wide and 10 inches long; make sure there is space between the two logs, as they'll grow in the oven.
- Mix together the topping ingredients and sprinkle over both dough logs.
- Bake about 25 minutes, until the biscotti is lightly browned with small cracks forming across the top. Remove the baking sheet from the oven, but be sure to leave the oven on.
- Let the biscotti cool for 10 minutes. Use a large knife, such as a bread knife, to diagonally slice the logs 1/2-inch apart. Use a straight-down motion to cut; don't saw.
- Arrange the biscotti spaced out on the baking sheet. Stand them up if possible, or lay them on their sides. Bake for another 15-20 minutes, flipping them over halfway if necessary, to equally crisp both sides.
- Cool completely on the baking sheet. Store in an airtight container as long as a few weeks.
- OM NOM NOM!
Read More
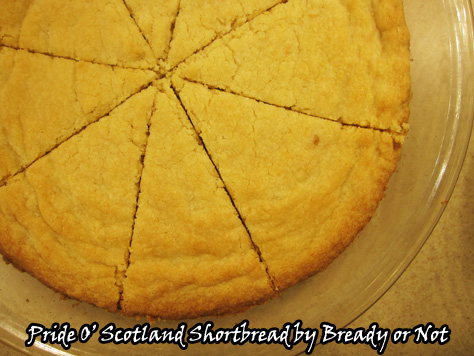
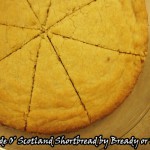
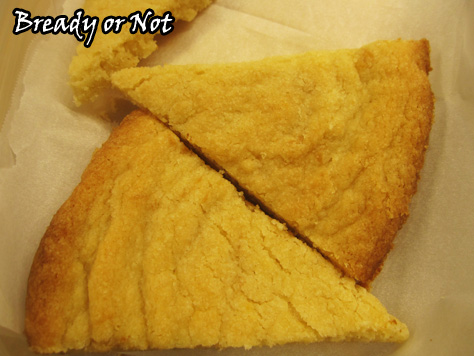
Bready or Not: Pride O’ Scotland Shortbread
The day after my anniversary, it seems only right to share the shortbread recipe I made for my husband the first day we met: Pride O’ Scotland Shortbread.
The original recipe is from one of my mom’s very battered cookbooks, which she gave to me a few years ago. The pages tenuously cling to the spiral binding. Back when I was a teenager, this shortbread recipe was one of the first I really declared ‘mine.’
Back in those dark ages before widespread internet shopping and Cost Plus World Market, my family was only able to obtain shortbread once or twice a year–at the Fresno Highland Games, and maybe at Christmas. Those red boxes of Walker’s Shortbread brought us great joy.
So when I found this recipe and my relatives declared that my shortbread was BETTER than Walker’s brand… whoa. I felt like I’d made something magical.
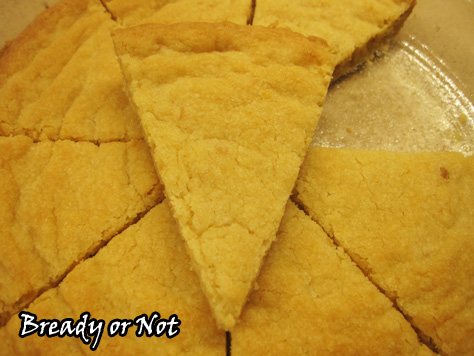
Maybe I did. It helped snare me a husband, after all.

Bready or Not: Pride O' Scotland Shortbread
Ingredients
- 2 cups all-purpose flour
- 3/4 cups white sugar
- 1/4 teaspoon salt
- 1 cup unsalted butter 2 sticks, softened
- 1 egg yolk
- 1 teaspoon vanilla extract
Instructions
- Preheat oven at 375-degrees. Grease two 9-inch pie pans.
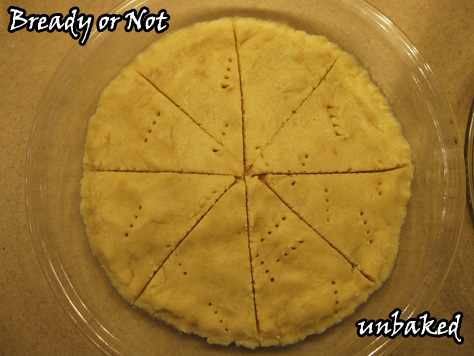
- Place dry ingredients in mixing bowl; add butter, egg yolk, and vanilla. Mix with fingers until dough holds together. Divide dough into two balls and press each ball into a pan. Flatten evenly with palms; prick surface all over with floured fork. Slash into wedges.
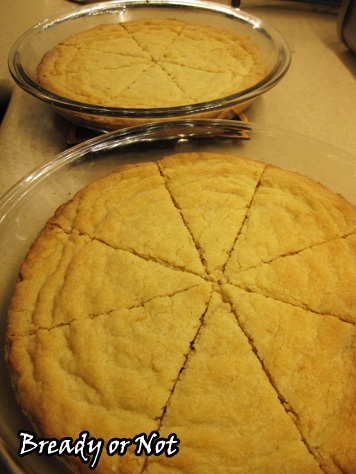
- Bake for 17 to 22 minutes, until the edges are golden brown. Remove from oven. Immediately cut again following slash marks and carefully run the blade around the edge of the crust to loosen the shortbread.
- Let shortbread cool. Cut again along slash marks and the crust, then remove wedges to eat. Shortbread keeps in sealed container for several days.
- OM NOM NOM!
Read More
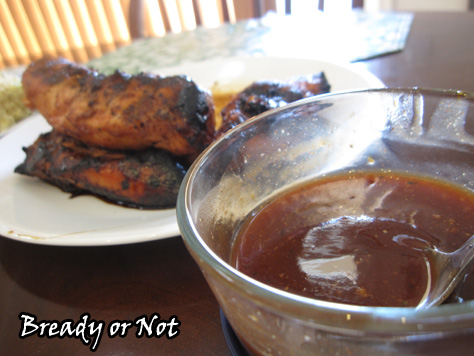
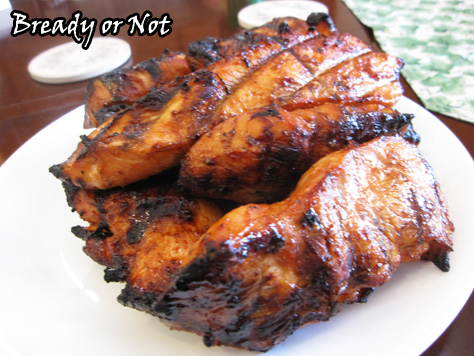
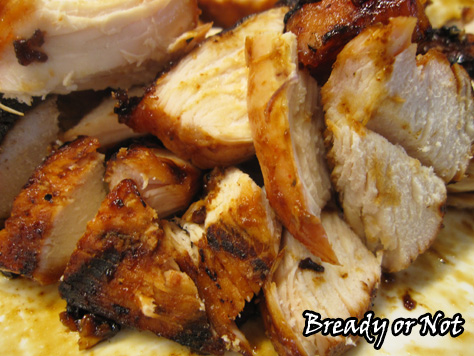
Bready or Not: Maple BBQ Chicken Tenders
It has come to my attention that I haven’t featured a maple recipe since March. So let’s remedy that with a meaty recipe for from-scratch Maple Barbecue Chicken.

Yep, you create your own BBQ sauce for this recipe! It’s full of maple goodness with just the right balance of savory-sweet. You divvy up the sauce, using some to marinate the meat and reserving the rest for eating time.
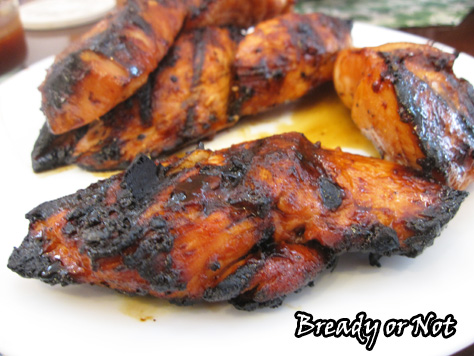
Use this base recipe to cook the chicken however you want. Grill it. Roast it in your oven. Whatever gets the meat cooked and chewed and in your belly.
Maple makes everything better, right?
Modified from A Dash of Sanity.

Bready or Not: Maple BBQ Chicken Tenders
Ingredients
- 3 - 4 pounds chicken tenders
- 1/2 cup brown sugar packed
- 1 cup ketchup
- 1/4 cup red wine vinegar
- 1/4 cup water
- 1/3 cup pure maple syrup
- 1 Tablespoon Worchester sauce
- 2 teaspoons ground mustard
- 2 teaspoons paprika
- 1 1/2 teaspoons kosher salt
- 1 teaspoon black pepper
Instructions
- Place the chicken tenders in a sturdy gallon sealable bag. In a bowl, mix together all of the other ingredients. Pour enough of the sauce into the bag to coat the chicken; reserve the rest of the sauce for serving later. (If the sauce gets contaminated by the raw meat, boil it to make sure it's safe to eat.)
- Let the chicken marinate in the fridge for anywhere from 2 hours to a day.
- Heat up your grill [or, alternatively, bake it in your oven]. Grill the chicken at medium heat for 4 minutes, then turn to cook another 4 minutes, and longer as needed. Check for doneness by testing the temperature in a thick section; it should be at least 170-degrees.
- Serve immediately. Chicken is fantastic hot or cold, and can be frozen with sauce for later enjoyment, too.
- OM NOM NOM!
Read More
