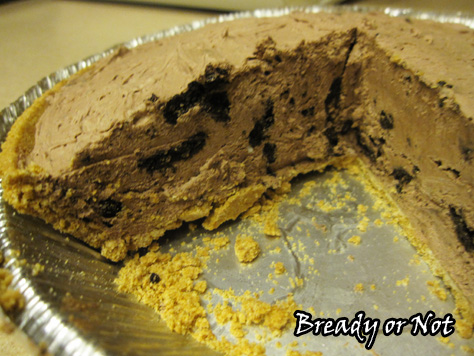
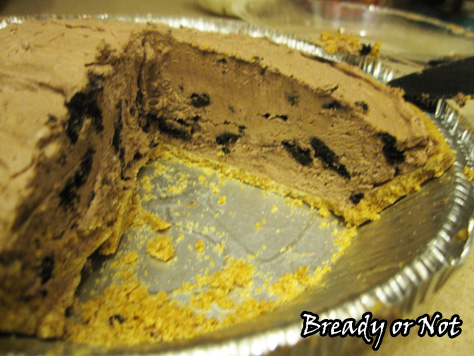
Bready or Not: No Bake Chocolate Pie
This super-easy pie comes together in minutes and is all things fluffy, chocolately, and delicious.
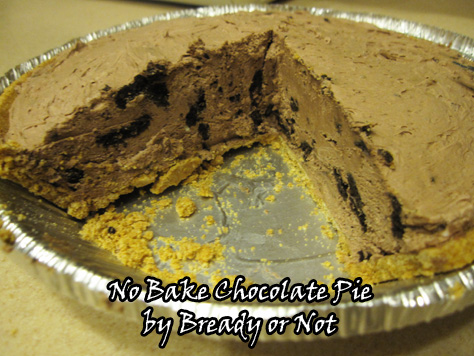
I love to bake, but when company’s coming and I’m already cooking meals AND juggling writing deadlines, a fancy cake or pie ain’t gonna happen. No-bake is the way to go. That way I can even make it the day before and I know it will keep just fine–and even improve in flavor.
This pie is really easy to tweak. I added mini Oreos, but you can throw any kind of cookie or candy bar in there… or keep it smooth and add nothing at all.
One concern I had was that this would taste like cheesecake. My family isn’t into cheesecake. The cream cheese here adds a lot of texture and richness, but the clear flavor is that of chocolate. Which meant… shhh… people didn’t know the cream cheese was in there.
It’ll be our secret.
Modified from German Sweet Chocolate Pie at Let’s Dish.
Bready or Not: No Bake Chocolate Pie
Ingredients
- 4 ounces Baker’s German Sweet or Semi Sweet Chocolate
- 1/3 cup milk or cream or half & half
- 2 Tablespoons white sugar
- 1 8 ounce package cream cheese, softened
- 1 8 ounce Cool Whip topping, thawed Reduced Fat works fine
- 1 graham cracker or chocolate pie crust
- 4 ounces Mini Oreos, chopped or other cookies or candy
Instructions
- Heat chocolate and 2 tablespoons of the milk in a small saucepan over low heat, stirring frequently until chocolate is melted. Remove from heat.
- In a large bowl, beat together the sugar and cream cheese. Add the rest of the milk, and the cooled chocolate mixture. Beat until smooth.
- Fold in whipped topping and until the colors are blended. Add in the cookie chunks. Spoon into the premade cookie crust.
- Freeze the pie until firm, about 4 hours, or in the fridge overnight. Thaw at room temperature for a short while before serving, if need be. If desired, garnish with more Cool Whip, or chocolate or caramel drizzle. Store in the fridge.
OM NOM NOM!
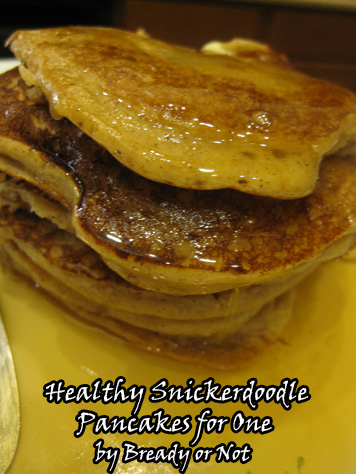
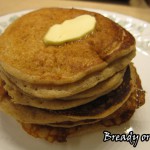
Bready or Not: Snickerdoodle Pancakes for One
One day my husband sighed most pitifully. “You know what I miss?” he said. “Pancakes. You never make pancakes anymore.”
“That’s because I can’t eat piles of bready things oozing in syrup,” I said. “But let me see if I can find a good recipe that will work for just you.”
In the end, I had to work some kitchen magic. I found a good recipe, cut the amounts in half, and played with the ingredients. I was pleased that it used sour cream as the base because I know it makes a rich, tender dough in breads. Almondmilk worked just fine, too. It actually made for a somewhat healthy stack of pancakes… which he then, of course, drowned in pure maple syrup.
My husband loves Snickerdoodle cookies and many other Snickerdoodle-like things. He vows that these live up to the name. They are Snickerdoodle goodness in pancake form.
This small stack is perfect for a hungry adult or to feed a couple kids.
Modified from Snickerdoodle Pancakes at No. 2 Pencil.
Bready or Not: Snickerdoodle Pancakes for One
Ingredients
- 1/2 cup all-purpose flour
- 1 1/2 Tablespoon white sugar
- 1 teaspoon cream of tartar
- 1/4 teaspoon baking soda
- 1/4 teaspoon kosher salt
- 1 teaspoon cinnamon
- pinch nutmeg
- 1/2 cup sour cream or vanilla or plain yogurt
- 2 Tablespoons melted butter
- 1 egg lightly beaten
- 3 + Tablespoons milk almondmilk works great
Instructions
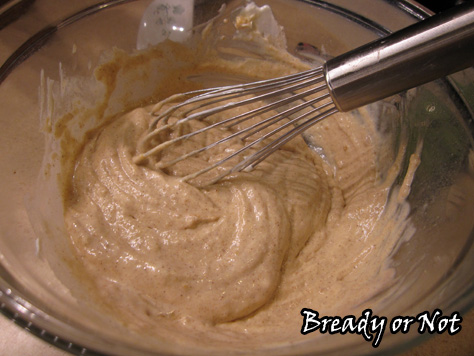
- Combine the dry ingredients in a large bowl. In a small bowl, mix together the wet ingredients, and then combine everything. If the batter is really thick, slowly add milk to get the right consistency.
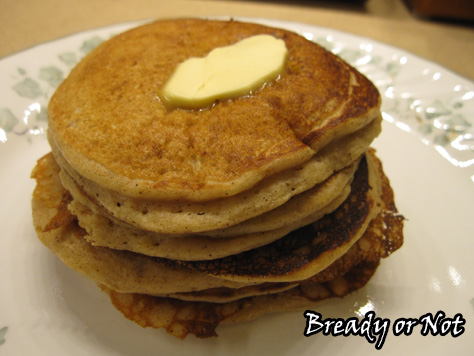
- Heat up a nonstick griddle or pan. Use 1/4 cup to scoop up batter onto the surface. When the edges of a pancake are set with little bubbles creating craters on top, it's time to flip to cook the other side.
- Makes a small stack of medium-sized pancakes. Serve with whatever fixings you like!
OM NOM NOM!
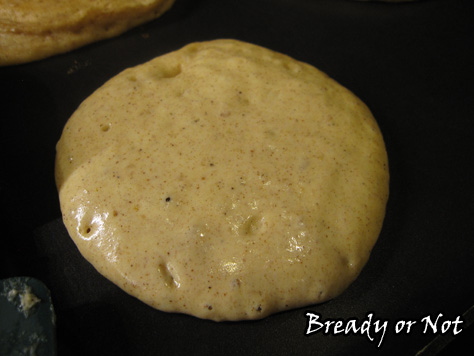
Those little bubbles popping on top mean I should set down the camera and flip this baby over.
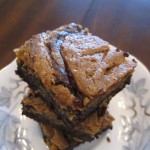
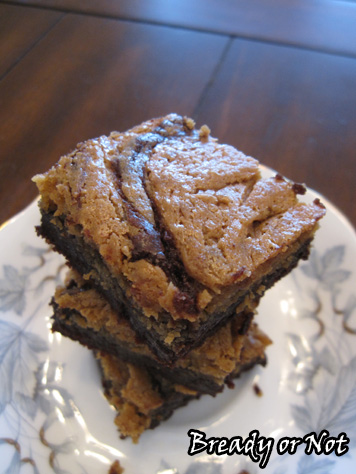
Bready or Not: Biscoff Brownies
How about some beautiful brownies for Valentine’s Day?
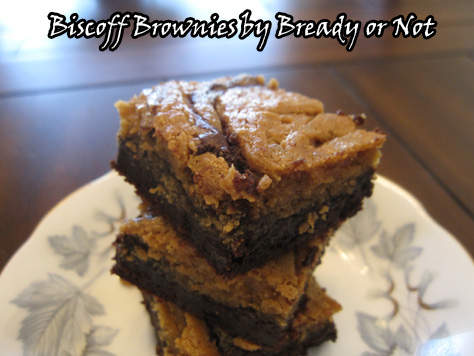
Sometimes you want a brownie that punches you in the face with its chocolate flavor. Other times you want a gentle slap. This brownie is the latter.
These mild brownies blend the magic of Biscoff spread/Speculoos spread with chocolately brownies. Neither flavor is strong, but together they create something delicious, tender, and good.
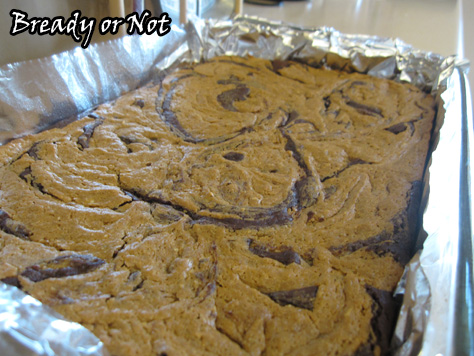
Also, they are PRETTY. Look at that swirl!
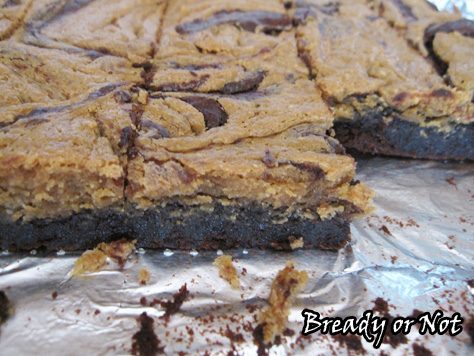
These are photogenic brownies.
They also keep really well for several days in a sealed container at room temperature. If you can restrain yourself to make them last that long.
Slightly modified from Biscoff Brownies at Bake at 350.
Bready or Not: Biscoff Brownies
Ingredients
For the Biscoff swirl:
- 1/2 cup smooth Biscoff or cookie butter spread
- 4 ounces cream cheese softened
- 2 Tbsp sugar
- 1 egg room temperature
For the brownies:
- 1 cup Dutch-process cocoa sifted
- 1 tsp kosher salt
- 1/2 tsp baking powder
- 12 Tb unsalted butter 1 1/2 sticks
- 2 cups white sugar
- 1 Tbsp vanilla extract
- 3 eggs room temperature
- 1 cup all-purpose flour
Instructions
- Preheat oven to 325-degrees. Line a 9x13 pan with aluminum foil and grease surface.
- For the Biscoff swirl: In a small bowl, combine the cookie butter spread, cream cheese, sugar, and egg, until smooth. Set aside.
- For the brownies: Sift together the cocoa, salt and baking powder and set aside.
- In a medium saucepan, melt the butter over low heat. Remove from heat and add the sugar. Once they are mixed, return to the burner and keep stirring as it heats through. You don't want it to bubble.
- Remove the pan from heat and stir in the cocoa mixture. Let it cool a few minutes. Whisk in the eggs and vanilla extract until smooth. Stir in the flour. Pour into the prepared pan and smooth it out.
- Dollop the Biscoff mixture here and there on top of the brownie batter. Use a table knife to gently swirl the mixture every which way across the surface.
- Bake for 30-35 minutes, until the swirl looks set and it passes the toothpick test. Cool on a wire rack before cutting.
OM NOM NOM!
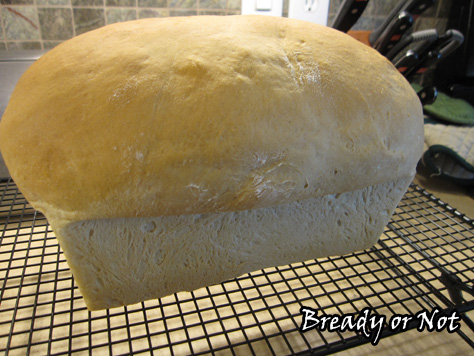
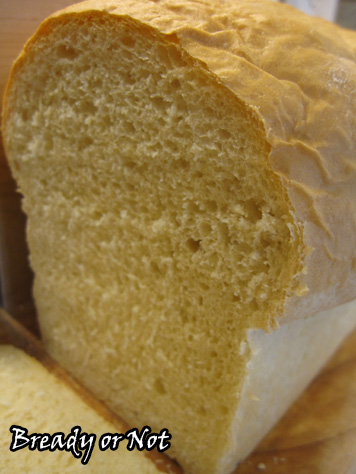
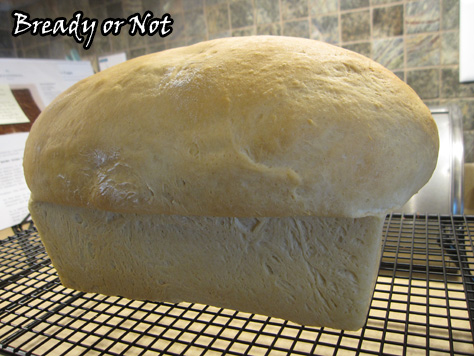
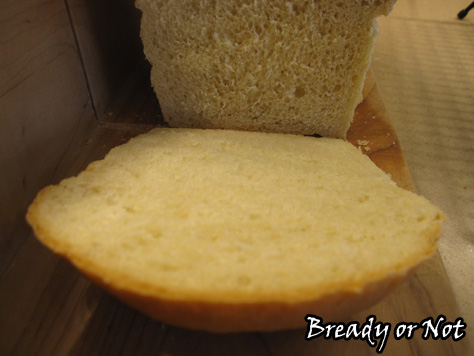
Bready or Not: Sour Cream Bread
Make note: this recipe doesn’t make sourdough bread. Instead, it uses sour cream to create tender, delicious sandwich bread that isn’t the least bit sour.
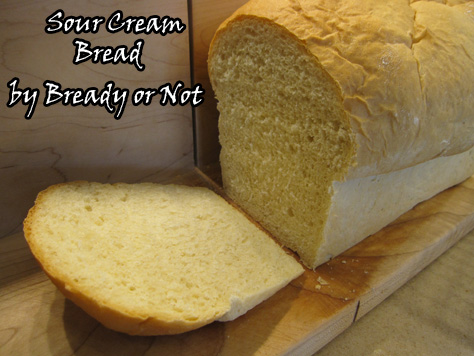
I always keep sour cream around. It’s often on sale, it keeps well, and I can use it for tacos, salads, or making this bread. I actually make this bread on an almost weekly basis.
Different brands of sour cream have different consistency. That means you need to keep an eye on this in the mixing stage. If it looks lumpy, add more water. If it’s looser, add more flour.
This loaf bread may be finicky, but it’s worth the effort. The end result has that perfect fresh bread smell and soft texture. It makes your whole house smell cozy and happy, and does the very same to your belly.
I originally found this recipe in a fabulous book, The Bread Lover’s Bread Machine Cookbook by Beth Hensperger.
Bready or Not: Sour Cream Bread
Ingredients
- 1/2 cup plus 1 Tablespoon water
- 1 cup sour cream use nonstick spray on measuring cup
- 3 1/2 cups bread flour
- 1 Tablespoon light brown sugar
- 2 teaspoons vital wheat gluten
- 1 1/4 teaspoons salt
- 2 1/4 teaspoons active dry yeast
Instructions
- If you're using a bread machine, add the ingredients in the recommended order and run on dough cycle or full bread mode. I prefer to do dough cycle and bake in the oven.
- If you're using a stand mixer, blend water and sour cream. In a separate bowl, combine bread flour, brown sugar, gluten, salt, and yeast. Mix wet and dry ingredients together and knead with a dough hook.
Either method: Keep an eye on the texture. If it's wet or too tacky, add more flour. If it's too lumpy or thick, splash in a tiny bit more water as needed.
- Let dough rise until it has doubled, 1-2 hours. Grease or non-stick spray a bread pan.
- Lightly grease a surface and dump your dough onto it. With your greased hands, form the dough into a loaf shape by gently folding. Set in the pan--or glop it in, and smooth it out (that's still a professional method, I think). Cover with lightly greased plastic wrap or a shower cap.
- Let dough rise in a warm spot until it's crested to desired height, 30-60 minutes. Watch it.
- Preheat oven to 350-degrees.
- Bake bread for 20 minutes. Cover the top with foil to prevent heavy browning, then bake for an additional 15-20 minutes. When it's done, it'll sound hollow when tapped.
- Remove bread from oven and hold it over a rack so it will gently drop out; use a spatula to carefully loosen it, if needed. If you want, you can brushed the top with some butter to soften the crust and give it a shine.
- Let the bread cool at least 45 minutes before cutting. Also, you can let it cool completely and then wrap it several layers of plastic wrap before placing it in the freezer. Keeps well in freezer up to one month.
OM NOM NOM.
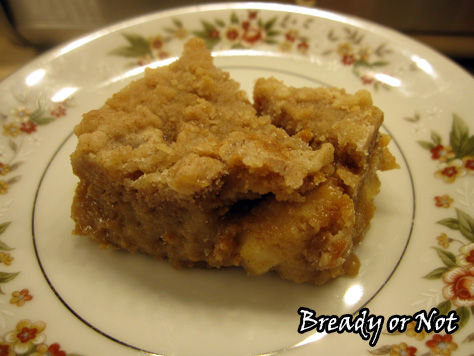
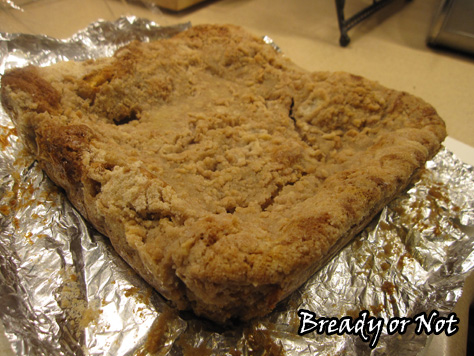
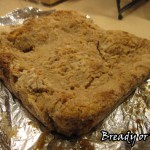
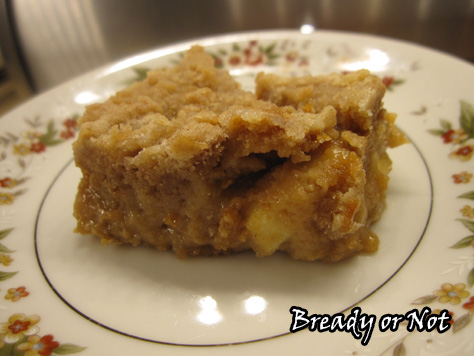
Bready or Not: Dulce de Leche Apple Blondies
Dessert. Breakfast. Brunch. Hunger. These are all good times to whip up these Dulce de Leche Apple Blondies.
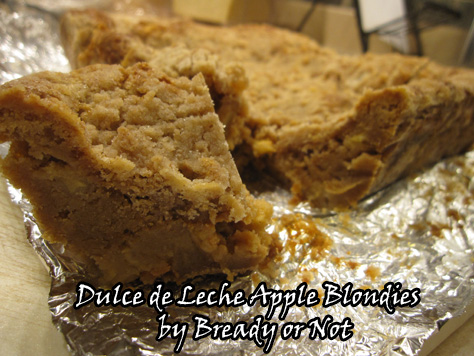
This is kinda like a cross between an apple crisp and a pie. The apples are mixed into batter and then topped with layers of caramel and sweetened crumbs.
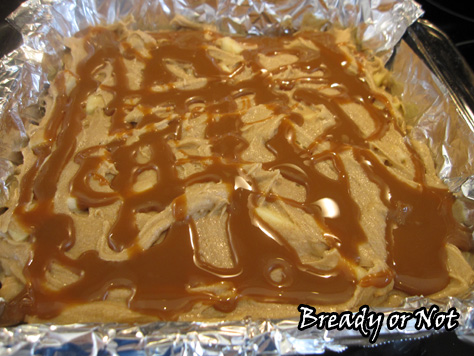
I confess, I didn’t measure the amount of dulce de leche I used here. The measurement below is a total guess. Really, get a squeeze bottle or an open jar and drizzle. Don’t worry about covering the whole surface.
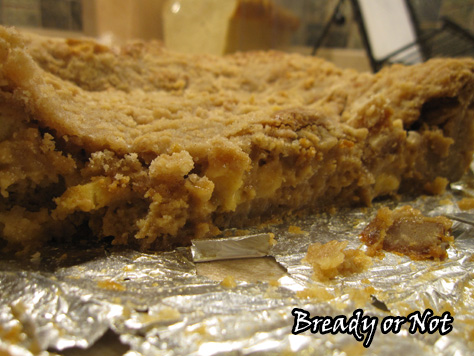
The edges here bake up solid and chewy. The middle passed the toothpick test for doneness, but once it was cut into, it was still a little gooey. That was fine. I knew it was baked through. It’s just a pie-like consistency in the middle.
Serve this cold straight out of the fridge. Maybe add a scoop of ice cream. Or warm it up a touch in the microwave. These blondies are versatile. They can take many paths to end up in your happy belly.
Modified from Foodie Crush
Bready or Not: Dulce de Leche Apple Blondies
Ingredients
For the blondies
- 1 1/2 cups all-purpose flour
- 1 teaspoon baking powder
- 1 teaspoon ground cinnamon
- 1/2 teaspoon cream of tartar
- 1/4 teaspoon salt
- 1 2/3 cups light brown sugar packed
- 3/4 cup unsalted butter room temperature
- 2 large eggs room temperature
- 2 teaspoons vanilla
- 2 medium apples peeled and diced (1 1/2-2 cups)
- 1/4 to 1/2 cup dulce de leche or caramel topping
For the strudel
- 5 Tablespoons cold butter chopped
- 2/3 cup all-purpose flour
- 1/2 cup white sugar
- 1 teaspoon ground cinnamon
Instructions
- Preheat the oven to 350 degrees. Line a 8 X 8 inch pan (or 9 X 9 inch) pan with aluminum foil so that it hangs over the sides. Apply non-stick spray.
- Whisk together the flour, baking powder, cinnamon, cream of tartar and salt in a medium size bowl and set aside.
- In a large bowl, mix the brown sugar and butter. Add the eggs and vanilla and mix until well combined. Add the dry ingredients. Add the apple pieces. Spread the batter in the prepared pan.
- Whip out a squeeze bottle or jar of dulce de leche or caramel. Drizzle over the batter.
- Combine the strudel ingredients in another bowl and chop together until the butter is mostly down to pea-size chunks. Sprinkle evenly over the top of the batter.
- Bake for 40-45 minutes or until the top is lightly golden and a toothpick inserted into the center of the pan comes out clean. Allow to cool completely. Lift the bars out by the overhanging foil and cut into bars. The edges will be crisper and more solid, while the center may be messier and sticky with caramel. It's all good.
OM NOM NOM.
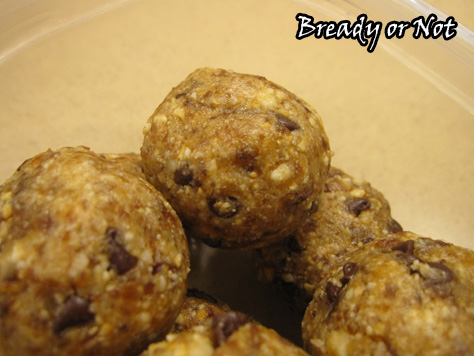
Bready or Not: Chocolate Chip Cookie Dough Breakfast Bites
I present to you a healthy, delicious breakfast option that just happens to taste like cookie dough. OH YEAH.
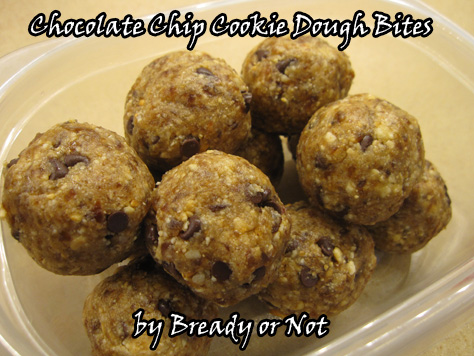
A while back I shared my recipe for Maple Energy Bites. Now it’s time to share the cookie dough version. It’s very simple. Throw ingredients in a high-powered blender. Form into bars or balls. Stash in the fridge. Eat.
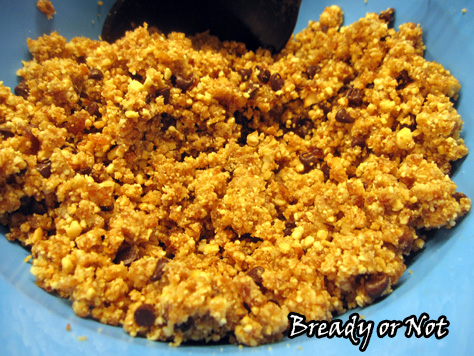
You can use any kind of nut here, really, or a combination of nuts, but cashews will be the closest to cookie dough. They have that natural buttery taste. The dates add sweetness and also act as a binding agent. I add cinnamon, but you can sprinkle in whatever flavors you want and make it more like a spice cookie.
I usually eat two or three for breakfast. They are great before a work-out. They also will keep for upward of two weeks in a sealed container in the fridge.
Healthy cookie dough. This is totally a thing.
Bready or Not: Chocolate Chip Cookie Dough Breakfast Bites
Ingredients
- 2/3 cup dates chopped, medjool best
- 1 cup cashews
- big pinch cinnamon
- 1 teaspoon vanilla
- 2 Tablespoons mini chocolate chips
- water if needed
Instructions
- In a bowl, combine all of the ingredients but the chocolate chips and water. Pour 1/3 or 1/2 the mix into a high-powered food processor or blender. Pulse. Stir it with a spoon or spatula--it will be thick and gum up the machine. Pour the blended mix out, then add in more of the nut-date blend until everything is mostly blended. It's okay to have some chunks. Add the mini chocolate chips.
- Squeeze the mash between your fingers. If it doesn't want to stick together, stir in water by 1/2 teaspoon until it's cohesive.
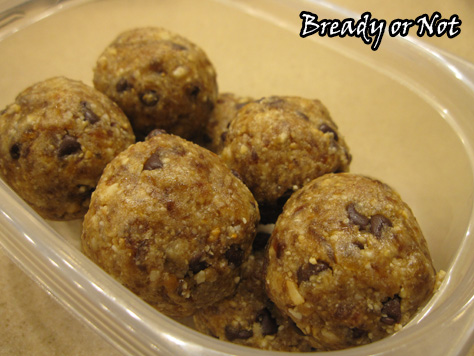
- You can shape them in two ways. Use a tablespoon scoop to form a ball, then compress them with your hands to tighten. Or, make bars. Place a sling of parchment paper in a bread pan. Pour the mash in. Compress as tightly as you can. Remove using the sling and cut to preferred size.
- Keep stored in covered dish or closed baggie in fridge. Makes about 9 tablespoon-sized balls or 7 bars. Will keep for upward of 2 weeks.
OM NOM NOM!