


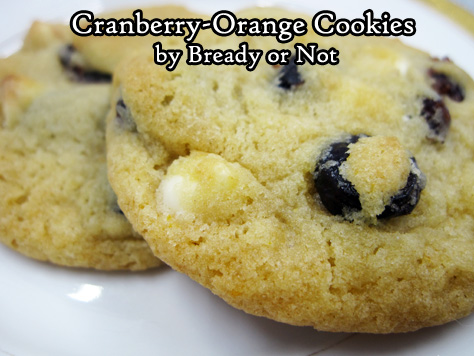
Bready or Not Original: Cranberry-Orange Cookies
These Cranberry-Orange Cookies are packed with vivid, fresh flavor, and a sure way to brighten your day, whatever the season!
The order of ingredients is important here. You take one orange and zest and juice it. The zest goes straight into the dough, while the juice is used to soak the dried cranberries.
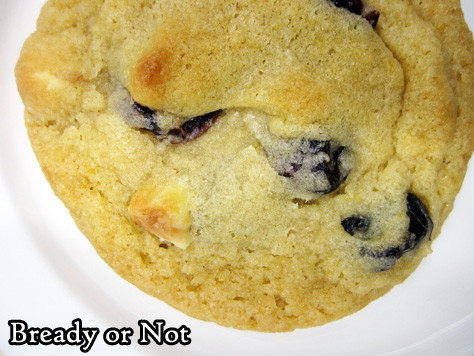
Not only does this plump up the desiccated berries, but it naturally amplifies their flavor, too. The tartness becomes stronger, in perfect complement to the citrusy freshness.

Then, you add two tablespoons of the juice to the dough. The rest, do whatever with. It’s mighty tasty to drink!
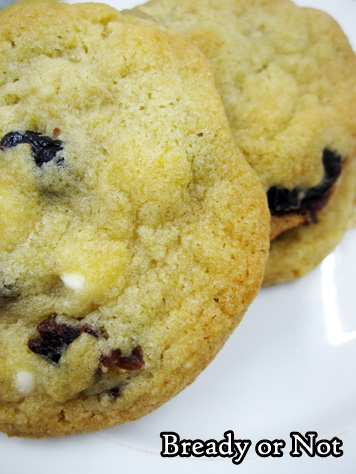
The white chocolate chips add sporadic sweetness to balance the tartness, and it goes so well with the orange flavor, too.

Plus, these cookies are downright pretty on a holiday tray, packed as a gift, or eaten whenever, all the year long!

Bready or Not Original: Cranberry-Orange Cookies
Ingredients
- 1 orange
- 1 1/2 cups dried cranberries
- 1 cup unsalted butter 2 sticks, softened
- 1 cup white sugar
- 1/2 cups brown sugar packed
- 1 egg
- 2 1/2 cups all-purpose flour
- 1/2 teaspoon baking soda
- 1/2 teaspoon salt
- 1/2 cup white chocolate chips
Instructions
- Preheat oven at 375-degrees.
- Zest then juice the orange. Place dried cranberries in bowl and pour orange juice over them, stir, then set aside to soak
- In a large bowl, beat together butter and sugars. Add the egg. Stir in orange zest.
- In a separate bowl, stir together the flour, baking soda, and salt. Gradually blend with butter mixture. Measure 2 tablespoons of orange juice from the bowl, and add to the dough. Drain off the rest of the orange juice (discard it or save it to drink) and add the dried cranberries and white chocolate chips to the dough. Combine.
- Use a tablespoon scoop or spoon to space out dollops of dough on baking sheet; cookies will spread. Bake for 12 to 14 minutes, until cookies are golden and set. Let set on sheet for 5 minutes, then transfer to a rack to completely cool. Repeat with the next batch(es).
- Store in a sealed container.
OM NOM NOM!
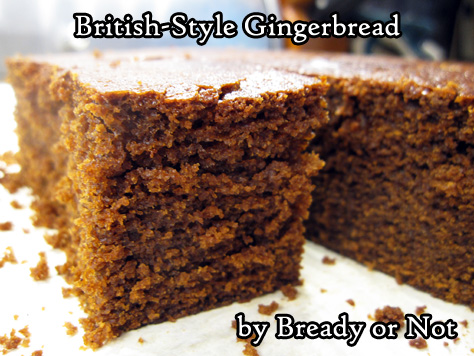
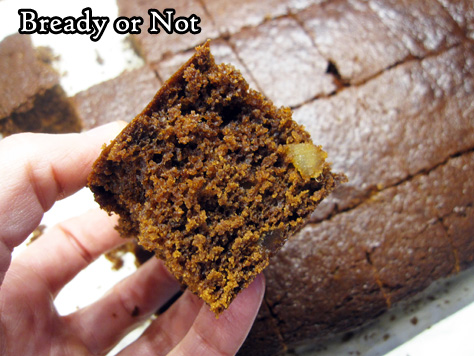
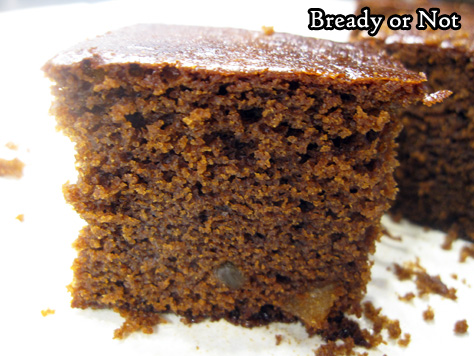
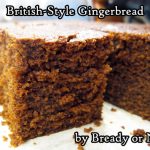
Bready or Not: British-Style Gingerbread
I adore famed British baker Mary Berry, one of the original judges on the Great British Bake Off. This British-Style Gingerbread recipe is modified from her cookbook Cooking with Mary Berry.
She has published a ton of cookbooks in the UK, but this particular cookbook has the measurements translated to American standards! Click on the picture below to order a copy for yourself–but maybe try my take on one of her recipes first, as it’s a great example of what you’ll find.

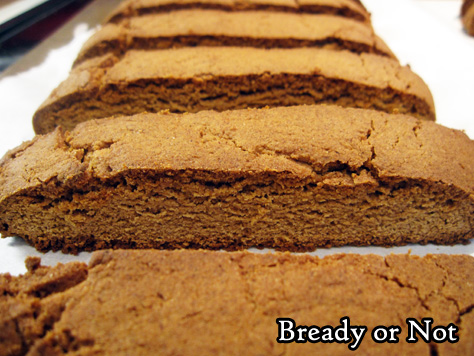
I’ve eaten and baked a number of American-style gingerbread recipe. This one is different in a lot of ways. First of all, the cooking method. It’s prepared on the stovetop, then baked.
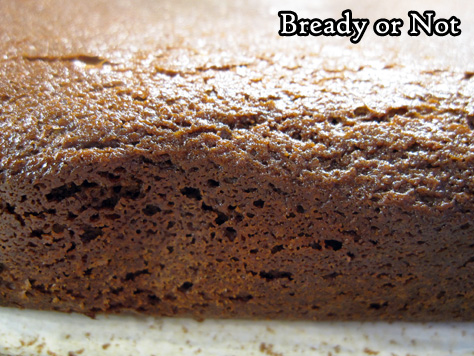
The end result is tall, spongy, and cakey, with a solid ginger kick. And like chocolate recipes, this gingerbread actually improves after a day, as the flavors become deeper and more complex. Almost coffee-like, though it contains no coffee.
Oh yeah, and it’s REALLY REALLY GOOD.
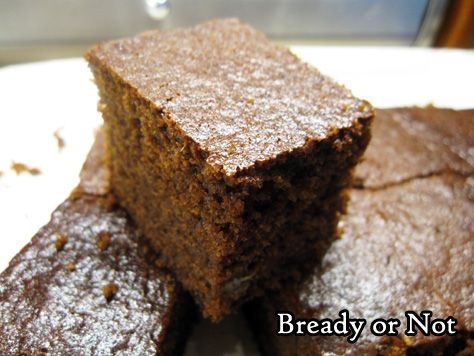
The sporadic candied ginger pieces throughout add vivid pops of flavor, in an already ginger-filled cake.
This would be especially good paired with tea, coffee, or a good, stout beer (Guinness, in particular, comes to mind).
Bready or Not: British-Style Gingerbread
Equipment
- 9x13 casserole pan
Ingredients
- 1 cup unsalted butter 2 sticks
- 1 cup brown sugar light or dark, packed
- 1 cup molasses
- 3 cups all-purpose flour
- 5 teaspoons ground ginger
- 2 teaspoons ground cinnamon
- 2 large eggs
- 3 pieces candied ginger coarsely chopped
- 1 1/4 cups milk
- 2 teaspoons baking soda
Instructions
- Preheat oven at 325-degrees. Line baking pan with aluminum and apply butter or nonstick spray.
- In a large pot, warm the butter, sugar, and molasses until it is combined and smooth. Set aside to cool.
- Mix the flour and spices into the big pot, followed by the eggs and the candied ginger pieces.
- In a small saucepan, warm the milk--don't boil! Add the baking soda. Pour into the gingerbread mixture and mix together.
- Pour everything into the prepared pan. Bake for 1 hour. When done, it will be spongy to the touch and pass the toothpick test in the middle.
- Let cool in pan, either at room temperature or in the fridge. Once cool, use the foil to lift onto a cutting board and slice into bars.
- Store in a covered dish with waxed paper or parchment between the layers. Flavor will grow deeper and more complex over the next day.
OM NOM NOM!
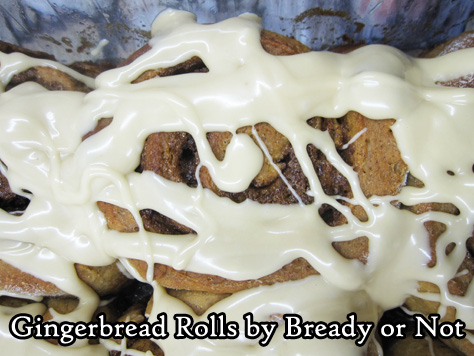
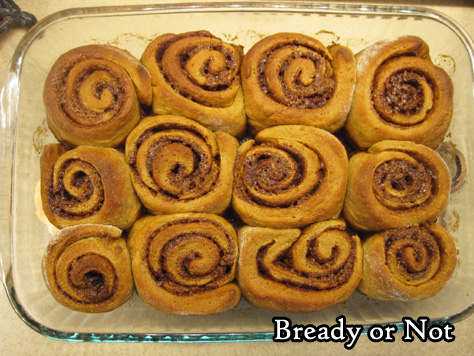
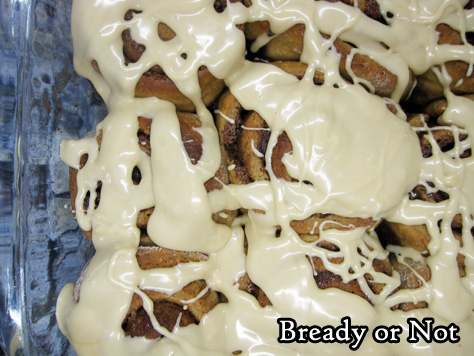
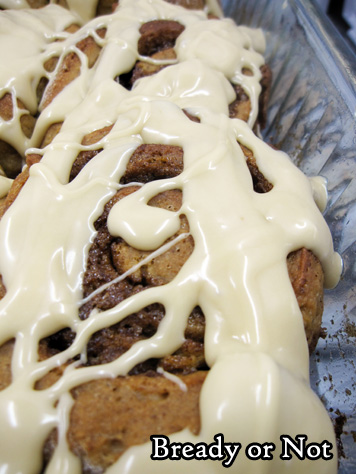
Bready or Not Original: Glazed Gingerbread Rolls
Imagine cinnamon rolls that taste like gingerbread, and you have these incredible Gingerbread Rolls.
These things are a TREAT. Make them for a special holiday breakfast or brunch, or make them just because.
I had to make this twice to get it right. I followed another recipe closely at first and did a cream cheese frosting, which was delicious, but required the rolls be refrigerated, which made them end up pretty stiff before being eaten the next day.
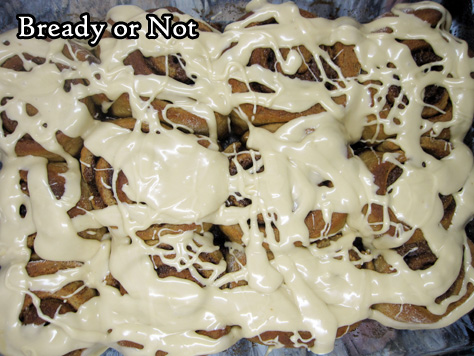
So, take two. This time, I made up my own glaze, and that worked beautifully. The rolls could stay at room temperature, and stay nice and pliable.
One of my husband’s co-workers described these rolls as “not as soft as Cinnabon, but better flavor.” By golly, I’ll take that, especially since the rolls had been made the day before.
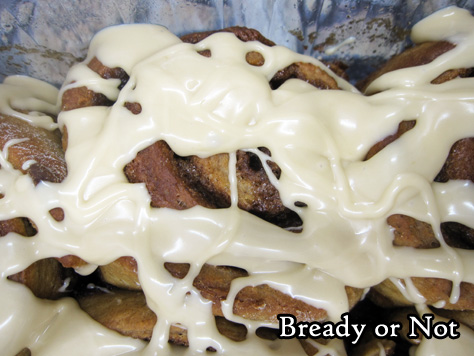
These rolls are as delicious as they look… and they look pretty good, don’t they?

Bready or Not Original: Glazed Gingerbread Rolls
Ingredients
Dough:
- 1/4 cup white sugar
- 1 teaspoon ground cinnamon
- 3/4 teaspoon ground ginger
- 1/2 teaspoon kosher salt
- 3 1/2 cups all-purpose flour divided
- 1 Tablespoon dry active yeast
- 1 cup whole milk or substitute 3/4 cup half & half and 1/4 cup water
- 2 Tablespoons unsalted butter room temperature
- 1 large egg
- 2 Tablespoons molasses
Filling:
- 1/2 cup brown sugar packed
- 6 Tablespoons unsalted butter room temperature
- 1 Tablespoon ground cinnamon
- 1 1/2 teaspoons ground ginger
- 1/4 teaspoon ground cloves
- all-purpose flour to dust work surface
Glaze:
- 2 1/2 cups confectioners' sugar
- 1 teaspoon molasses
- 1 teaspoon vanilla extract
- 1 Tablespoon milk or half & half, use more as needed
Instructions
Make the dough:
- In a large bowl (such as a Kitchen Aid bowl), combine sugar, ground cinnamon, ginger, salt, and 1 3/4 cups of flour. Stir in yeast.
- In a small saucepan, warm milk and butter. Cook until butter is melted and the milk/butter is between 105 and 110-degrees.
- Pour the milk mixture into the flour mixture. Stir. Add the egg and molasses, and stir well.
- Use a dough hook on a stand mixer or arm power to beat the dough. Gradually add the remaining 1 3/4 cups flour, kneading until the dough is smooth and pliable. Using a dough hook, this will be 4 to 5 minutes.
- Transfer dough to a lightly buttered or greased bowl and cover with plastic wrap or a towel. Let rise until doubled in size, about 1 hour.
Make the filling and assemble rolls:
- After the dough has risen, butter or grease a 9x13 OR 8x8 OR 9x9 casserole dish.
- In a small bowl, combine the filling ingredients: brown sugar, butter, cinnamon, ginger, and cloves.
- Prepare a clean stretch of counter or table with a dusting of flour. Roll out the dough to about a 12x16 rectangle. Spread the filling all over, but not quite to the edges. Starting with the long side, roll into a log.
- If using a 9x13 pan, cut the rolls into 12 equal rounds; if using a smaller pan, cut into 9. A piece of unwaxed dental floss makes this easy; wrap around dough log, then pull two ends of floss opposite directions to slice through.
- Once the pan is full of rolls, cover with plastic wrap or a towel and let rise again until doubled, about an hour.
- Preheat oven at 375-degrees. Once it comes to temperature, place rolls inside. Bake for about 12 minutes then cover with foil to reduce browning, then bake about 8 to 12 minutes. Let cool a bit.
Glazing:
- Combine the glaze ingredients to each a thick yet loose texture. Add more milk or confectioners' sugar, as needed, to reach a good consistency. Spoon and spread over the rolls.
- Eat immediately, or cover with foil and keep at room temperature. Enjoy right from the pan or warmed slightly in the microwave. Best within a day or two.
OM NOM NOM!
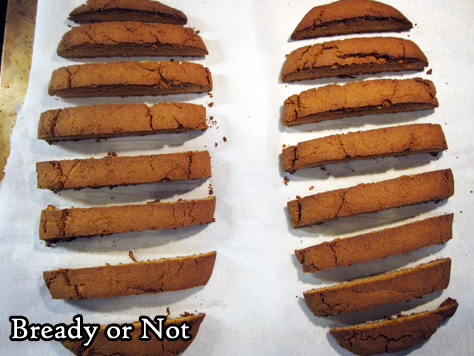
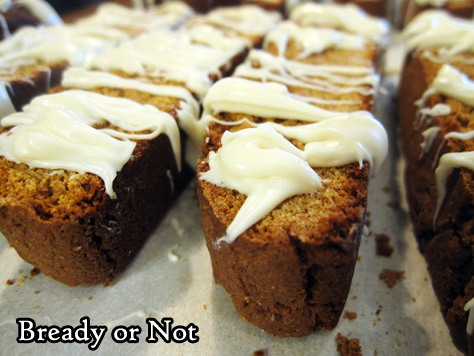
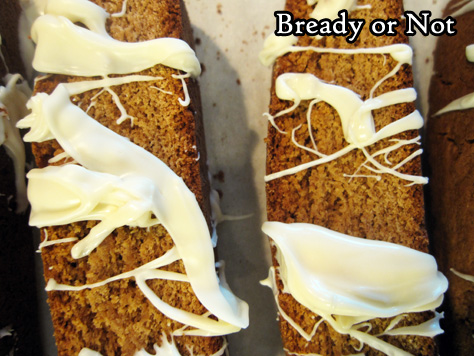
Bready or Not Original: Gingerbread Biscotti
Let’s get into the holiday spirit with some Gingerbread Biscotti!
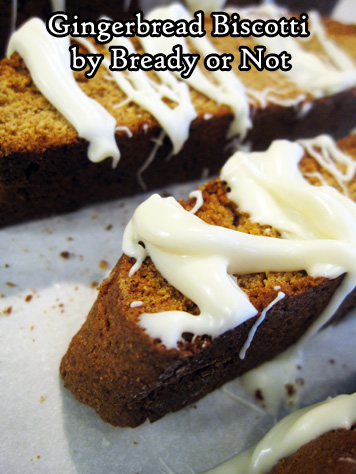
This recipe is super-duper easy! Plus, the end result keeps well–it can even be frozen–and biscotti make for a wonderful holiday gift!
I was really amazed at the flavor of these. They are straight-out gingerbread, with the perfect crispness of biscotti.
Since the flavor is so great, they are good on their own… but like all biscotti, are even better in accompaniment to hot drinks like coffee, tea, or cocoa.
Like biscotti? I have a full assortment for you to try!
Snickerdoodle Biscotti
Chocolate Almond Biscotti
Pistachio Cardamom Biscotti
Maple Walnut White Chocolate Biscotti
Peppermint Biscotti
Bready or Not Original: Gingerbread Biscotti
Ingredients
Biscotti
- 1/3 cup vegetable oil
- 1 cup white sugar
- 3 large eggs
- 1/4 cup molasses
- 2 1/4 cups all-purpose flour
- 1 cup white whole wheat flour or whole wheat flour
- 1 Tablespoon baking powder
- 1 1/2 Tablespoons ground ginger
- 2 1/4 teaspoon ground cinnamon
- 1/2 teaspoon cloves
- 1/4 teaspoon nutmeg
- 1/4 teaspoon salt
Drizzle
- 3/4 cup white chocolate chips
- 1 Tablespoon shortening
Instructions
- Preheat oven at 375-degrees. Line a large baking sheet with parchment paper.
- In a large bowl, stir together oil, sugar, eggs, and molasses. In a separate bowl, sift together the two flours, baking powder, ginger, cinnamon, cloves, nutmeg, and salt. Gradually stir the dry ingredients into the wet until it is the same consistent brown.
- Divide the dough in half on the prepared baking sheet. Form each into a log about 4 inches wide and 10 inches long; make sure there is space between the two logs, as they'll grow in the oven.
- Bake for 20 minutes, until tops are set when tapped. Remove the baking sheet from oven, but leave the oven on.
- Let the biscotti cool for 10 minutes. Use a large knife, such as a bread knife, to diagonally slice the logs 1/2-inch apart. Use a straight-down motion to cut; don't saw.
- Arrange the biscotti spaced out on the baking sheet. Stand them up if possible, or lay them on their sides. Bake for another 15 minutes, flipping them over halfway if necessary, to equally crisp both sides.
- Cool completely on the baking sheet.
- Zap white chocolate chips with shortening in microwave for 20 seconds, stir, then continue to repeat until it stirs smooth; keep a close eye on it, as the chocolate can burn fast! Use a fork to drizzle white chocolate over biscotti, or dip an end of each biscotti into chocolate.
- Store in an airtight container at room temperature as long as a few weeks. Can also be frozen.
OM NOM NOM!
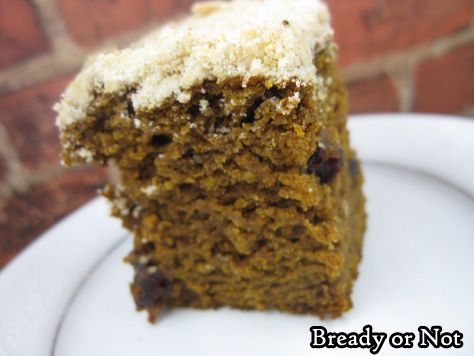
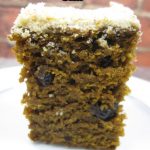
Bready or Not Original: Pumpkin-Gingerbread Coffee Cake
Wake up to lovely autumn flavors with this Pumpkin Gingerbread Coffee Cake!
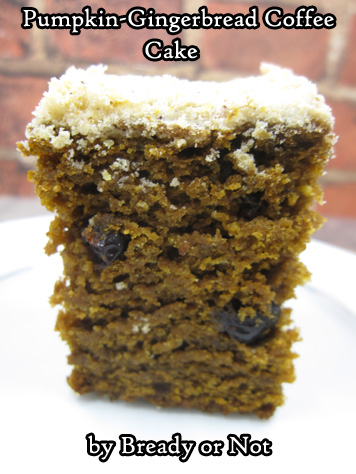
It’s beautiful to behold, and beautiful upon the tongue, too.
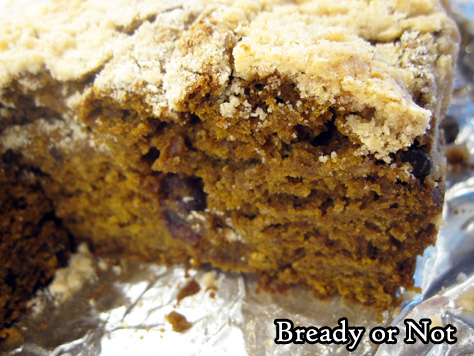
This isn’t a straightforward pumpkin cake. The gingerbread flavor is what comes across foremost–that molasses with a warm combination of spices–with the pumpkin flavor underlying it all.
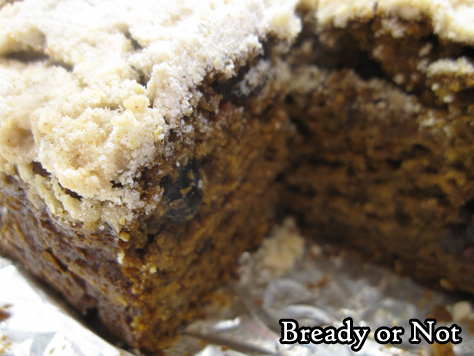
The pumpkin, of course, also permeates the cake with a moist, tender crumb. The crumb topping has all of the spices and acts in lovely contrast (in coloration and flavor) to the cake beneath.
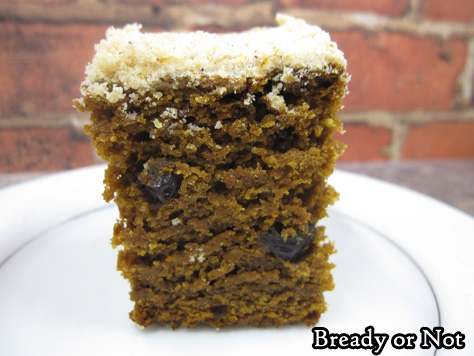
Oh yes, and the dried cranberries sprinkled throughout add little nuggets of tartness with a different kind of chewy texture. I bet this would be great with dried blueberries or cherries, too.
This cake would be incredible for a dessert, snack, and especially as a breakfast–especially on a special occasion like Halloween and Thanksgiving morning.
Greatly modified from original recipe in Fall Baking 2016 by Better Homes & Gardens.
Bready or Not Original: Pumpkin-Gingerbread Coffee Cake
Equipment
- 9x9 or 8x8 square pan
Ingredients
- 2 cups all-purpose flour
- 1/2 cup white whole wheat flour or whole wheat flour
- 1/2 cup yellow cornmeal
- 1 cup white sugar
- 2 teaspoons ground ginger
- 1 teaspoon ground cinnamon
- 1 teaspoon ground nutmeg
- 1/4 teaspoon black pepper
- 3/4 cup unsalted butter 1 1/2 sticks, softened
- 15 ounces pumpkin puree
- 2 eggs room temperature
- 1/2 cup molasses
- 1/3 cup buttermilk or sour milk
- 1 1/2 teaspoons baking soda
- 1 cup dried cranberries
Instructions
- Preheat oven at 350-degrees. Line pan with foil and apply butter or nonstick spray.
- In a large bowl, combine both flours, cornmeal, sugar, ginger, cinnamon, nutmeg, and pepper. Cut in the butter to form coarse crumbs. Measure out 1 cup of the mixture; set aside to use as topping.
- In another bowl, mix together the pumpkin, eggs, molasses, and baking soda. Stir together the dry and wet ingredients, then fold in the dried cranberries.
- Spread batter in prepared pan. Sprinkle reserved crumb topping over entire surface.
- Bake for 55 to 60 minutes, until the center passes the toothpick test. Completely cool at room temperature. Slice within pan, or use foil to lift onto cutting board.
OM NOM NOM!
Bready or Not Guest: Fiery Surprise Cupcakes by Wendy Nikel, author of THE CAUSALITY LOOP
I’m happy to welcome Wendy Nikel back for another bout of cupcakes and a time travel novella! The Causality Loop finishes up her four-book sequence from World Weaver Press, and it’s fantastic. The perfect end for the series. (Disclaimer: I have indeed read them all, courtesy of WWP.) As novellas, each book makes for a quick read… but not so quick that you can’t enjoy a cupcake (or two) as you snuggle into your reading nook for a much-needed escape from our current timeline.
If you haven’t yet, check out Wendy’s past visits:
THE CONTINUUM and Chocolate Coffee Cupcakes
THE GRANDMOTHER PARADOX and Cherry Cupcakes
CASSANDRA COMPLEX and Chocolate Blueberry Cupcakes
THE CAUSALITY LOOP
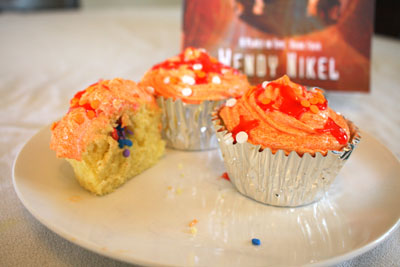
Fiery Surprise Cupcakes
by Wendy Nikel
It’s release day for THE CAUSALITY LOOP, the fourth and final Place in Time novella, which means that once again, it’s time for me to pull out my mixer, cupcake pans, and frosting tips, and share with you something delicious to celebrate my new book!
I have loved coming up with new cupcake recipes for each of these books. In a way, it’s kind of like being on Cupcake Wars or Sugar Rush – some of my favorite Netflix competition shows. In each of these, the judges provide a theme or challenge for each round, and bakers have to come up with ways to meet it by producing a delicious dessert. And while the previous books were a bit easier to figure out – space-inspired chocolate coffee cupcakes with galaxy-swirled frosting for THE CONTINUUM; Midwest county fair-inspired cherry chocolate cupcakes for THE GRANDMOTHER PARADOX; and a blueberry cupcake for THE CASSANDRA COMPLEX, which was inspired by an old Fred Harvey recipe – this one was a bit more difficult to figure out, but I had a couple elements I knew I wanted to include.

The first of these was fire! As you can see from the cover, fire plays an important role in this book. The opening pages (which you can read here) start out with an act of arson, which our main character Dodge Greenley hopes will protect his family – and the scent of smoke follows him throughout the book.
The second element I wanted to include was a callback to the previous books. In many ways, this final novella brings things full circle, pulling in story threads, characters, and elements from the previous three books, so I wanted to tie that into my celebration cupcake somehow. I scoured recipe books and baking blogs, searching for the perfect combination.
I pulled out my favorite basic cupcake recipe and grated the zest of one lemon to balance out some of the bolder, more “fiery” flavors I was planning to add later.
After mixing all the dry ingredients (flour, baking powder) in one bowl and the wet ingredients (sugar, butter, eggs, lemon zest) in another, I combined them with a bit of milk. Then, it was into the cupcake trays and into the oven for 16 minutes at 350 degrees.
While they were cooling, I started on the orange frosting. I blended the orange extract and orange food coloring (I used the gel kind for a bright hue) into the butter until it was smooth, then alternated adding the powdered sugar and milk until it was the consistency I wanted. Then it was time to try out a new tip I’d run across in my research – a pastry bullet.
The idea with these is to lay out plastic wrap, drop your frosting directly onto it, and then twist it up into a “bullet” that’s easier to handle and tidier to clean up. Tie one end close to the frosting and leave a few inches of twisted plastic wrap on the other end. I was really pleased with how this worked out. When it was time to frost, I could just throw it all into the pastry bag, thread the longer end through the piping tip, cut off the extra, and be ready to frost without the mess of trying to maneuver the frosting into the very bottom of the bag or the excess frosting coming back out the back of the bag.
But first, it was time to add my surprise! I found large, round sprinkles in the colors of each of my previous book covers – blue, red, and purple – and mixed them together in a dish. Then I took each of the cupcakes, cut a hole in the middle, and had my assistants (my kiddos wanted to help with this part) drop the sprinkles into the center of the cupcake.
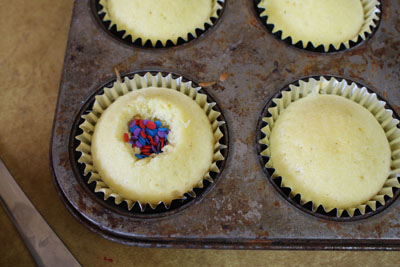
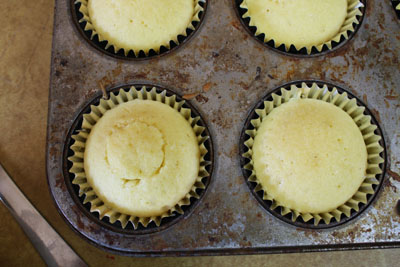
Then we took the inner section we’d cut out of the cupcake and placed the top of it back onto it to cover the hole we’d made. Ta-da! Now when you bite into the cupcake, you’ll get a confetti-like surprise!
After we frosted the cupcakes, I threw them back into the fridge while I prepared the next step: our fiery cinnamon Red Hot drizzle. I dumped about half a cup of Red Hots into a saucepan and just barely covered them with water. Stirring constantly, I melted these over medium heat.
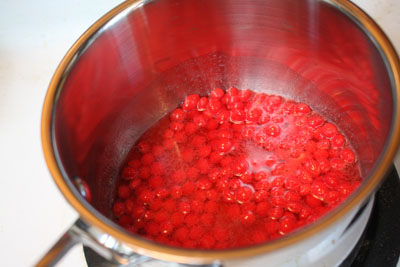
Once they were melted and I pulled them off the stove, I could drizzle them onto the frosted cupcakes. The drizzle thickens fairly quickly; I had to put it back onto the hot burner a couple times to thin it out again to make it easier to dribble onto the cupcakes.
I topped the cupcakes with orange and white sprinkles (if you do it while the Red Hot drizzle is still hot, they stick to it pretty well).
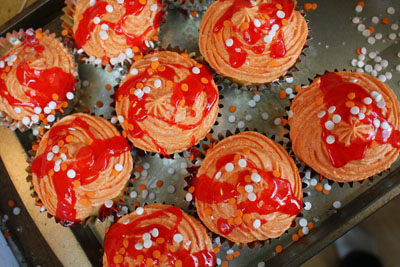
And now our fiery surprise cupcakes were finally ready for consumption!
About THE CAUSALITY LOOP:
Dodge Greenley is tired of being the go-between for his time-traveling family. All he wants is for them all to be able to live together peacefully in one era—is that too much to ask? But after breaking all the Rules of time travel in a desperate attempt to retroactively free his parents from the threat of the secret organization his father worked for a hundred years earlier, Dodge makes a startling discovery. It turns out there’s someone else stalking his family up and down the timeline, and this time, the menace may be coming from within the Place in Time Travel Agency itself.
Enlisting the help of his 22nd century coworker, Dodge sets off to the year 1915 to rescue his sister from a threat that might have originated at any point in their past, present, or future, proving once again that the greatest threat to time travelers is other time travelers.
THE CAUSALITY LOOP: Amazon | Barnes & Noble | iTunes/Apple Books | World Weaver Press
About the author:
Wendy Nikel is a speculative fiction author with a degree in elementary education, a fondness for road trips, and a terrible habit of forgetting where she’s left her cup of tea. Her short fiction has been published by Analog, Nature: Futures, Podcastle, and elsewhere. Her time travel novella series, beginning with The Continuum, is available from World Weaver Press. For more info, visit wendynikel.com

THE CAUSALITY LOOP Fiery Surprise Cupcakes
Ingredients
Cupcake Ingredients:
- 1 2/3 cups all-purpose flour
- 1 teaspoon baking powder
- 1 cup white sugar
- 1 cup butter 2 sticks 2 sticks
- lemon zested zested
- 4 eggs
- 3 Tablespoons milk
Frosting ingredients:
- 1 cup butter 2 sticks 2 sticks
- 4 cups confectioners' sugar
- 6 Tablespoons milk
- orange food coloring
- 1 teaspoon orange extract
- Red Hot candies
- sprinkles
Instructions
- Preheat oven to 350 degrees F.
- Sift together flour and baking powder. In separate bowl, blend sugar and butter. Grate lemon zest into the mixture.
- Add eggs to sugar mixture one at a time.
- Gradually add the dry mixture and milk into the sugar mixture until well blended.
- Fill cupcake liners half full and bake for 15 to 17 minutes. Let cool.
- Beat butter, food coloring, and orange extract until creamy. Alternate adding 1 cup confectioners' sugar and 2 tablespoons milk, mixing well after each addition, until all ingredients are mixed in.
- When cupcakes are cool, carefully cut a hole into the top of each cupcake. Pull out the inner section of cake and set aside. Fill hole with sprinkles, then replace the top of the cake and frost!
- Melt Red Hots on the stove. Drizzle melted candy over the frosted cupcakes. Top with sprinkles and enjoy with a good book!
